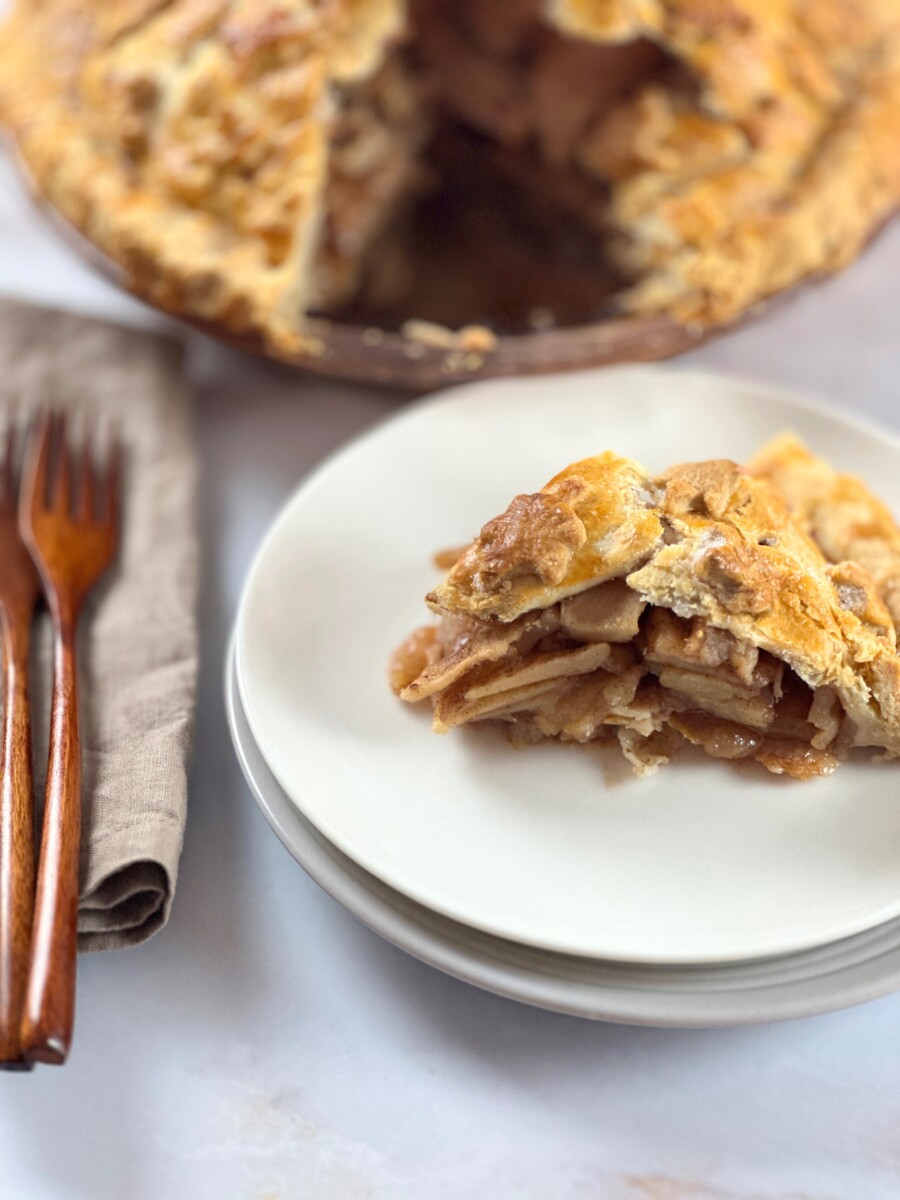
If you’re anything like me, Thanksgiving isn’t complete without a homemade apple pie. Keep reading to discover how to make the ultimate easy deep-dish apple pie that’s sure to impress.
Type of Cuisine:
American

Prep Time: 1 hour.
Cook Time: 1 hour 25 minutes

How Many Servings?
8-10 servings
Table of Contents
Thanksgiving is just around the corner, and I can already picture you contemplating the perfect dessert to grace your holiday table. Well, look no further! I’ve got the inside scoop on an easy, tried-and-true classic: my beloved deep-dish apple pie. Picture this: your kitchen is filled with the irresistible aroma of warm apples and fragrant cinnamon. And the crust? It’s a masterpiece, flaky and buttery, just like Grandma used to make. The best part? You can prepare the crust in advance, leaving you with less to worry about on the big day. So whether you’re the host of this year’s feast or a cherished guest, my easy apple pie is the ultimate grand finale for your Thanksgiving celebration. Trust me; it’s not just good; it’s downright incredible.
Simple Ingredients for Your Easy Apple Pie
Transition Description: “Now, let’s dive into the straightforward yet essential ingredients that make this easy apple pie a true delight. With just a handful of components, you’ll be well on your way to creating a masterpiece with everyone asking for seconds.
- All-purpose flour: Provides the sturdy foundation for your flaky pie crust, ensuring it holds up to the delicious filling.
- Unsalted butter: The key to a rich, buttery crust melds perfectly with the flour for a melt-in-your-mouth pastry.
- Ice water: Helps bind and keep the dough together, contributing to the crust’s perfect texture.
- Salt: Enhances the overall flavor profile, balancing the sweetness of the apple filling.
- Large apples: The show’s star, these sweet and tart apples deliver that classic apple pie taste and tender texture.
- Sugar and light brown sugar: Sweetens the apple filling and adds depth with caramel notes.
- Lemon juice: Provides a refreshing zing that balances the sweetness and adds a touch of brightness.
- Cinnamon and nutmeg: The dynamic duo of spices that infuse your filling with warm, comforting flavors.
- Unsalted butter (again): Adds richness and a silky texture to the apple filling.
- Egg wash: Gives your pie a beautiful golden sheen, making it as appealing as it is delicious.
Choosing the Right Apples for Your Pie
Wondering which apples to pick? The magic happens in this deep-dish apple pie recipe when you blend Crispin and Granny Smith apples. This duo creates a perfect balance of sweet and tart flavors, elevating your pie from good to unforgettable. Plus, these apples hold their shape well during baking, ensuring your pie tastes great and looks picture-perfect! To explore more apple-centric desserts, check out this Walnut Stuffed Apple Dessert.
Make-Ahead Tips for Your Easy Deep-Dish Apple Pie
Preparing a full Thanksgiving spread can be daunting, but this deep-dish apple pie offers flexibility when it comes to time management. Here are some key make-ahead tips to simplify your pie-making process:
- Pie Dough: The crust is the foundation of a great pie, and the good news is that you can make it well in advance. Prepare the dough up to a week before Thanksgiving and store it in the freezer. Thaw it in the fridge the day before you bake, ensuring it’s ready when needed.
- Apple Filling: To save time, prepare your apple filling a day ahead. Store it in the refrigerator and let it come to room temperature before assembling your pie. This streamlines your Thanksgiving preparations and allows the flavors to meld beautifully.
Essential Baking Tips:
Here are four crucial tips to keep in mind during your preparation and baking process:
- More Apples, More Flavor: Deep-dish apple pies require a fuller crust, so be prepared to use more ingredients compared to traditional pies. This ultimate homemade pie will need close to 6 pounds of apples.
- Avoiding Sogginess: Apples contain water, which can result in a soggy pie. To prevent this, toss the sliced apples with sugar and lemon juice, then let the filling sit for 10 minutes before draining excess liquid in a colander for another 5.
- The Cold Butter Trick: For a flaky crust, use cold butter. If your kitchen is warm, find a cooler spot to work. Cube the butter and keep it chilled until you’re ready to incorporate it into your dough.
- Dough Handling: When rolling out the pie dough, handle it gently and efficiently to maintain its flakiness.
Preparation

Add 1 cup of chilled, cubed butter to the food processor. Pulse until the butter crumbles, about 10 seconds.
Add the ice water and pulse again until the dough begins to form.
Transfer the dough onto a lightly floured surface. Divide and shape it into two large discs.
Wrap each disc securely in plastic wrap and refrigerate for a minimum of one hour.

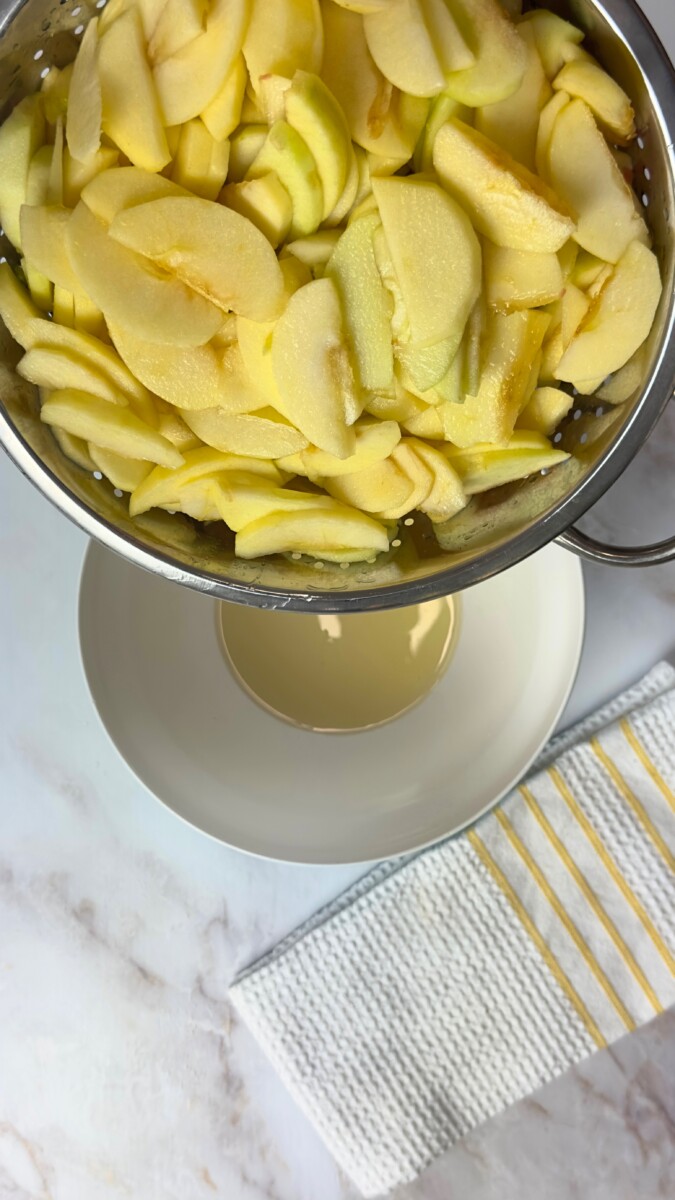
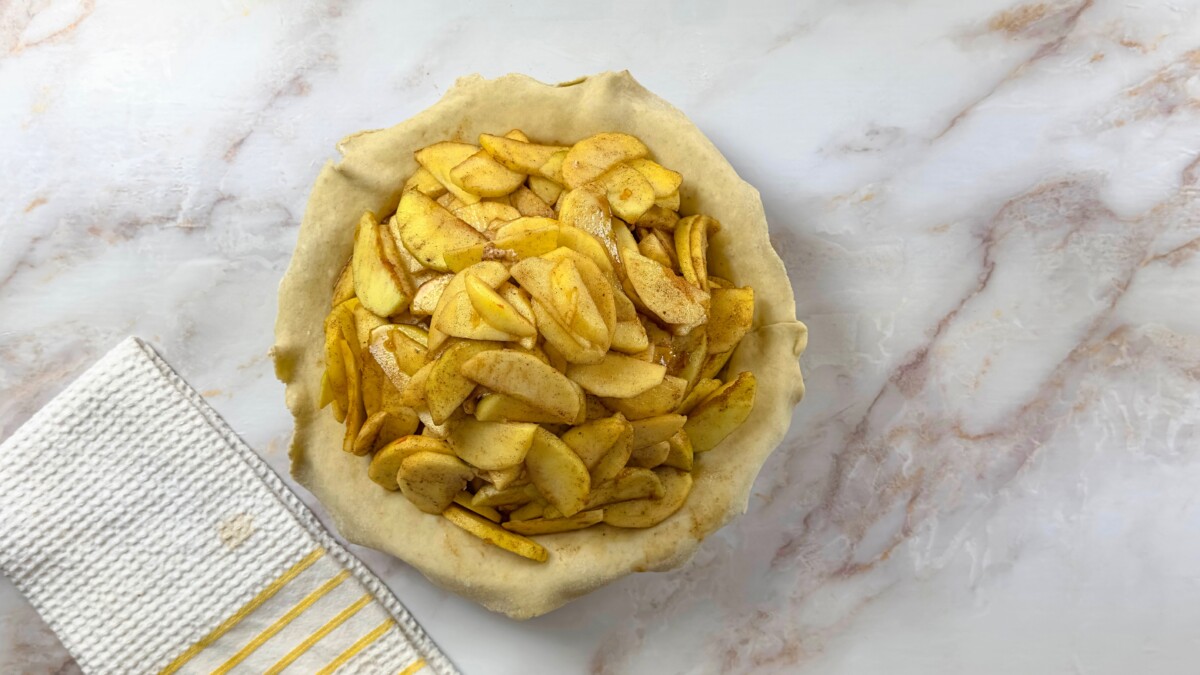
Return the drained apples to the bowl. Mix in light brown sugar, cinnamon, nutmeg, and 1 teaspoon salt.

Roll out one disc of chilled pie dough on a floured work surface to a circle of 12 inches in diameter.
Carefully transfer the dough to an 11-inch diameter, 2-inch deep pie dish. Tuck the dough around the edges to prevent shrinkage during baking.
Dot the filling with 1 tablespoon of small butter pieces.
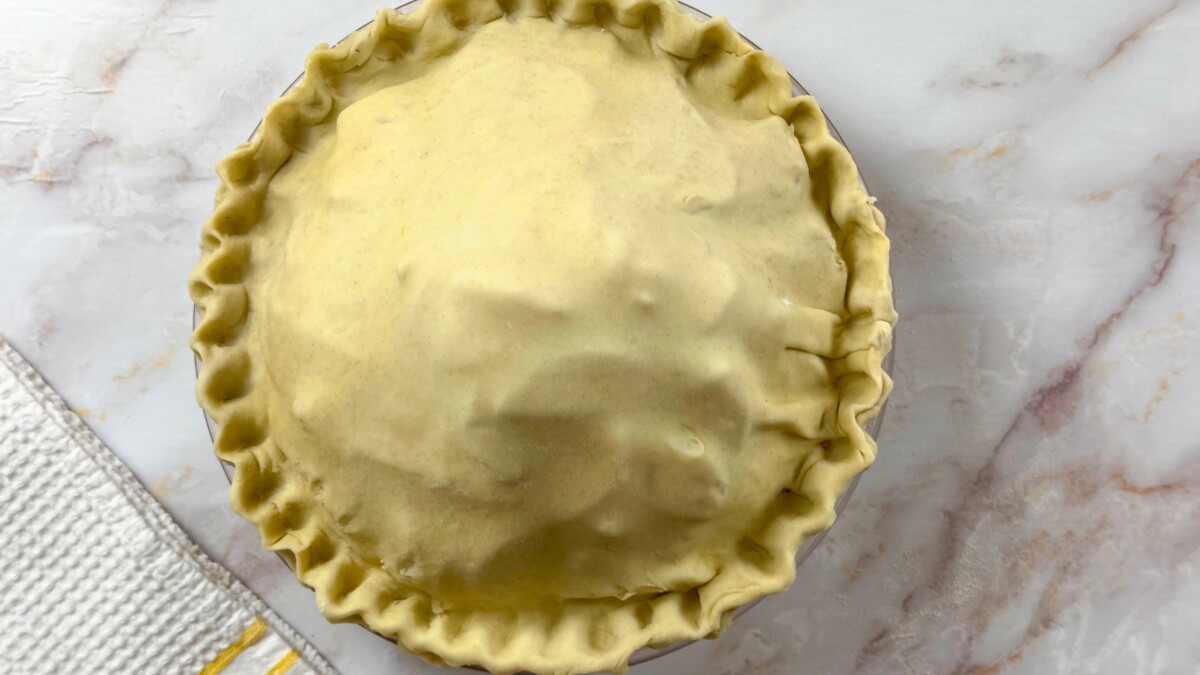

Brush the pie crust with the egg wash, and optionally sprinkle with coarse sugar.
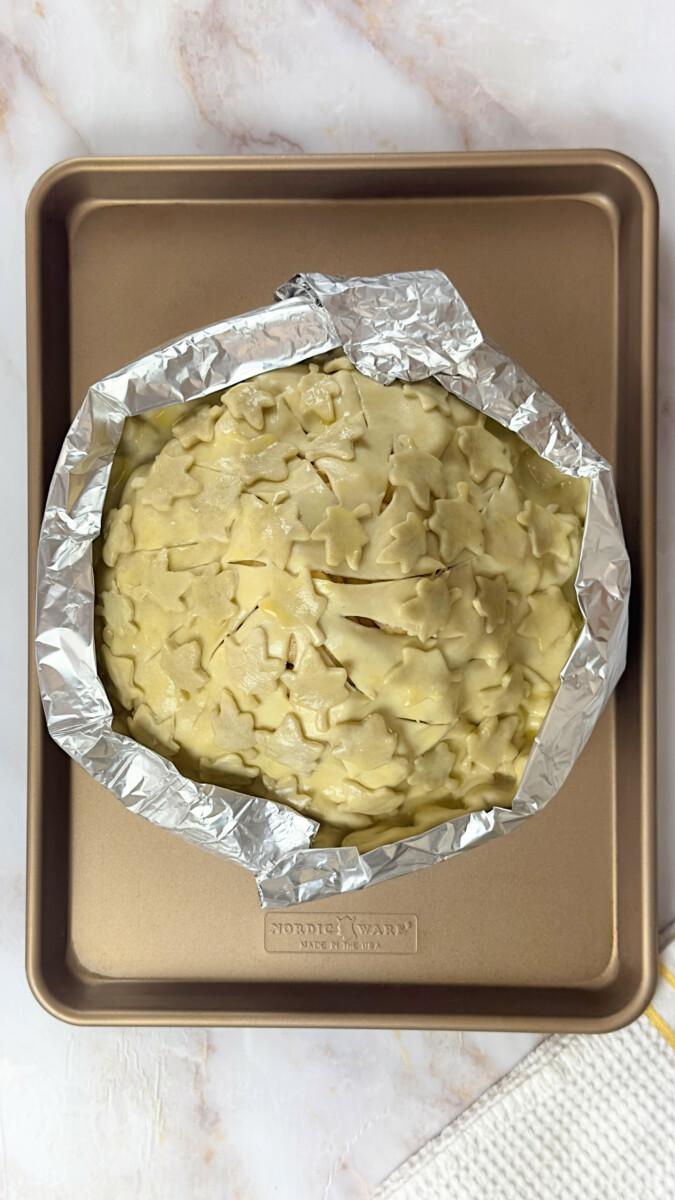
After 25 minutes, lower the oven temperature to 350°F.
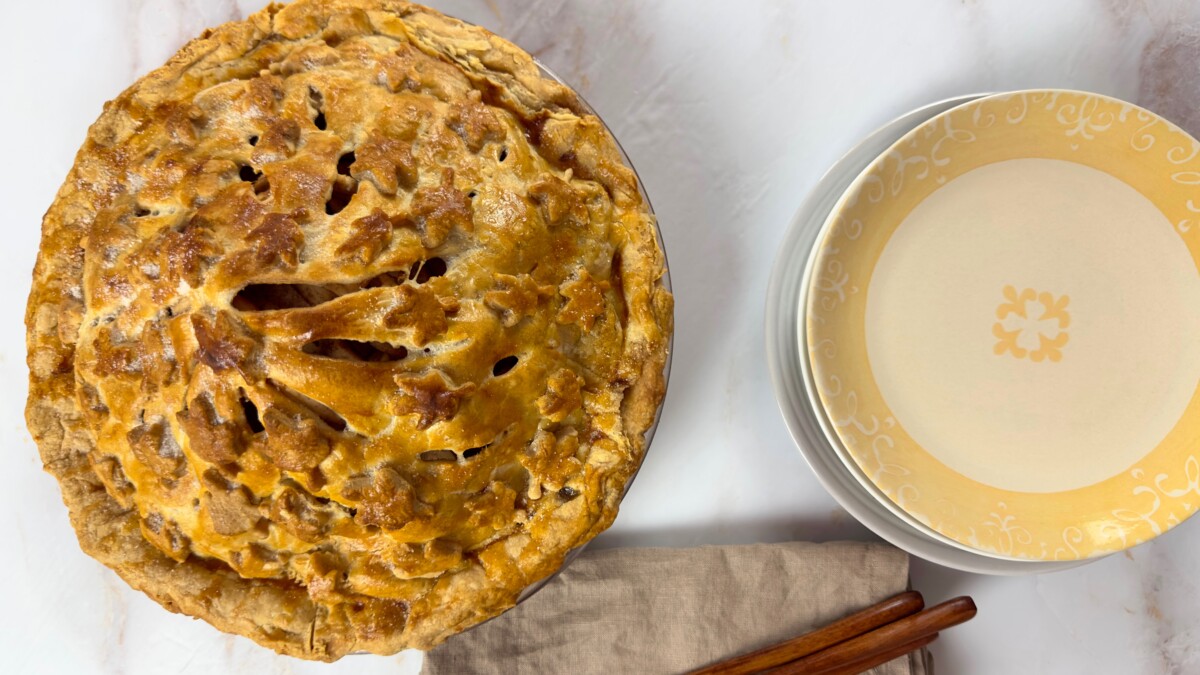
Continue to bake for an additional 45-60 minutes, or until the apples are tender and the crust is golden brown.
Enjoy your delicious deep-dish apple pie!
Get ready to bake the ultimate deep-dish apple pie! This pie combines the perfect blend of sweet and tart apples with a flaky, buttery crust. Follow this easy recipe to make a Thanksgiving dessert that will have everyone asking for seconds!
Type of Cuisine:
American
Prep Time: 1 hour.
Cook Time: 1 hour 25 minutes
How Many Servings?
8-10 servings
Ingredients:
Adjust Servings
| 2 ½ cups all-purpose flour | |
| 1 cup butter (cut into cubes and cold) | |
| ½ cup ice water | |
| ½ teaspoon salt | |
| 1 tablespoon butter (cut into small pieces) | |
| 1 egg washed (1 large egg beat with one tablespoon of milk) | |
| Coarse sugar for sprinkling (optional) |
For the Apple Filling:
| 10 large apples (cored, peeled, and sliced into ¼ inch slices. About 12 cups or 6 lb of apples) | |
| ½ cup sugar | |
| ½ cup light brown sugar | |
| Juice of one lemon | |
| 2 teaspoons cinnamon | |
| ¼ teaspoon nutmeg | |
| 1 teaspoon salt |
Preparation
Recipe Tips & Suggestions
Pie Shield or Foil:
Temperature Check:
Taste Test:
Egg Wash:
Cooling Time:
Spice it Up:
Storage Smarts:
Make it A-la-mode:
Nutrition Information
The information shown is an estimate provided by an online nutrition calculator. It should should not be considered a substitute for a professional nutritionist's advice.
See our full nutrition disclosure here.

Never Miss a Recipe
Subscribe to my newsletter for authentic Mediterranean recipes, essential cooking tips, and the latest food news, all delivered directly to your inbox for FREE. Let’s create memorable dishes together!

I would love to hear your experience!
Did you try this recipe? We’d love to hear from you! Please leave a comment below to let us know what adjustments you made, and how it turned out for you.