Print & Share This Recipe!
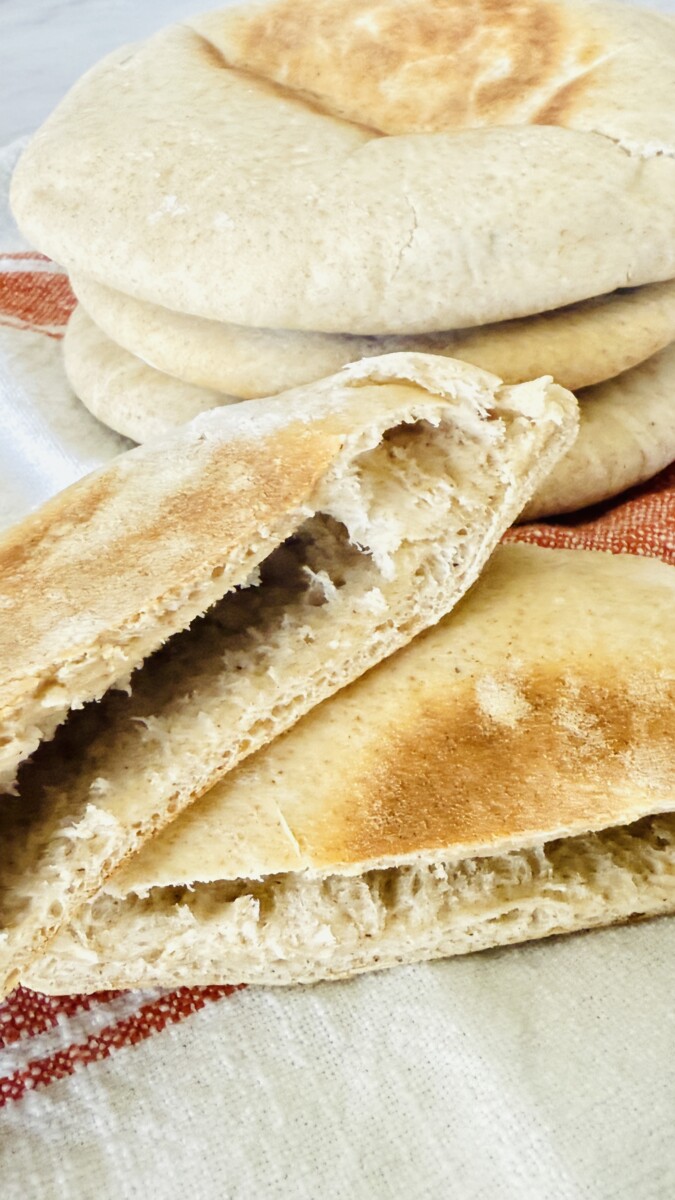
This homemade pita bread recipe makes soft, fluffy pitas with perfect pockets every time. Easy to bake in the oven or cook on the stovetop, they’re freezer-friendly and so much better than store-bought.
Type of Cuisine:
Mediterranean

Prep Time: Prep Time: 20 minutes Resting Time: 1 hour 30 minutes – 2 hours.
Cook Time: 2–4 minutes per pita (

How Many Servings?
6-8 pitas
Ingredients:
1X
2X
3X
Adjust Servings
| 2 cups (240g) all-purpose flour | |
| 1 cup (120g) whole wheat flour | |
| 2 teaspoons (7g) instant yeast | |
| 1 1/2 teaspoons (9g) fine salt | |
| 1 teaspoon (4g) honey or sugar | |
| 1 1/4 cups (300 ml) warm water (100–110°F / 38–43°C) | |
| 2 tablespoons 28g) extra virgin olive oil |
Preparation
1
Pita Bread – Instructions (Hand Kneading with Stand Mixer Option)
In a large mixing bowl, combine 2 cups of all-purpose flour and 1 cup of bread flour with the instant yeast, sugar, and salt. Mix the dry ingredients thoroughly to evenly distribute everything.
In a large mixing bowl, combine 2 cups of all-purpose flour and 1 cup of bread flour with the instant yeast, sugar, and salt. Mix the dry ingredients thoroughly to evenly distribute everything.
2
Add the Wet Ingredients and Form the Dough
In a separate bowl or measuring cup, combine the warm water (between 100°F and 110°F) with the olive oil. Make a well in the center of the flour mixture and pour the water and oil into the middle. Using a wooden spoon or your hands, begin mixing from the center outward until a shaggy dough forms. Cover the bowl with a towel and let it rest for 10 minutes. This short rest allows the flour to hydrate and makes the dough easier to work with.
In a separate bowl or measuring cup, combine the warm water (between 100°F and 110°F) with the olive oil. Make a well in the center of the flour mixture and pour the water and oil into the middle. Using a wooden spoon or your hands, begin mixing from the center outward until a shaggy dough forms. Cover the bowl with a towel and let it rest for 10 minutes. This short rest allows the flour to hydrate and makes the dough easier to work with.
3
Knead the Dough
After resting, transfer the dough onto a lightly floured surface. To knead, fold the dough in half toward yourself, then press it away using the heel of your palm. Rotate the dough 90 degrees clockwise, fold it in half again, and press. Continue this folding, pressing, and turning motion rhythmically for about 6 to 8 minutes, or until the dough becomes smooth, elastic, and just slightly tacky but not sticky.
After resting, transfer the dough onto a lightly floured surface. To knead, fold the dough in half toward yourself, then press it away using the heel of your palm. Rotate the dough 90 degrees clockwise, fold it in half again, and press. Continue this folding, pressing, and turning motion rhythmically for about 6 to 8 minutes, or until the dough becomes smooth, elastic, and just slightly tacky but not sticky.
4
First Rise and Divide
Place the kneaded dough into a lightly oiled bowl, turning it once to coat the surface with oil. Cover the bowl with a clean kitchen towel or plastic wrap and let the dough rise at room temperature for about 1½ hours, or until it has doubled in size. Once risen, gently deflate the dough by pressing down on it with your hand. Transfer it to a lightly floured surface and divide it into 8 equal pieces.
Place the kneaded dough into a lightly oiled bowl, turning it once to coat the surface with oil. Cover the bowl with a clean kitchen towel or plastic wrap and let the dough rise at room temperature for about 1½ hours, or until it has doubled in size. Once risen, gently deflate the dough by pressing down on it with your hand. Transfer it to a lightly floured surface and divide it into 8 equal pieces.
5
Shape and Rest the Dough Balls
Working with one piece at a time, shape each portion into a ball by gently tucking the edges of the dough toward the center, pinching them together at the bottom. Flip the ball over so the smooth side faces up. Be careful not to overwork the dough at this stage — the goal is to create surface tension without tearing or tightening it too much. Place the dough balls on a lightly floured surface, cover them with a clean kitchen towel, and let them rest for 20 minutes. This rest relaxes the gluten and makes rolling easier.
Working with one piece at a time, shape each portion into a ball by gently tucking the edges of the dough toward the center, pinching them together at the bottom. Flip the ball over so the smooth side faces up. Be careful not to overwork the dough at this stage — the goal is to create surface tension without tearing or tightening it too much. Place the dough balls on a lightly floured surface, cover them with a clean kitchen towel, and let them rest for 20 minutes. This rest relaxes the gluten and makes rolling easier.
6
Roll Out the Dough
After the dough balls have rested, lightly flour your surface and roll each ball into a circle about 6 inches wide and roughly ¼ inch thick. Try to keep the thickness even and avoid rolling the center too thin, which helps with even puffing. Place the rolled dough on a floured surface or parchment paper in a single layer as you go.
After the dough balls have rested, lightly flour your surface and roll each ball into a circle about 6 inches wide and roughly ¼ inch thick. Try to keep the thickness even and avoid rolling the center too thin, which helps with even puffing. Place the rolled dough on a floured surface or parchment paper in a single layer as you go.
7
Final Rest and Preheat
Once all the rounds are rolled, cover them lightly with a kitchen towel and let them rest again for 15 to 20 minutes. This final rest allows the gluten to relax and improves puffing during cooking. While the dough is resting, preheat your oven to 500°F (260°C). If using the oven method, place a cast-iron pan, pizza stone, or inverted baking sheet inside the oven to heat along with it. If you're using the stovetop method, place a cast-iron skillet over medium heat and let it get hot while the dough rests.
Once all the rounds are rolled, cover them lightly with a kitchen towel and let them rest again for 15 to 20 minutes. This final rest allows the gluten to relax and improves puffing during cooking. While the dough is resting, preheat your oven to 500°F (260°C). If using the oven method, place a cast-iron pan, pizza stone, or inverted baking sheet inside the oven to heat along with it. If you're using the stovetop method, place a cast-iron skillet over medium heat and let it get hot while the dough rests.
8
Oven Method (Recommended for Best Puffing)
Carefully transfer one or two rounds of dough at a time onto the preheated cast iron pan, pizza stone, or baking sheet in the oven. Bake for 2 to 4 minutes, or until the pita puffs up into a balloon and the surface is lightly golden. Remove from the oven and place the baked pitas on a clean kitchen towel to cool slightly. Cover with the towel to keep them soft. Repeat with the remaining rounds.
Carefully transfer one or two rounds of dough at a time onto the preheated cast iron pan, pizza stone, or baking sheet in the oven. Bake for 2 to 4 minutes, or until the pita puffs up into a balloon and the surface is lightly golden. Remove from the oven and place the baked pitas on a clean kitchen towel to cool slightly. Cover with the towel to keep them soft. Repeat with the remaining rounds.
9
Stovetop Method (Great Alternative)
Place one round of dough into the hot cast iron skillet. Cook for 30 to 60 seconds, or until bubbles begin to form. Flip the pita and cook for another 1 to 2 minutes, gently pressing with a spatula to encourage puffing. Flip once more if needed, until golden brown on both sides. Transfer to a towel-lined plate and keep covered. Repeat with the remaining dough.
Place one round of dough into the hot cast iron skillet. Cook for 30 to 60 seconds, or until bubbles begin to form. Flip the pita and cook for another 1 to 2 minutes, gently pressing with a spatula to encourage puffing. Flip once more if needed, until golden brown on both sides. Transfer to a towel-lined plate and keep covered. Repeat with the remaining dough.
10
Keep Warm or Store
As you cook the pitas, stack them in a clean kitchen towel to keep them warm and soft. If not serving right away, allow the pitas to cool completely to room temperature before storing. Once cooled, place them in an airtight bag or container. They’ll stay fresh at room temperature for up to 2 days or can be frozen for longer storage.
As you cook the pitas, stack them in a clean kitchen towel to keep them warm and soft. If not serving right away, allow the pitas to cool completely to room temperature before storing. Once cooled, place them in an airtight bag or container. They’ll stay fresh at room temperature for up to 2 days or can be frozen for longer storage.
Recipe Tips & Suggestions
Storage & Freezing Tips for Homemade Pita Bread
At Room Temperature:
Keep pita bread wrapped in a clean kitchen towel and stored in a sealed plastic bag or airtight container for up to 3 days. The towel traps steam and keeps them soft.
In the Refrigerator:
Not recommended, as refrigeration tends to dry out bread quickly. Stick to room temperature or freezer storage for best results.
Freezing:
Cool the pitas completely, then stack them with small squares of parchment paper between each one to prevent sticking. Place the stack in a freezer-safe bag, squeeze out excess air, and freeze for up to 2 months.
Reheating from Frozen:
Skillet: Warm on a hot, dry skillet for 1–2 minutes per side.
Oven: Wrap in foil and bake at 350°F (175°C) for 5–7 minutes.
Microwave: Wrap in a damp paper towel and heat for 20–30 seconds for soft, fluffy results.