These grilled ribs are the kind of meal that has everyone—kids and adults alike—licking their fingers and asking for seconds. It’s the ultimate crowd-pleaser that turns any BBQ into a family favorite.

Type of Cuisine:
American

Prep Time: 20 minutes.
Cook Time: 2 hours

How Many Servings?
8-10 servings
These are the best grilled baby back ribs—tender, flavorful, and fall-off-the-bone good. I’ve been making them for years, especially for summer BBQs and big gatherings. Baby back ribs are my go-to because they’re meatier than spare ribs and perfect for feeding a crowd.
The secret? A sweet, savory, slightly spicy dry rub and a smoky, tangy BBQ sauce made with pomegranate molasses. They’re a hit every time—especially on the 4th of July!
Ingredients for Best Grilled Baby Ribs

- Baby back ribs are tender, meaty, and perfect for grilling. They offer a savory taste with a touch of sweetness.
- Dijon mustard: Adds a tangy and slightly spicy note to enhance the ribs’ flavor.
- Dry rub: A mix of spices providing a balanced blend of sweet, smoky, and mildly spicy flavors. (Prepare by mixing brown sugar, kosher salt, black pepper, garlic powder, onion powder, smoked paprika, and chili powder)
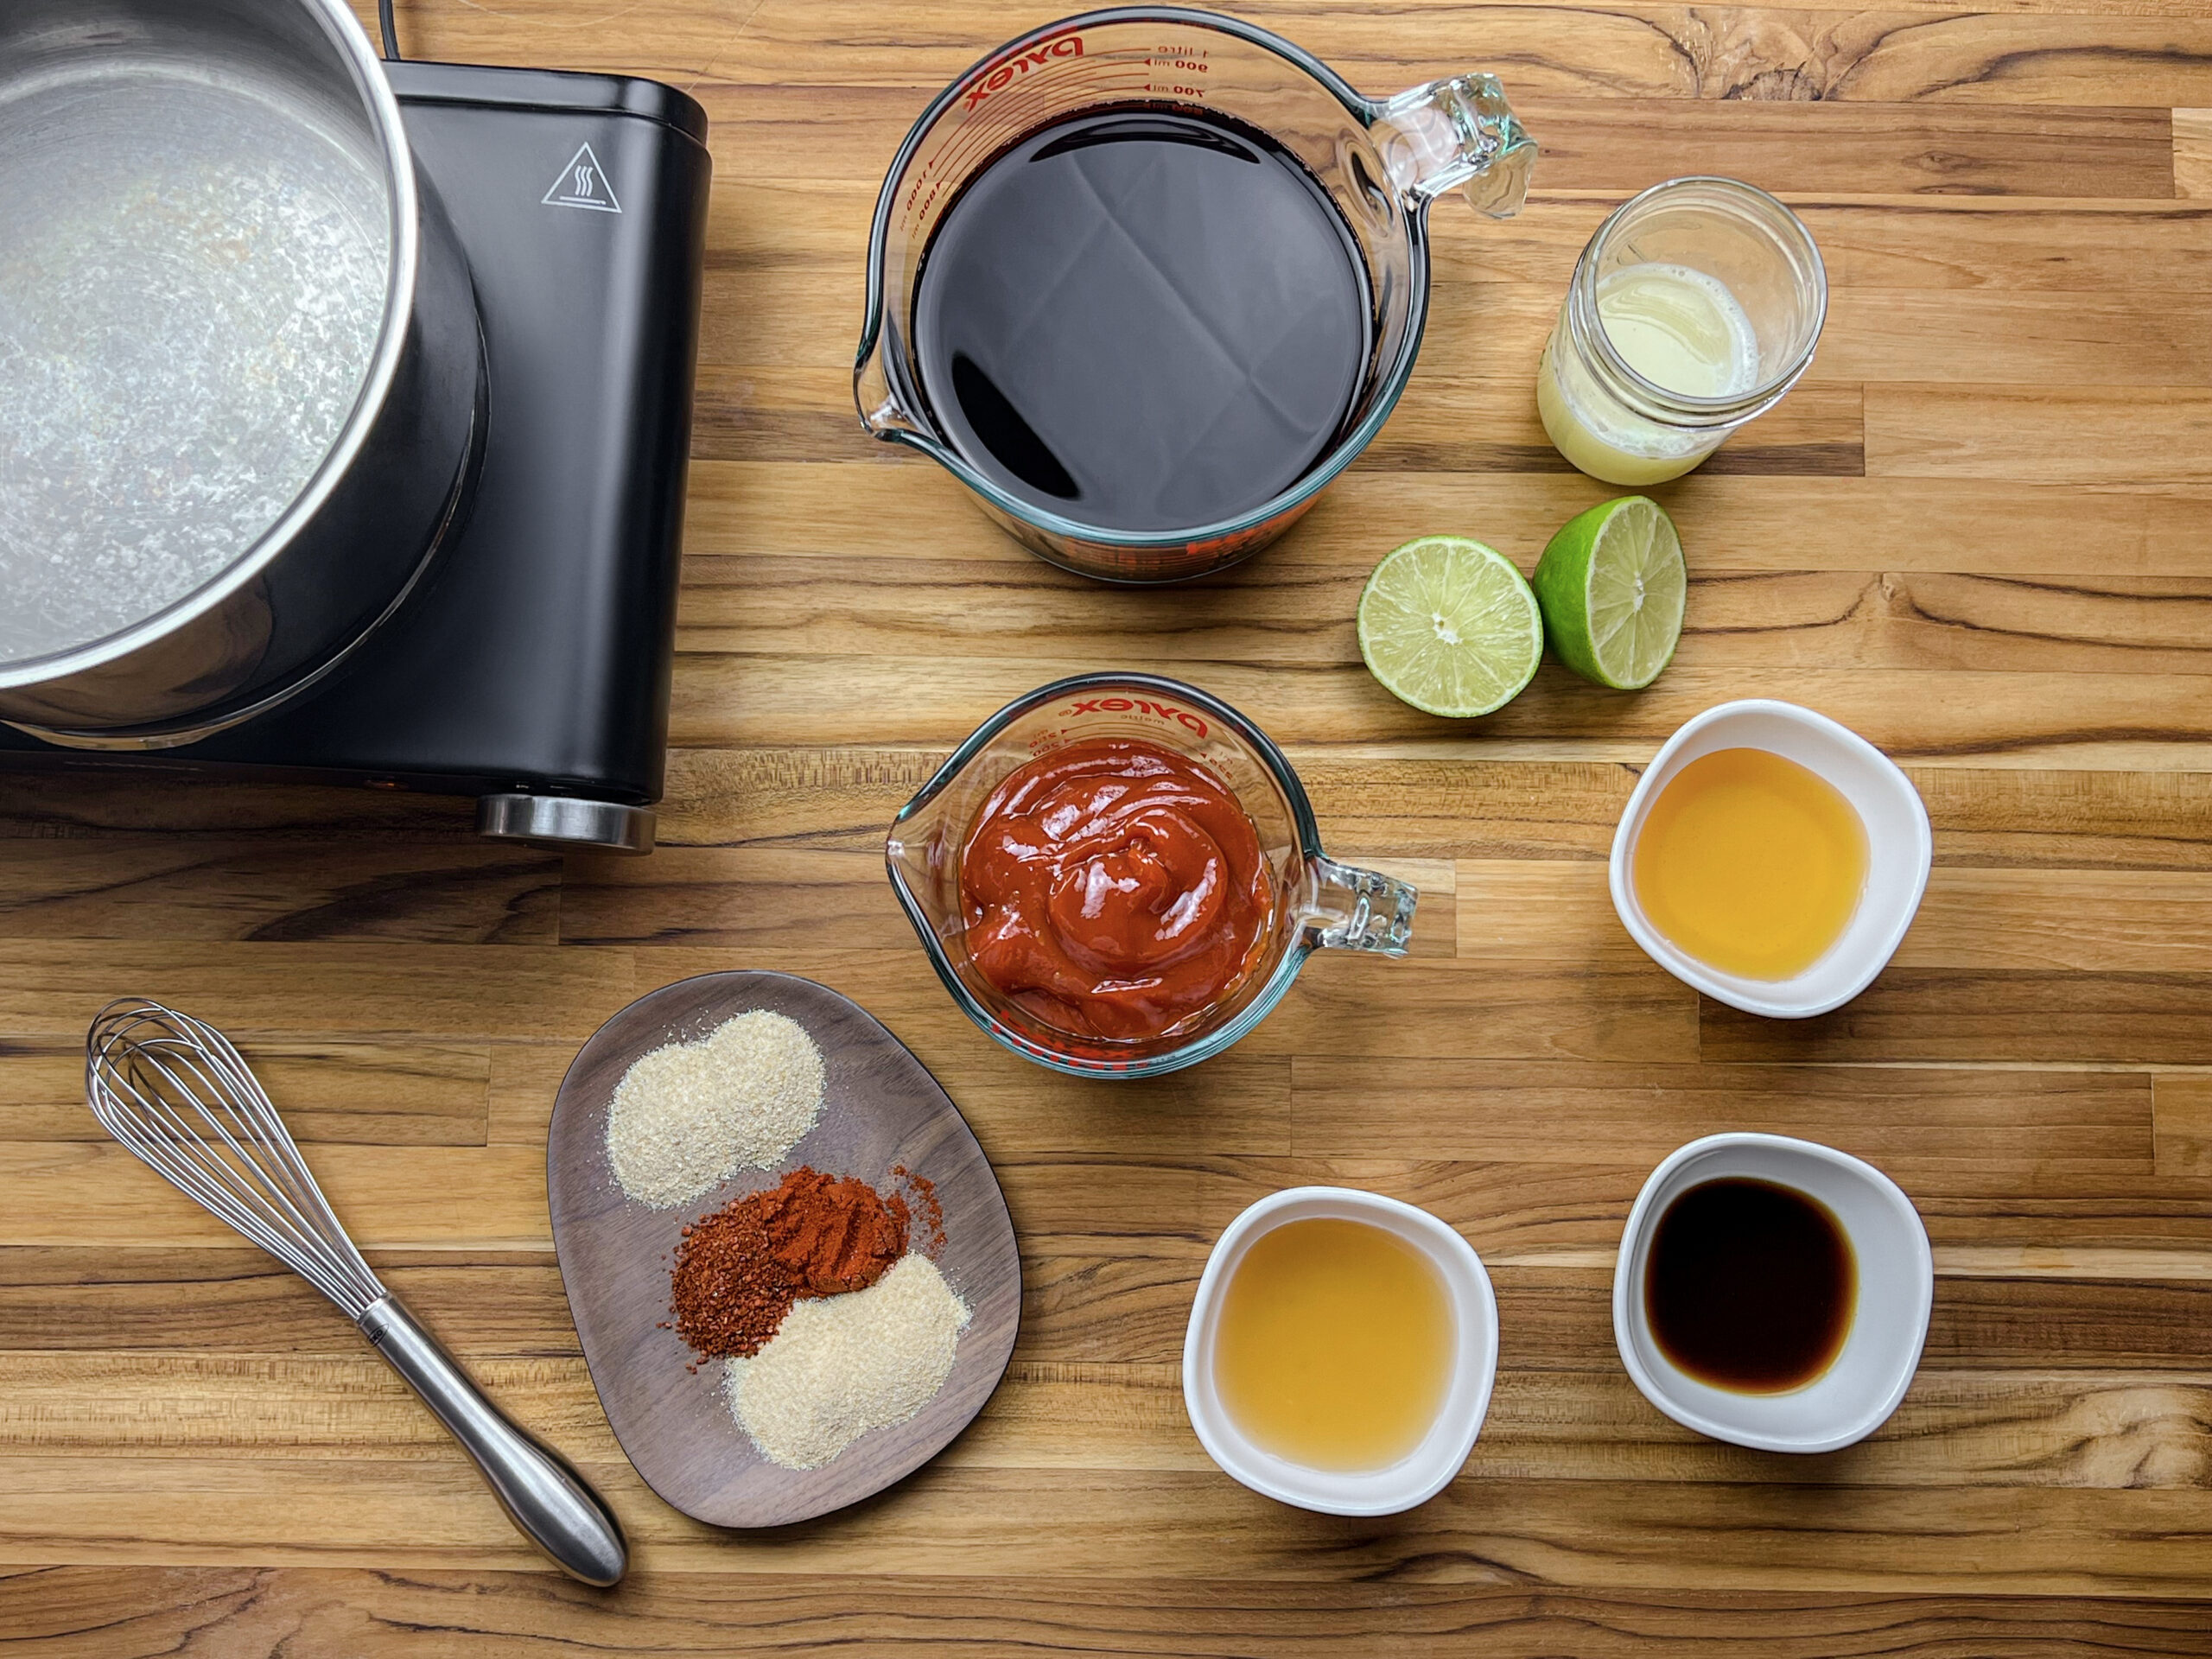
- Pomegranate BBQ sauce: Sweet and tangy with a fruity undertone, complemented by hints of smokiness and mild heat from the spices. A mix of Pomegranate 100% juice, ketchup, apple cider vinegar, honey, Worcestershire sauce, garlic powder, onion powder, smoked paprika, Aleppo pepper, and lime juice is cooked to become a sauce. Or use your favorite sauce.
How to Remove the Membrane?
Removing the membrane allows the rub and BBQ sauce flavors to penetrate the meat, resulting in a more tender and flavorful result.
- Start with the bone side facing up. This will make it easier to access the membrane.
- Use a small knife to carefully lift the membrane’s edge at the rack’s end. Gently slide the knife under the membrane to loosen it from the bone.
- Once you have a section loosened, use your fingers or a paper towel to get a good grip on the edge of the membrane.
- Slowly pull the membrane away from the ribs in one smooth motion. It should come off in one piece, but if it tears, you can use the knife to loosen the remaining sections and continue removing it.
- While removing the membrane, you may also notice a tough, silver skin on the meat side of the ribs. Use the knife to trim away this silver skin for a more enjoyable eating experience.
How to Season Baby Back Ribs for Maximum Flavor
Before you start seasoning, line your counter with a few overlapping sheets of aluminum foil for easy cleanup. Place the baby back ribs in the center and brush a light layer of Dijon mustard on the meat side—this helps the seasoning stick.
Generously apply your dry rub to the meat side, and go lighter on the bone side to avoid over-salting. The meat side needs a bold layer of flavor since it absorbs more seasoning during cooking. Wrap the ribs tightly in foil. As they cook, flavorful juices will collect—save that liquid and mix it into your BBQ sauce for an extra punch of flavor.
Grilling Perfection with Indirect Heat
- Utilize Indirect Heat: Light the fire on one side of the grill and place the baby back ribs on the opposite side. This ensures slow, controlled cooking for tenderness and flavor.
- Prevent Burning: Indirect heat prevents ribs from burning. Allows even cooking for optimal flavor development.
- Slow-Cooking Method: Position ribs away from direct flames. Gentle, gradual cooking intensifies flavors and ensures tender and juicy results.
- Monitor Grill Temperature: Regularly check and adjust grill temperature. Maintain a consistent, low-and-slow cooking environment.
- Achieve Perfect Results: Embrace patience for flavorful, fall-off-the-bone ribs. Let the meat absorb grill flavors for a memorable dining experience.
Side Dishes to Accompany the Grilled Ribs

When serving baby back ribs, it’s always great to complement them with various delicious side dishes. For a complete Mediterranean-themed meal, consider grilling some fresh corn on the cob with zaatar and feta, Grilled zucchini with garlic and lemon, and grilled asparagus. These grilled veggies add a smoky, charred flavor that pairs well with the ribs. To enhance the Mediterranean flavors, include a refreshing Fattoush salad or a Mediterranean potato salad, both bursting with vibrant herbs and tangy dressings. For a dip, offer creamy hummus and Muhammara, as well as a spicy red pepper and walnut dip, to contrast the rich and savory ribs. This combination of flavors and textures will make your meal a culinary delight.
Step-by-Step Instructions
Prep the Grill and Season the Ribs
Remove the membrane from the back of three racks of baby back ribs and pat them dry with paper towels.
In a small bowl, mix the brown sugar, kosher salt, black pepper, garlic powder, onion powder, smoked paprika, and chili powder to make your dry rub.
Apply Mustard and Dry Rub

Sprinkle the dry rub generously over both sides, using more on the meat side. Press the seasoning into ensure an even, flavorful coating.
Wrap and Grill Low & Slow

Transfer the wrapped ribs to the preheated grill and cook for about 2 hours, or until the internal temperature reaches 205°F. This slow cooking ensures tender, flavorful meat.
Make the Pomegranate BBQ Sauce
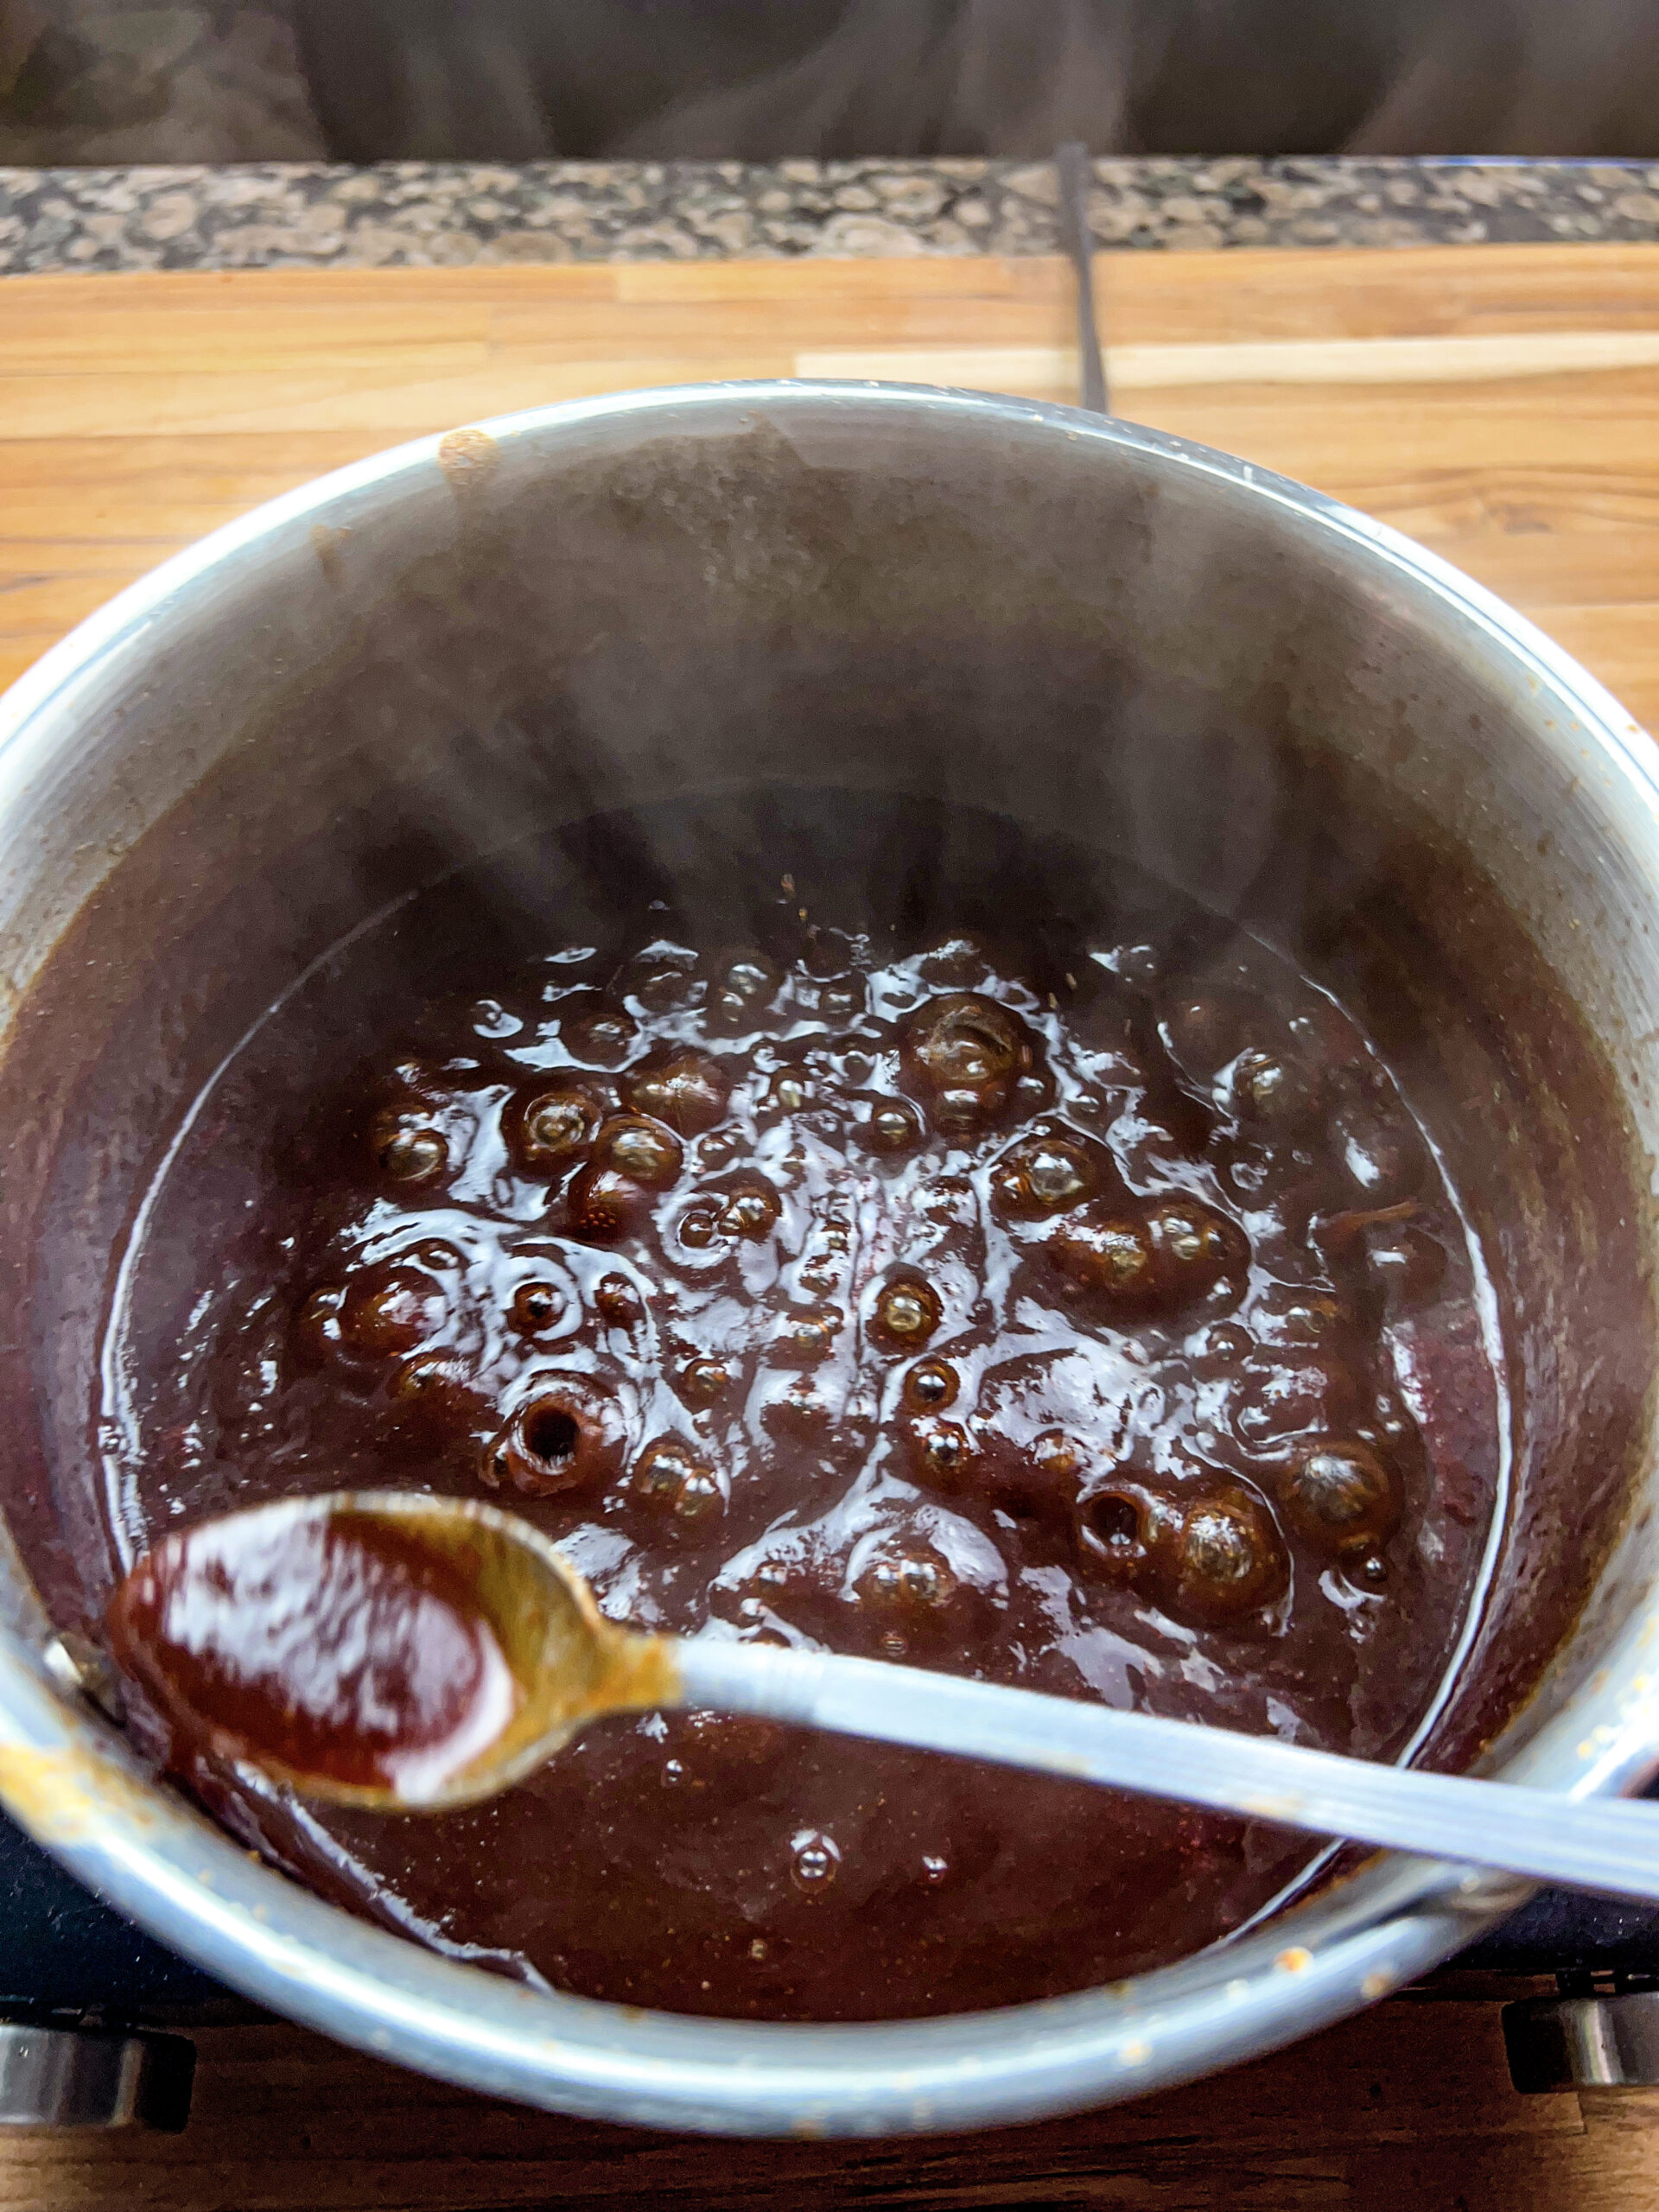
Reduce the heat to low and simmer for about 45 minutes, whisking every 5 minutes.
Stir in the lime juice at the end, then let the sauce cool to room temperature. Store in a glass jar until ready to use.
Final Grill & Glaze

Time to Feast
Happy Grilling! Enjoy
Get ready to grill the most delectable baby back ribs that will leave you craving for more. These tender ribs are seasoned with a homemade rub, grilled to perfection, and coated in a flavorful BBQ sauce. Fire up your grill and get ready for a mouthwatering feast that will satisfy all your BBQ cravings.
Type of Cuisine:
American
Prep Time: 20 minutes.
Cook Time: 2 hours
How Many Servings?
8-10 servings
Ingredients:
| 3 racks baby back ribs membrane removed and pat dry | |
| 3 tablespoons Dijon mustard | |
| 1 ½ cup brown sugar | |
| 8 tablespoons kosher salt | |
| 4 tablespoons black pepper | |
| 4 tablespoons garlic powder | |
| 3 tablespoons onion powder | |
| 3 teaspoons smoked paprika | |
| 4 teaspoons chili powder |
Tangy Pomegranate bbq sauce recipe:
| 3 cups pomegranate 100% juice | |
| 1 cup ketchup | |
| 4 tablespoons apple cider vinegar | |
| 3 tablespoons honey | |
| 2 tablespoons Worchester sauce | |
| 2 teaspoons garlic powder | |
| 2 teaspoons onion powder | |
| 1 teaspoon smoked paprika | |
| 1 teaspoon Aleppo pepper | |
| ¼ cup lime juice |
Preparation
Preheat your grill (charcoal or gas) to 400°F. Remove the membrane from the back of three racks of baby back ribs and pat them dry with paper towels. In a small bowl, mix the brown sugar, kosher salt, black pepper, garlic powder, onion powder, smoked paprika, and chili powder to make your dry rub.
Spread a thin layer of Dijon mustard on both sides of the ribs—this helps the dry rub stick. Sprinkle the dry rub generously over both sides, using more on the meat side. Press the seasoning into ensure an even, flavorful coating.
Tear off enough foil to fully wrap each rack of ribs. Place the ribs meat-side up on the foil and wrap them tightly. Transfer the wrapped ribs to the preheated grill and cook for about 2 hours, or until the internal temperature reaches 205°F. This slow cooking ensures tender, flavorful meat.
In a saucepan, whisk together all the BBQ sauce ingredients and bring to a boil. Reduce the heat to low and simmer for about 45 minutes, whisking every 5 minutes. Stir in the lime juice at the end, then let the sauce cool to room temperature. Store in a glass jar until ready to use.
Unwrap the ribs and discard the foil. Brush a generous layer of BBQ sauce over each rack and place them directly on the grill. Cook for about 10 minutes, flipping once and applying a second coat of sauce.
Remove from the grill and let the ribs rest for 15 minutes before slicing and serving. Happy Grilling! Enjoy
Recipe Tips & Suggestions
How to Store Leftover Ribs
How to Reheat Ribs
Subscribe to my newsletter for authentic Mediterranean recipes, essential cooking tips, and the latest food news, all delivered directly to your inbox for FREE. Let’s create memorable dishes together!

We would love to hear your feedback! Leave us a comment below and share your experience with this delicious BBQ rib recipe. Did it meet your expectations? Any tips or variations you’d like to share? We can’t wait to read your comments and keep the conversation going!