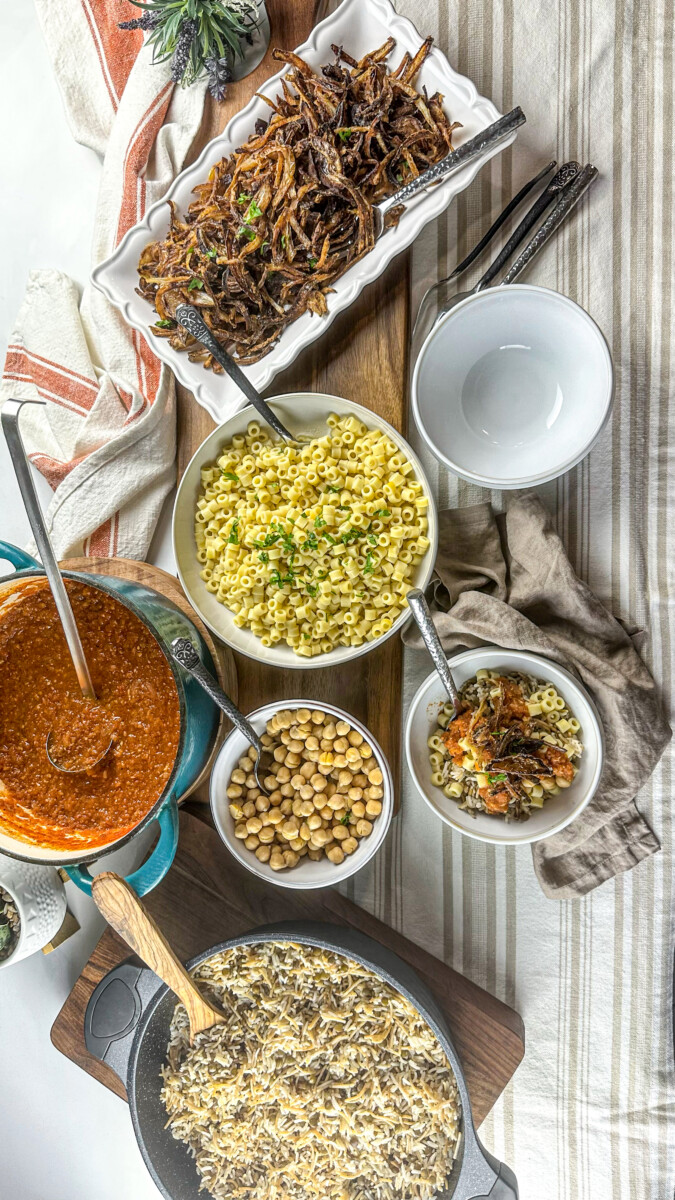
Each bite, a perfect blend of rice, pasta, lentils, and chickpeas enveloped in a tangy tomato sauce, creates a comforting and hearty culinary experience that’s impossible to resist.

Type of Cuisine:
Middle Eastern

Prep Time: 45 minutes.
Cook Time: 1 hour

How Many Servings?
about 8 servings
Table of Contents
Discover the enchanting world of Egyptian cuisine with our delightful Egyptian Koshari recipe. This traditional Egyptian dish, known for its rich history and remarkable flavors, has been a beloved staple for generations. Whether you’re planning a family gathering or a grand feast, Koshari will captivate your guests’ palates.
Koshari is a testament to the comforting and warming qualities of Egyptian cuisine. It’s a harmonious blend of rice, pasta, lentils, chickpeas, and a unique medley of spices and sauces, gracing Middle Eastern and Mediterranean cookbooks for ages. With easily accessible ingredients and a straightforward preparation process, Koshari is ideal for busy individuals and cooking enthusiasts.
I fondly remember preparing my version of this delectable Egyptian meal when I was younger. I’m excited to share my favorite way to make Koshari with you in this blog post. So, gather your essential ingredients, ready your kitchen, and embark on a culinary journey to savor the goodness of Koshari!
Tips for the Best Koshari
Before you start, gather all your ingredients and pre-measure them for a smoother cooking process.
- Cooking the Lentils: Pay close attention to them; ensure they are neither overcooked nor undercooked for the desired texture and flavor.
- Season the Pasta: While cooking the pasta, season it generously with salt and pepper to infuse flavor.
- Crispy Fried Onions: Fry thin onion slices until they turn golden and caramelized. Toss them with flour before frying, making them fluffy and crunchy. Reserve the excess oil for later use.
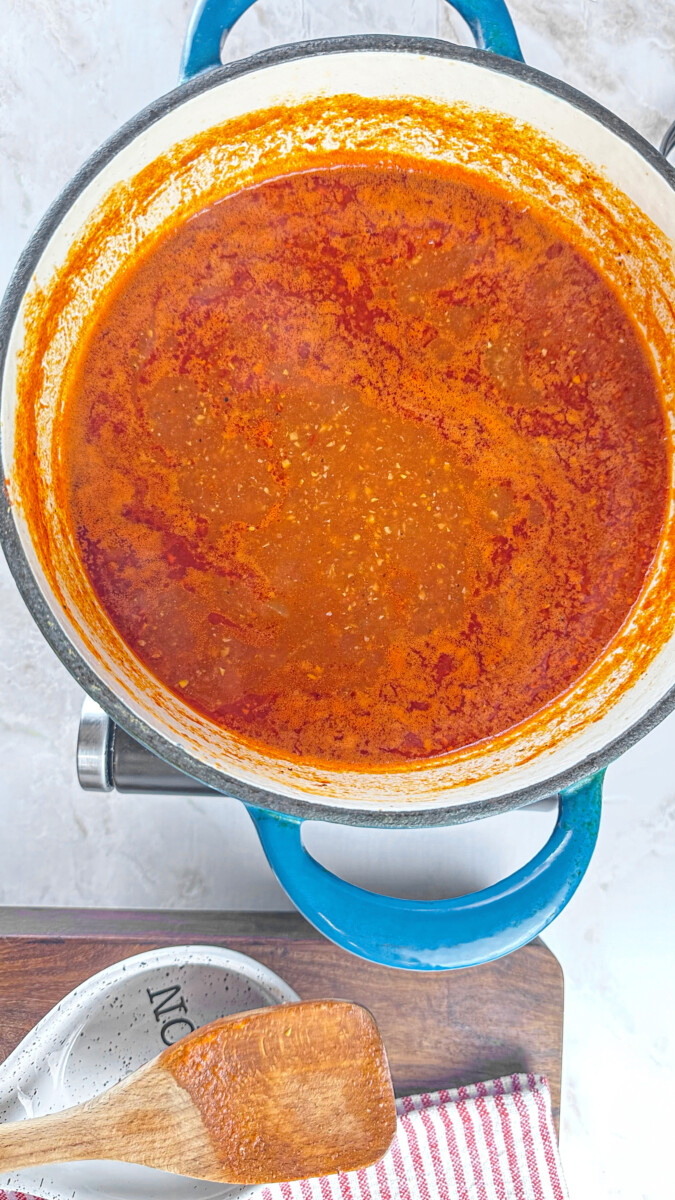
- Making Tomato Salsa: Sauté chopped onion in fried onion oil and garlic blend. Add coriander, cumin, salt, and optional spices for extra flavor. Blanch fresh tomatoes, blend and cook the mixture until thickened, adding sugar and vinegar to balance the sweetness. Canned tomatoes are a time-saving alternative.
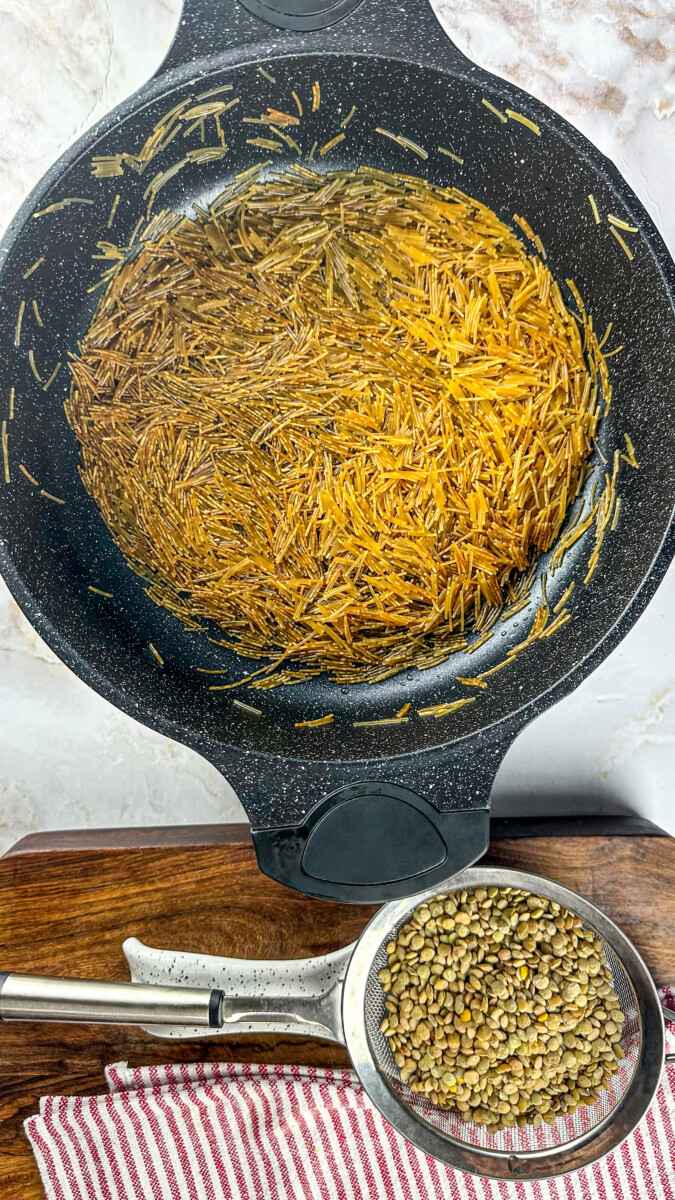
- Rice & Lentil Mix: Wash and sauté the lentils with cumin, coriander, and salt. Cook for 8 minutes, then add rice and simmer for 20 minutes. Caramelize vermicelli noodles in flavored onion oil and Ghee or butter in a separate step.
- Boil Pasta: Cook pasta according to package instructions until al dente, then drain and set aside.
- Prepare Garbanzo Beans: If using canned garbanzo beans, drain, rinse, and season with salt and flavored onion oil.
Serving Suggestions and Meal Prep
Koshari is a versatile dish that can be enjoyed in various ways, whether serving it for a family meal or preparing it for meal prep. Here are some serving suggestions and tips to make the most of your Koshari experience:
- Koshari Buffet: Create a Koshari buffet for gatherings, letting guests customize their bowls.
- Pair with Salads: Serve with fattoush or spinach salad for a refreshing combination.
- Ideal for Meal Prep: Prep and store components separately for quick, homemade Koshari anytime.
- Side Dish Inspiration: Use Koshari as a side dish alongside falafel, kebabs, or stuffed grape leaves.
- Enjoy Leftovers: Leftover Koshari stores well and makes convenient, delicious meals.
Egyptian Koshari’s adaptability makes it perfect for various dining occasions and meal prep needs.
Preparation


Making a delicious, fragrant, and hearty Koshari is easier than you might think. You can quickly make a traditional comforting meal with all the right ingredients. Koshari is an effortless dish that takes about an hour and a half.
Type of Cuisine:
Middle Eastern
Prep Time: 45 minutes.
Cook Time: 1 hour
How Many Servings?
about 8 servings
Ingredients:
Adjust Servings
| 3 large onions (sliced thin) | |
| 3 tablespoons flour | |
| 2 cups vegetable oil | |
| 2 tablespoons fried onion oil | |
| 1 small onion (chopped) | |
| 4 cloves garlic | |
| 1 tablespoon tomato paste | |
| 1 tablespoon harissa | |
| 1 tablespoon coriander | |
| ½ tablespoon cumin | |
| Salt and pepper to taste | |
| 3 lbs fresh tomatoes blanched/ skin removed and blended into a sauce (or you can use 2/ 28 oz cans of tomato sauce) | |
| 2 cups water | |
| 1 tablespoon sugar | |
| 2 tablespoons vinegar |
To cook Lentils:
| 2 tablespoons onion oil | |
| 1 tablespoon ghee | |
| 1 cup brown lentils (that have been soaked for 2 hours) | |
| 2 cups medium rice grain (washed and soaked for 15 minutes in warm water) | |
| 2 cups vermicelli | |
| 1 tablespoon coriander | |
| ½ tablespoon cumin | |
| ½ tablespoon salt |
Extra Ingredients
| 8 oz Ditalini Pasta | |
| 16 oz can Garbanzo beans |
Preparation
Recipe Tips & Suggestions
Storing:
Reheating:
Nutrition Information
The information shown is an estimate provided by an online nutrition calculator. It should should not be considered a substitute for a professional nutritionist's advice.
See our full nutrition disclosure here.

Never Miss a Recipe
Subscribe to my newsletter for authentic Mediterranean recipes, essential cooking tips, and the latest food news, all delivered directly to your inbox for FREE. Let’s create memorable dishes together!
I would love to hear your experience!
Have you had Koshary before or made this Recipe for your family yet? Love to hear your feedback. Please feel free to leave me a comment below.