Roasted bell peppers are a staple in my kitchen, and they’re easier to make than you might think. In this guide, I’ll show you exactly how to roast, peel, and store them—plus all the delicious ways to use them.
Type of Cuisine:
Mediaerranean

Prep Time: 5 minutes.
Cook Time: 15 minutes

How Many Servings?
4-6 servings
Roasting bell peppers is one of the simplest ways to add rich, smoky flavor to your meals, and nothing beats the taste of homemade. In the winter, I rely on store-bought jars to make muhammara and hearty soups. But once summer hits and fresh bell peppers are in season, I roast my own from the garden.
Homemade roasted red peppers are sweet, smoky, and free from the excess salt and preservatives found in store-bought versions. They’re easy to make, fridge-friendly, and ready to elevate everything from salads and pasta to sandwiches and dips.
How to Roast Bell Peppers in the Oven (Step-by-Step)
Roasting bell peppers in the oven is simple and delivers deep, sweet, and smoky flavor. Whether you’re using red, yellow, orange, or green bell peppers, each color brings a unique taste—green being slightly bitter, while red and yellow are sweeter.
Step 1: Prep the Peppers
-
Wash and pat dry the bell peppers.
-
Place them whole on a foil-lined baking sheet for easy clean-up.
-
Lightly coat them with olive oil to promote charring and prevent burning.
Step 2: Roast Under the Broiler
-
Preheat your oven to broil.
-
Position the tray 6–8 inches from the heat source.
-
Broil the peppers, turning every 1–2 minutes until all sides are evenly charred (about 5–7 minutes total).
Step 3: Steam and Peel
-
Transfer the hot, charred peppers into a zip-top bag or a bowl covered tightly with plastic wrap or a plate.
-
Let them steam for 10 minutes. This loosens the skin.
-
Once cooled slightly, peel off the blackened skin using your hands or a fork.
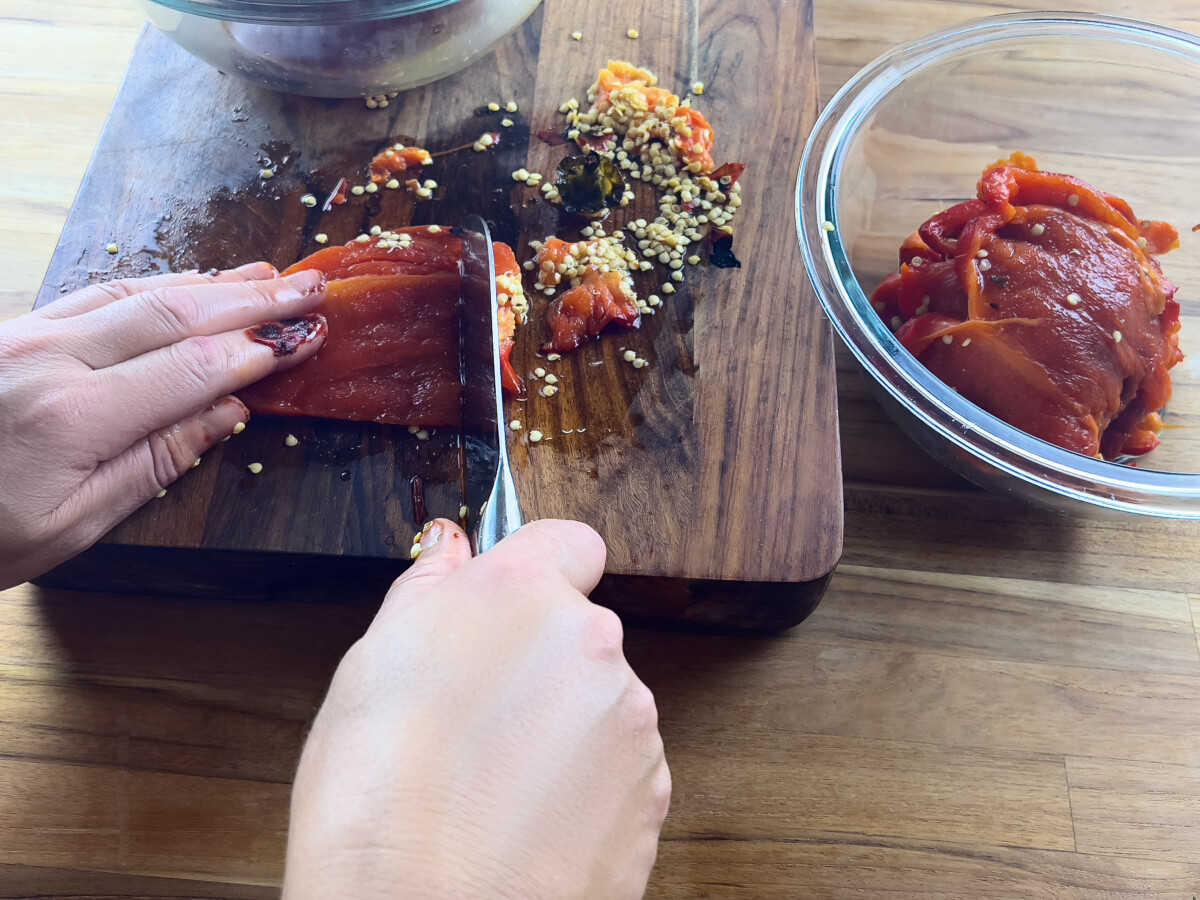
Step 4: Slice and Store
-
Remove the stems and seeds.
-
Slice into strips and store in an airtight container or jar.
-
Optional: Drizzle with olive oil for extra flavor. Let them come to room temperature before serving to get the best taste.
Why Peel the Skin?
While the charred skin adds a smoky look, it can make your dish taste bitter. Removing it enhances the flavor and texture, letting the natural sweetness and smokiness of the peppers shine through.
Beyond the Oven: Alternative Roasting Methods

Oven roasting is just the beginning. Here are other ways to roast bell peppers:
1- Grill Method
-
Place whole peppers directly over high heat on the grill.
-
Turn every couple of minutes until charred all over.
2- Stove Top (Gas Burner)
-
Place peppers directly over the flame of a gas burner.
-
Use tongs to turn them until all sides are blackened.
3- Kitchen Torch
-
Perfect for small batches.
-
Roast directly with a torch until the skin blisters and blackens.
Each method offers slightly different textures and flavors—don’t hesitate to experiment!
How to Use Roasted Bell Peppers in Recipes
Roasted bell peppers aren’t just a side—they’re a versatile flavor-booster for dozens of dishes. Once charred and peeled, you can fold them into meals to add smokiness, sweetness, and depth.

A delightful bowl of Muhammara, showcasing the rich color and texture of this delicious Middle Eastern dip.
Try Them In:
-
Muhammara Dip – Roasted red peppers are the soul of this classic Syrian spread. Their smokiness pairs perfectly with walnuts, olive oil, and pomegranate molasses.
-
Grilled Eggplant Sandwiches – Add slices of roasted peppers with grilled eggplant, fresh basil, and a smear of pesto for a rich, veggie-packed sandwich.
-
Crostini or Baguette Appetizers – Layer roasted peppers onto toasted bread with goat cheese or feta. Add a drizzle of honey or balsamic for an easy, elegant starter.
-
Pasta, Pizza, or Grain Bowls – Toss strips into warm pasta, top your favorite pizza, or mix into quinoa for a burst of flavor.
-
Salads – Use them in Mediterranean salads with olives, cucumbers, and chickpeas, or blend them into creamy salad dressings.
Step-by-Step Instructions
Prep the Bell Peppers
Broil Until Charred

Steam for Easy Peeling

Why and How to Peel the Skin
After steaming, the skin should loosen and blister. To peel:
Let the peppers cool slightly.
Use your hands to gently pull off large pieces of skin.
For any stubborn bits, use the back of a knife to scrape the skin away without damaging the soft flesh.
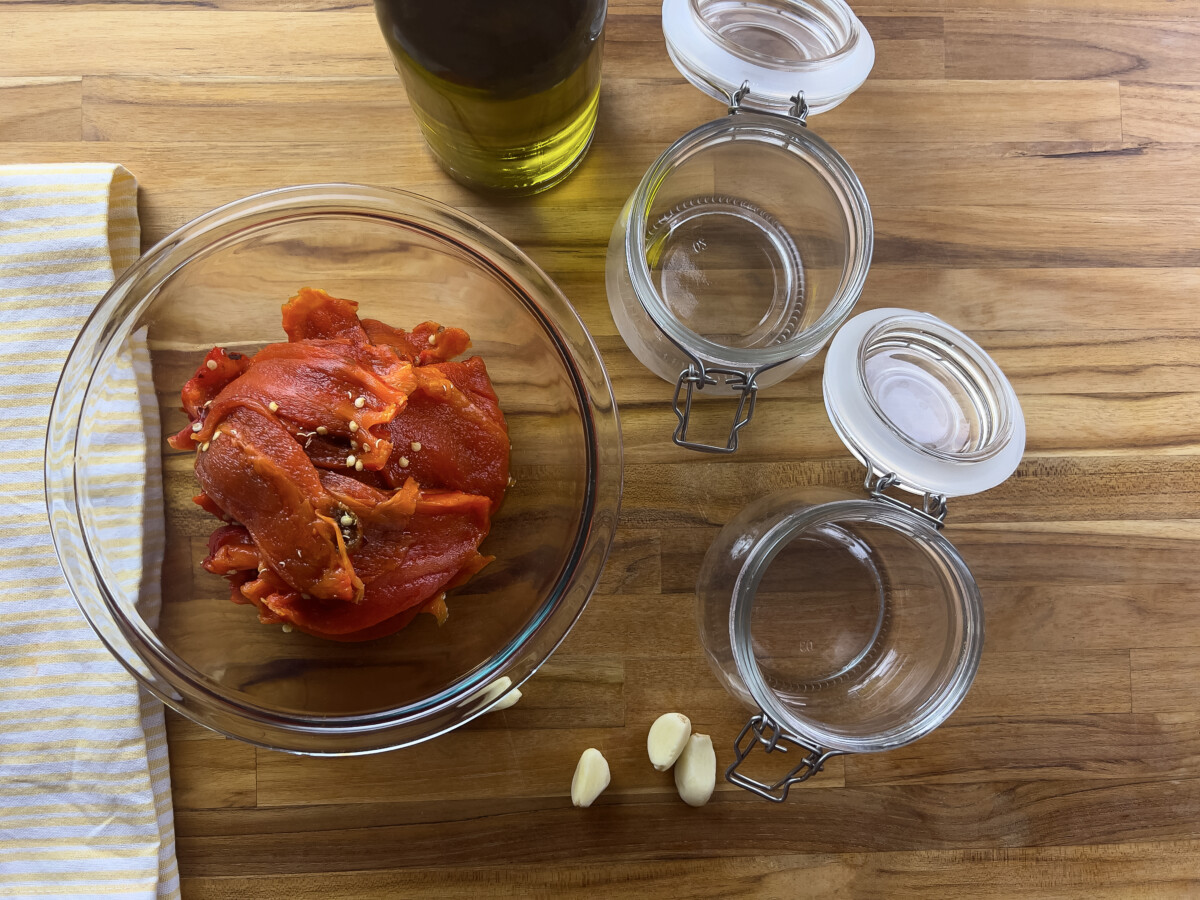
Slice and Store

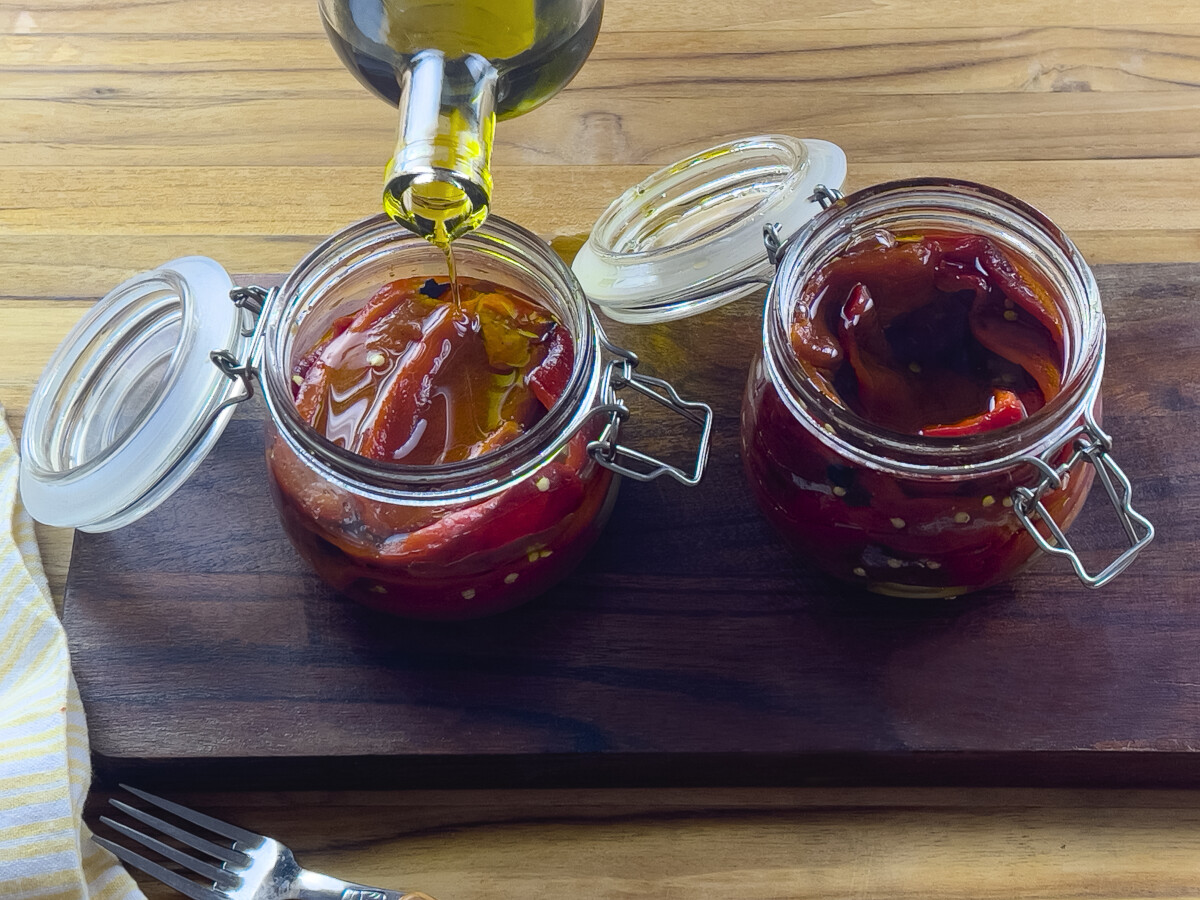
For storage, place the strips in a glass jar and cover with olive oil. Store in the refrigerator and use within 5–7 days for best flavor..
Capture the smoky goodness of charred bell peppers and preserve them in olive oil. Perfect for salads, sandwiches, or as a gourmet topping!
Type of Cuisine:
Mediaerranean
Prep Time: 5 minutes.
Cook Time: 15 minutes
How Many Servings?
4-6 servings
Ingredients:
| A few green, red, yellow or orange bell peppers. | |
| Olive Oil. |
Preparation
Wash and thoroughly dry each bell pepper. Place them on a foil-lined baking sheet for hassle-free clean-up. Lightly coat each pepper with olive oil to help them char evenly without burning.
Preheat your oven to the broil setting. Position the tray of bell peppers about 6–8 inches from the broiler (usually the top rack). Let them roast for about 5 minutes, or until the skin on one side is blackened and blistered. Then, rotate the peppers using tongs and continue broiling, turning as needed, until all sides are evenly charred.
Once the peppers are fully charred, transfer them immediately to a zip-top bag while still hot. Seal the bag and let them steam for about 10 minutes. This loosens the skin, making it easy to peel off. Once cooled slightly, gently remove the skin using your hands or a fork—it should slide right off.
While you can leave the charred skin on, it often adds an unpleasant burnt or bitter taste. Removing the skin brings out the natural sweetness and smokiness of roasted bell peppers—without the harsh aftertaste. After steaming, the skin should loosen and blister. To peel: Let the peppers cool slightly. Use your hands to gently pull off large pieces of skin. For any stubborn bits, use the back of a knife to scrape the skin away without damaging the soft flesh.
After peeling, cut off the tops of the roasted bell peppers and remove the seeds. Slice them into thick strips or any shape you prefer. For storage, place the strips in a glass jar and cover with olive oil. Store in the refrigerator and use within 5–7 days for best flavor..
Subscribe to my newsletter for authentic Mediterranean recipes, essential cooking tips, and the latest food news, all delivered directly to your inbox for FREE. Let’s create memorable dishes together!

Made these preserved peppers? Drop a comment below and share your experience! I would love to hear your thoughts and tips!