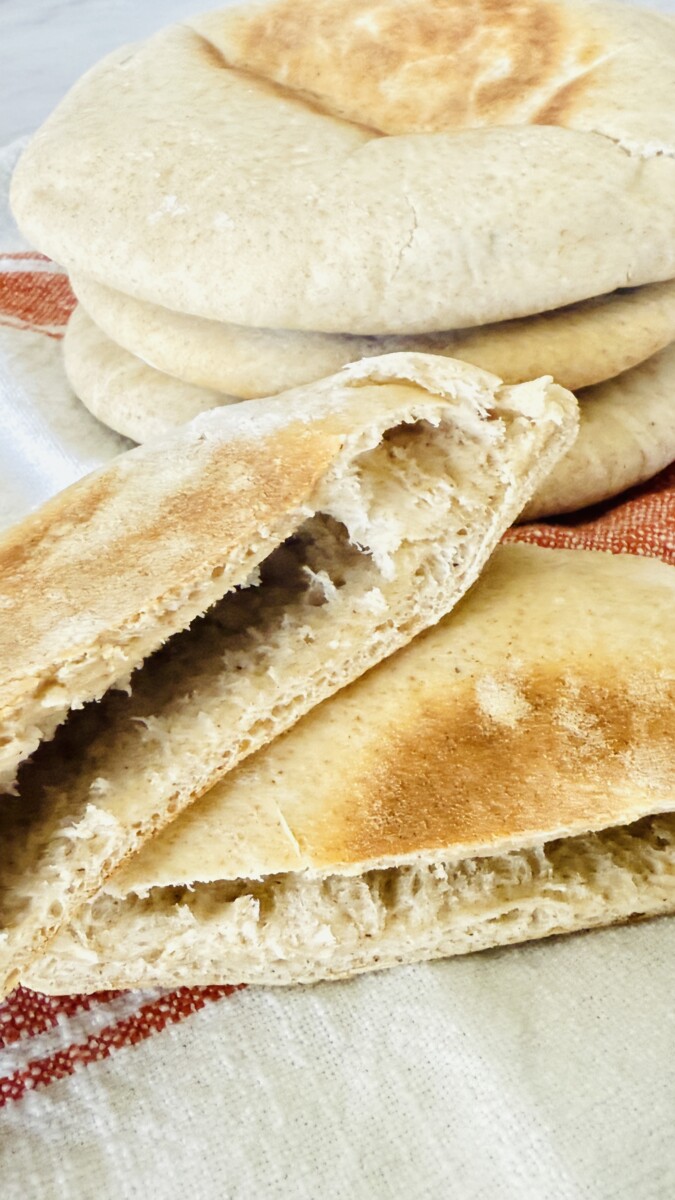
Warm, soft, and full of fluffy pockets—this homemade pita bread recipe is easier than you think, and the results will blow store-bought out of the water.
Type of Cuisine:
Mediterranean

Prep Time: Prep Time: 20 minutes Resting Time: 1 hour 30 minutes – 2 hours.
Cook Time: 2–4 minutes per pita (

How Many Servings?
6-8 pitas
I’m so excited to share this homemade pita bread recipe with you! As someone who could happily eat pita with every single meal (no joke), I’ve spent a lot of time testing this recipe. I experimented with different flours, yeast types, and baking methods until I found the version that works beautifully every time. Now I’m confident you’ll be able to make soft, fluffy pitas at home with success. I did the hard work for you—so all you need to do is follow the steps and enjoy!
Why I Love This Pita Bread Recipe
This truly is the best pita bread recipe because it checks all the boxes:
-
Soft & Fluffy: Each pita bakes up light and pillowy, perfect for wrapping or dipping.
-
Pockets That Puff: The high-heat method gives you that classic pita pocket, ready to fill with your favorite Mediterranean flavors.
-
Easy to Make at Home: With just a few pantry ingredients and simple steps, anyone can bake this bread from scratch.
-
Freezer-Friendly: These pitas freeze beautifully, so you can make a batch ahead of time and always have fresh bread ready.
Once you try this recipe, you’ll never want to go back to store-bought pitas again!
Ingredients You’ll Need for Homemade Pita Bread
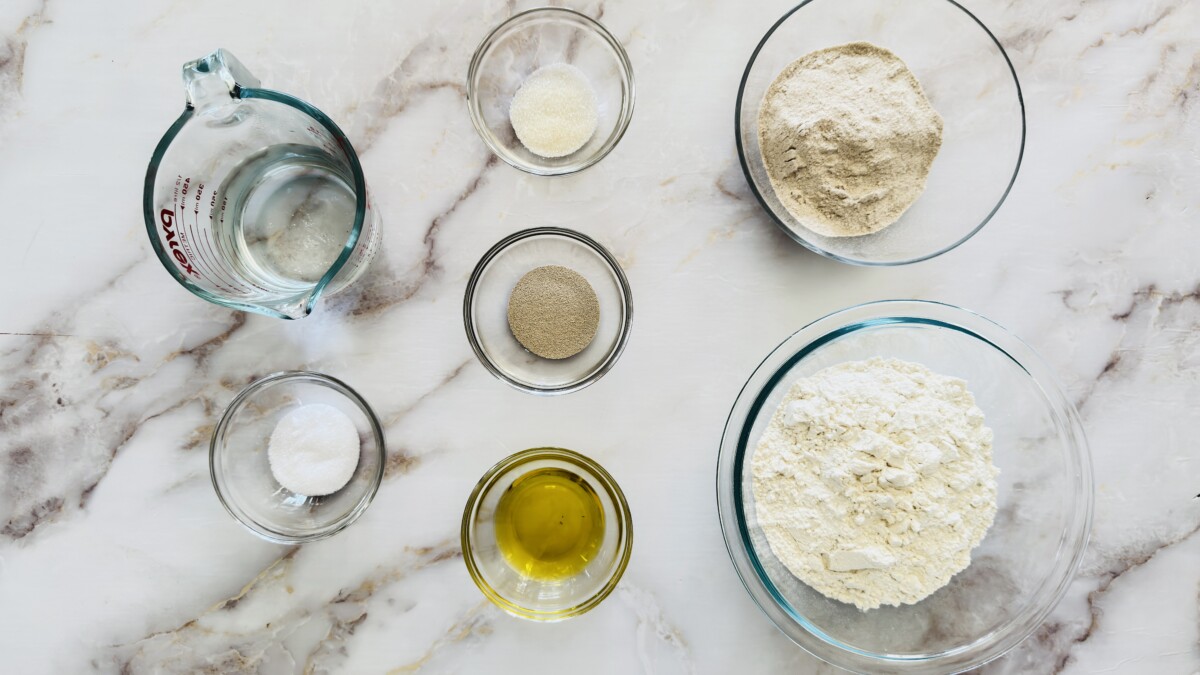
Here’s everything you’ll need to make a batch of soft, fluffy pita bread at home:
-
All-purpose flour – for softness and structure
-
Whole wheat flour – adds flavor and a slight nutty taste
-
Instant yeast – helps the dough rise quickly and evenly
-
Fine salt – balances flavor
-
Honey or sugar – feeds the yeast and adds a touch of sweetness
-
Warm water (100–110°F / 38–43°C) – the key to activating yeast
-
Extra virgin olive oil – for richness and tenderness
Tips & Tricks for Perfect Homemade Pita Bread
Want to make sure your pitas turn out soft, fluffy, and full of pockets every time? Here are my best-tested tips:
-
Measure Flour the Right Way
For best results, weigh your flour. If you don’t have a scale, use the spoon-and-level method: spoon flour into your cup, then level it with a knife. Scooping directly can pack too much flour, making the pita dense.
. Use the Right Flour Blend
A mix of all-purpose and whole wheat flour creates a hearty yet tender pita. If you only use all-purpose, the dough will be more delicate—roll carefully and avoid overstretching so it still puffs.
. Rest the Dough Often
After the first rise (1–2 hours), rest the dough again after shaping into balls, and once more after rolling. This relaxes the gluten, makes rolling easier, and helps the pita puff properly. Skipping rest time often leads to flat bread.
. Roll Evenly and to the Right Size
This recipe makes 8 pitas, about 6 inches in diameter. If you roll smaller, they’ll be doughier; if larger, they’ll be too thin and may not form pockets. Always roll evenly on all sides for consistent puffing.
. Keep Dough Warm and Covered
Pita dough loves warmth. Keep it covered with a damp towel while resting or waiting to cook—this prevents it from drying out and losing elasticity.
. Yeast Matters
This recipe uses instant yeast, which can be mixed directly into the flour. If using active dry yeast, dissolve it first in warm water (with a pinch of sugar) and let it sit until foamy before adding.
. Water Temperature is Key
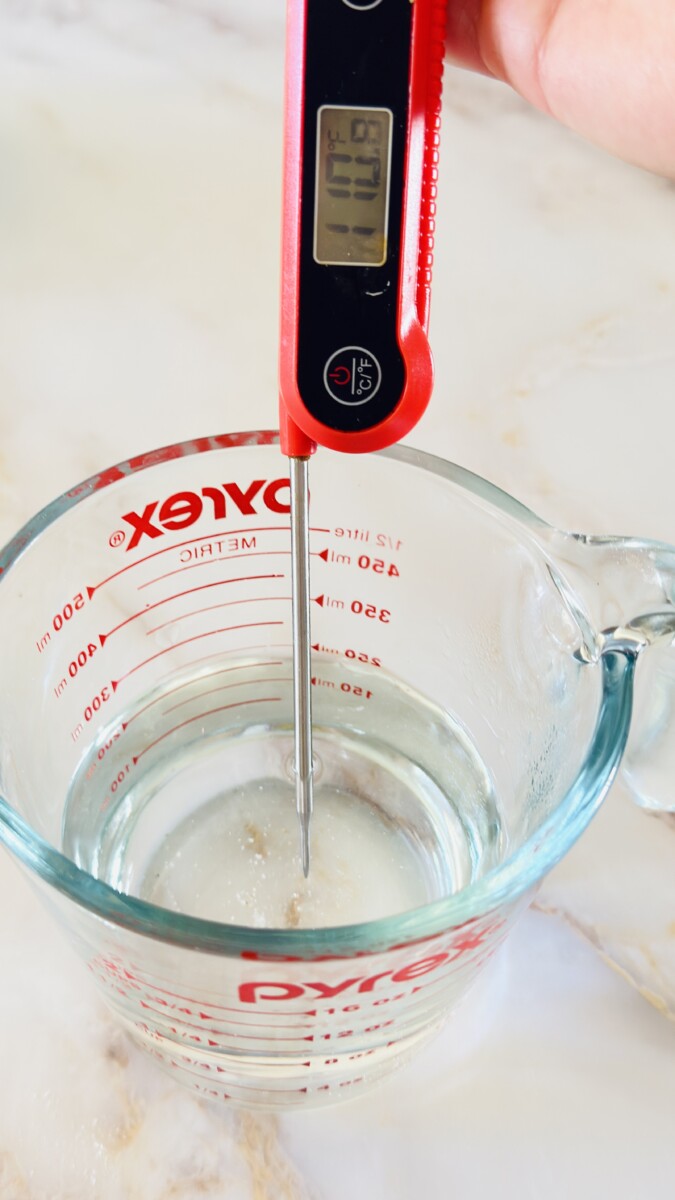
Use water between 100–110°F (38–43°C). Too hot and you’ll kill the yeast; too cold and the dough won’t rise. If you don’t have a thermometer, the water should feel warm to the touch, not hot.
. Cooking Tip: Flip for Best Puff
When cooking on a skillet, place the side that was facing up while resting down first. Flip after 30–60 seconds. This traps steam inside, creating that magical pita pocket.
Common Questions About Homemade Pita Bread
- Why didn’t my pita puff up?
The most common reason is rolling too thin or unevenly. Make sure the dough is evenly rolled to about 6 inches wide and ¼-inch thick. Also, your oven or skillet needs to be very hot—steam is what creates that pocket. - Can I freeze homemade pita bread?
Yes! Once cooled, place the pitas in a freezer-safe bag with parchment between each one. Freeze for up to 2 months. To reheat, warm in a hot skillet or wrap in foil and bake until soft. - What’s the best way to reheat pita bread?
For soft results, wrap pita in a damp towel and microwave for 20–30 seconds, or warm in the oven at 350°F for 5–7 minutes. For a slightly crisp edge, use a hot skillet. - Do I have to use whole wheat flour?
No—if you don’t have whole wheat, you can use all-purpose flour only. The pitas will still be soft and fluffy, though a little more delicate to roll. - Can I make pita bread without yeast?
Traditional pita needs yeast for that puffed pocket. For a quicker flatbread, you could try a no-yeast recipe, but it won’t form the same hollow pocket.
Hand Kneading vs. Stand Mixer: Which Should You Use?
In the instructions above, I’ve included the hand-kneading method, which I love for its connection to the dough and control over texture. But if you have a stand mixer, that’s perfect too — it makes the process faster and more consistent, especially when you’re short on time or making larger batches.
Hand Kneading
Kneading by hand gives you direct feedback as the dough develops. After mixing the ingredients and letting the dough rest for 10 minutes, knead using a fold-press-turn motion for 6 to 8 minutes, until the dough becomes smooth, elastic, and slightly tacky.
Stand Mixer
To use a stand mixer, combine the flours, instant yeast, sugar, and salt in the bowl. Add the warm water and olive oil, then knead with the dough hook on low speed for 6 to 8 minutes, until the dough pulls away from the sides and becomes smooth.
Once the dough is ready with either method, jump back to the “First Rise and Divide” step to continue.
Oven vs. Stovetop: The Best Way to Cook Pita Bread
One of the most common questions when making homemade pita bread is: Oven or stovetop? I’ve tested both — and while each method has its perks, I personally prefer the oven for its consistency and reliable puff.
My Experience: Why I Prefer the Oven
I used the same cast-iron skillet for both methods — one placed in the oven and the other on the stovetop. While both techniques produced delicious pita, I found that the oven’s controlled, high-heat environment made the pitas puff more consistently. The hot air surrounds the dough evenly, creating that iconic balloon-like pocket.
That said, I didn’t have access to a pizza oven or a large cast-iron griddle that could handle multiple pitas at once — which would be ideal. So, for batch cooking, the oven was far more efficient for me.
Baking Pita in the Oven
-
High Heat is Key: Preheat your oven to its highest setting (at least 500°F / 260°C).
-
Use the Right Surface: Heat a cast-iron pan, pizza stone, or inverted baking sheet inside the oven. This helps create that burst of bottom heat for the puff.
-
Quick Bake: Bake for 2–4 minutes. Watch them balloon up like magic!
Cooking Pita on the Stovetop

-
Best Pan: A heavy cast-iron skillet over medium-high heat works best.
-
Cook Side First: Start with the side that was facing up during resting — it helps trap steam and encourages puffing.
-
Press for Pockets: Flip after 30–60 seconds and gently press with a spatula to help it rise. Cook another 1–2 minutes until golden.
Final Thoughts: Which Is Better?
-
Oven: Best for big, pillowy pockets and consistent results when cooking multiple pitas. My personal favorite.
-
Stovetop: Great for a more hands-on experience and a slightly chewier texture. Plus, it’s fun to watch the puff happen in real time.
-
Pizza Oven (if available): The dream tool — perfect char, fast puff, and bakery-quality texture.
Serving Ideas for Homemade Pita Bread

Once you’ve made a fresh batch of soft, fluffy pita bread, the fun part begins—deciding how to enjoy it! Here are some of my favorite ways to serve it:
- Classic with Hummus or Dips – Tear warm pita and scoop up creamy hummus, baba ghanoush, tzatziki, or muhammara.
- Stuffed Pita Pockets – Fill the pocket with falafel, grilled chicken, kofta kebabs, or shawarma for an easy Mediterranean meal.
- Wraps & Sandwiches – Use pita instead of tortillas to make fresh wraps with veggies, cheese, and your favorite protein.
- Pita Chips – Cut into wedges, brush with olive oil, and bake until crisp. Perfect for snacking or dipping.
- Breakfast Pita – Fill with scrambled eggs, avocado, and veggies for a quick breakfast sandwich.
- Side with Soups & Salads – Warm pita pairs beautifully with Egyptian lentil soup, Greek salad, or fattoush.
No matter how you serve it, homemade pita takes any meal up a notch. It’s versatile, freezer-friendly, and always delicious.
Step-by-Step Instructions
Pita Bread – Instructions (Hand Kneading with Stand Mixer Option)
Add the Wet Ingredients and Form the Dough
Cover the bowl with a towel and let it rest for 10 minutes. This short rest allows the flour to hydrate and makes the dough easier to work with.
Knead the Dough
First Rise and Divide
Shape and Rest the Dough Balls
Roll Out the Dough

Final Rest and Preheat
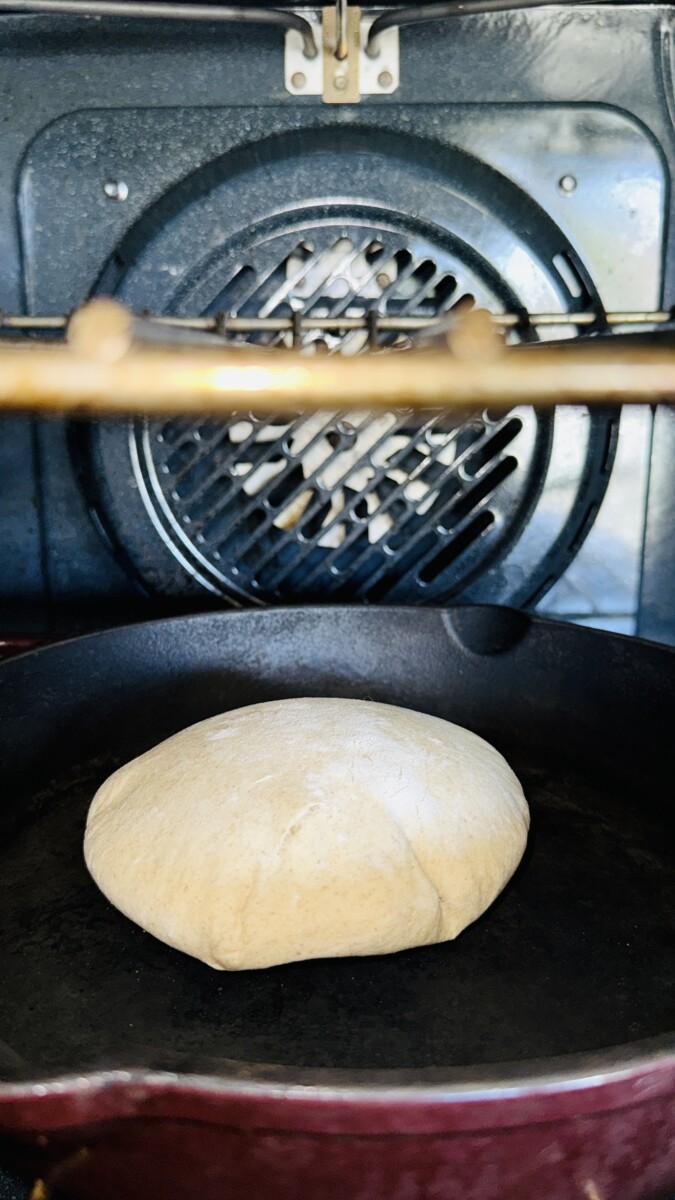
While the dough is resting, preheat your oven to 500°F (260°C). If using the oven method, place a cast-iron pan, pizza stone, or inverted baking sheet inside the oven to heat along with it. If you're using the stovetop method, place a cast-iron skillet over medium heat and let it get hot while the dough rests.
Oven Method (Recommended for Best Puffing)
Stovetop Method (Great Alternative)
Keep Warm or Store
This homemade pita bread recipe makes soft, fluffy pitas with perfect pockets every time. Easy to bake in the oven or cook on the stovetop, they’re freezer-friendly and so much better than store-bought.
Type of Cuisine:
Mediterranean
Prep Time: Prep Time: 20 minutes Resting Time: 1 hour 30 minutes – 2 hours.
Cook Time: 2–4 minutes per pita (
How Many Servings?
6-8 pitas
Ingredients:
| 2 cups (240g) all-purpose flour | |
| 1 cup (120g) whole wheat flour | |
| 2 teaspoons (7g) instant yeast | |
| 1 1/2 teaspoons (9g) fine salt | |
| 1 teaspoon (4g) honey or sugar | |
| 1 1/4 cups (300 ml) warm water (100–110°F / 38–43°C) | |
| 2 tablespoons 28g) extra virgin olive oil |
Preparation
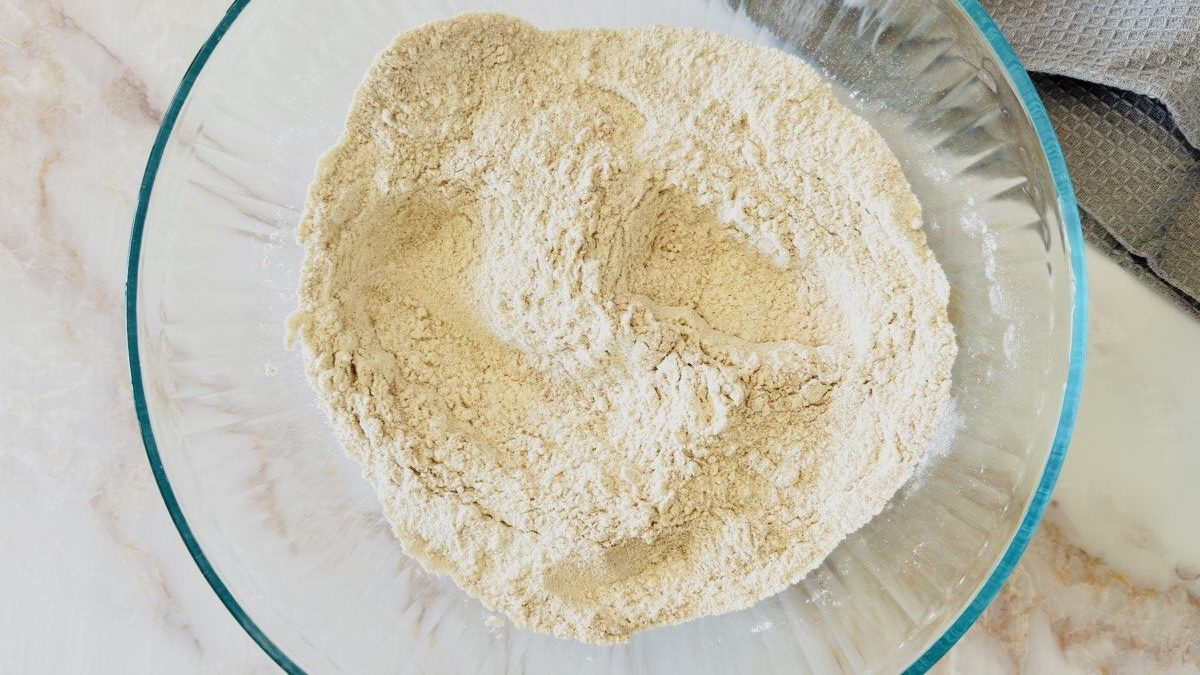
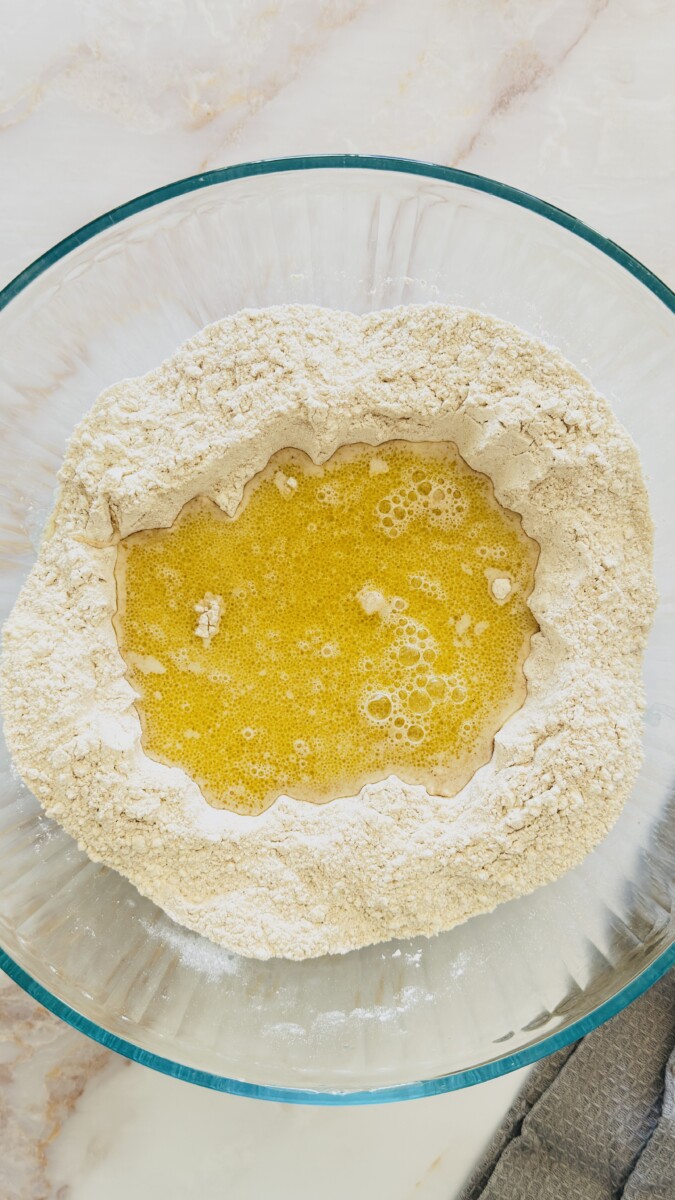
In a large mixing bowl, combine 2 cups of all-purpose flour and 1 cup of bread flour with the instant yeast, sugar, and salt. Mix the dry ingredients thoroughly to evenly distribute everything.
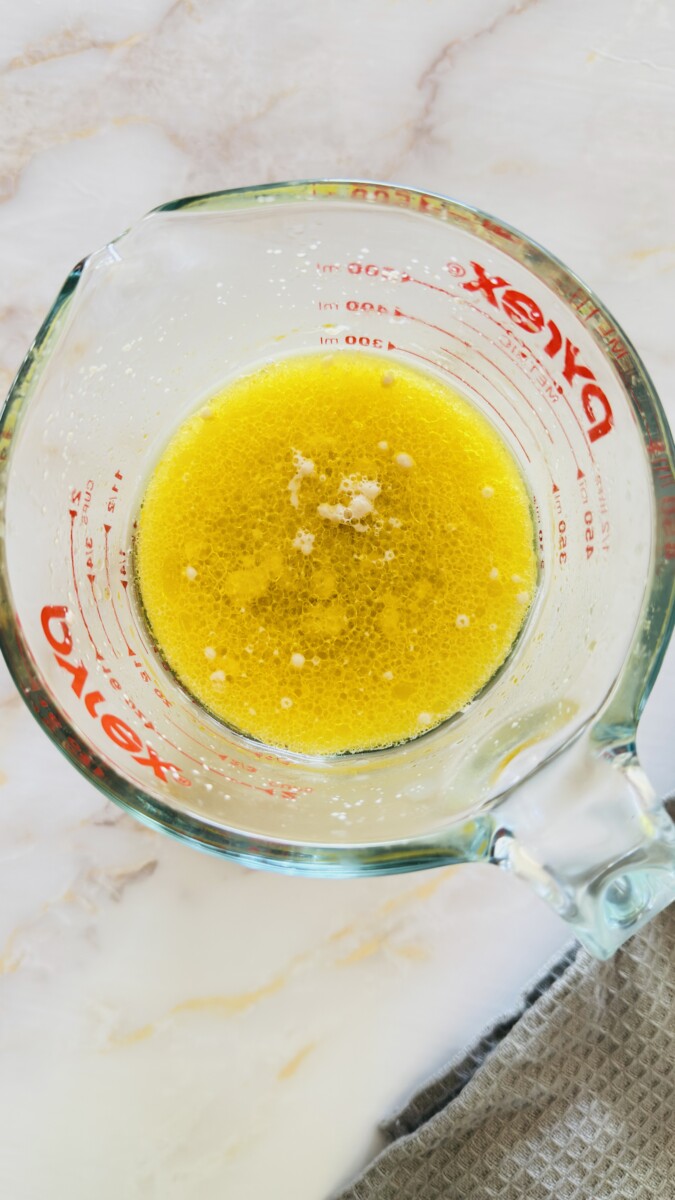
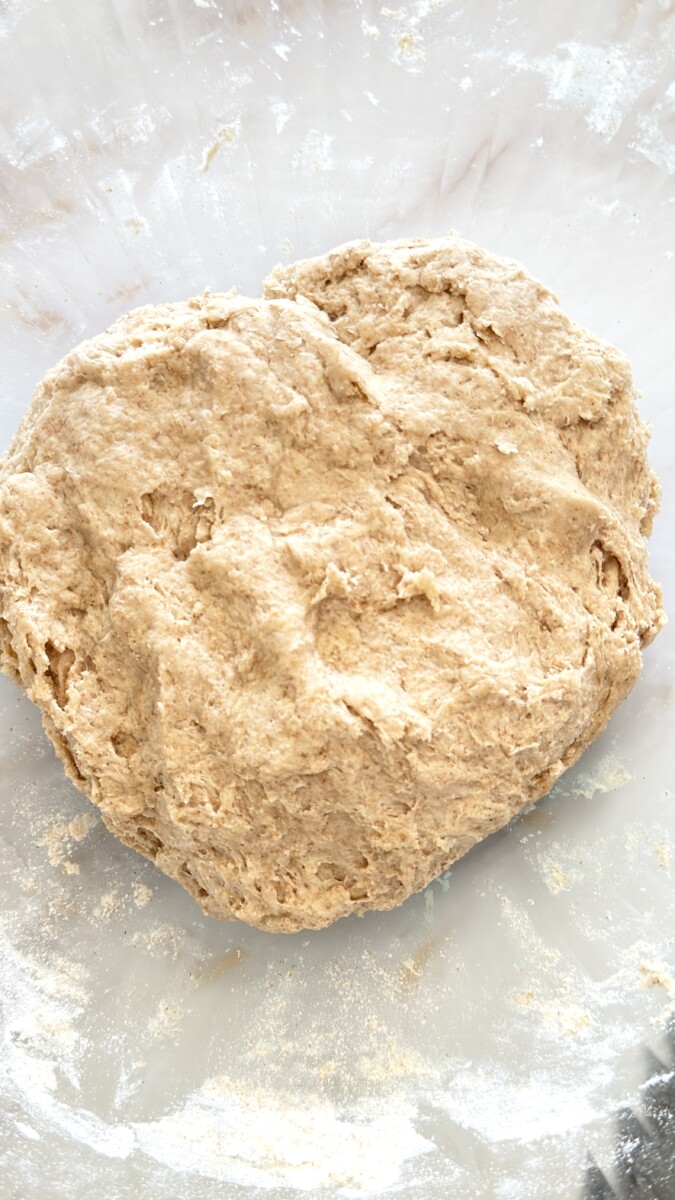
In a separate bowl or measuring cup, combine the warm water (between 100°F and 110°F) with the olive oil. Make a well in the center of the flour mixture and pour the water and oil into the middle. Using a wooden spoon or your hands, begin mixing from the center outward until a shaggy dough forms. Cover the bowl with a towel and let it rest for 10 minutes. This short rest allows the flour to hydrate and makes the dough easier to work with.
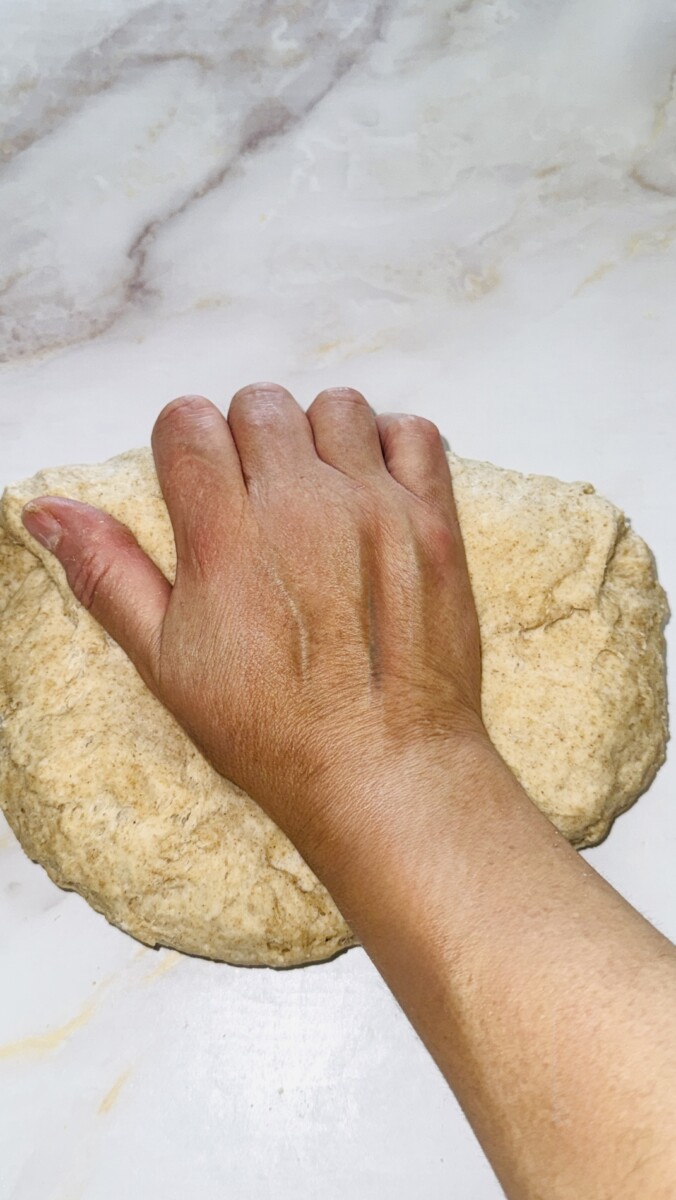
After resting, transfer the dough onto a lightly floured surface. To knead, fold the dough in half toward yourself, then press it away using the heel of your palm. Rotate the dough 90 degrees clockwise, fold it in half again, and press. Continue this folding, pressing, and turning motion rhythmically for about 6 to 8 minutes, or until the dough becomes smooth, elastic, and just slightly tacky but not sticky.
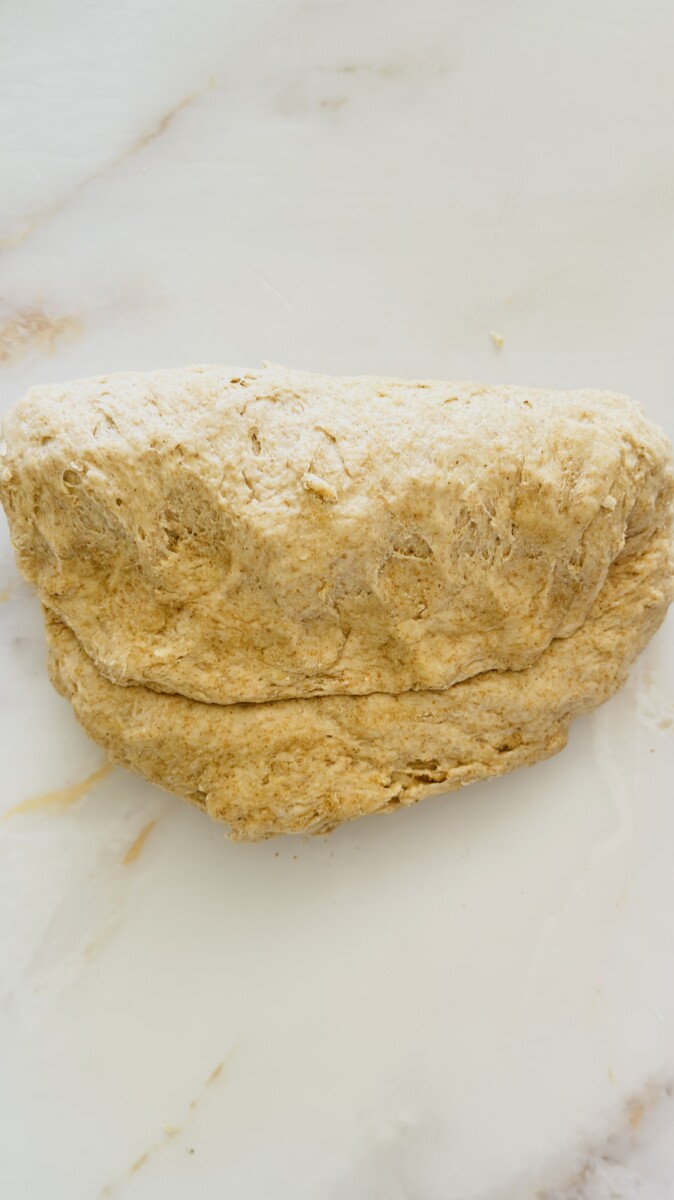
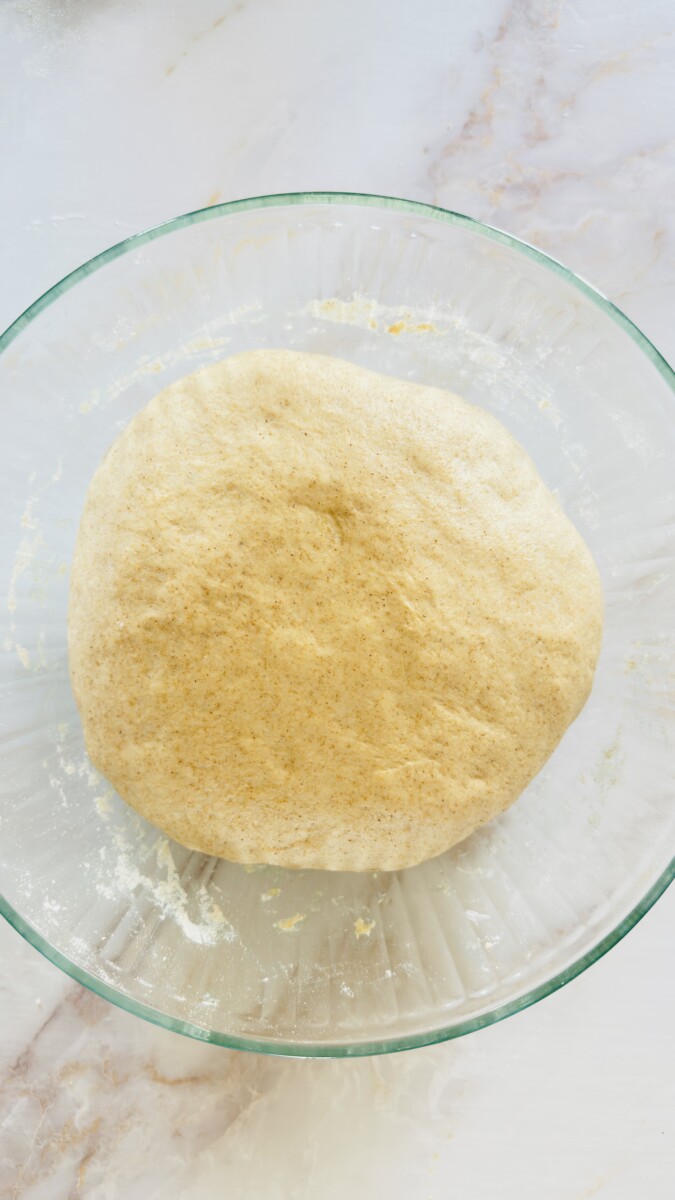
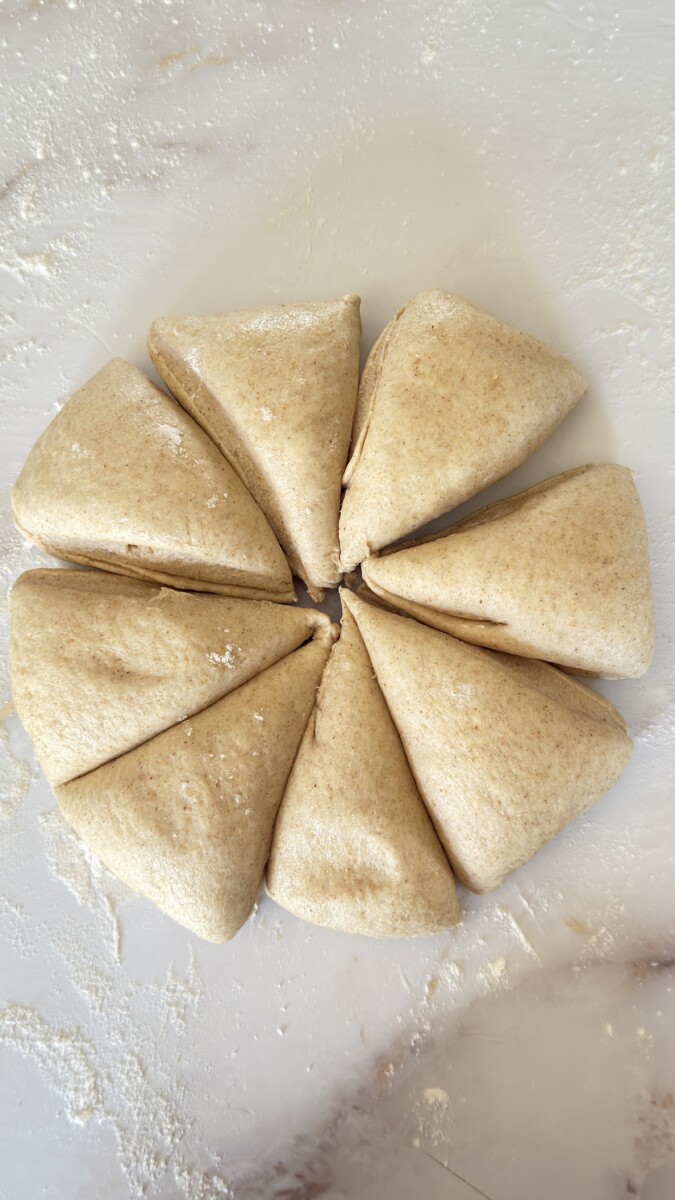
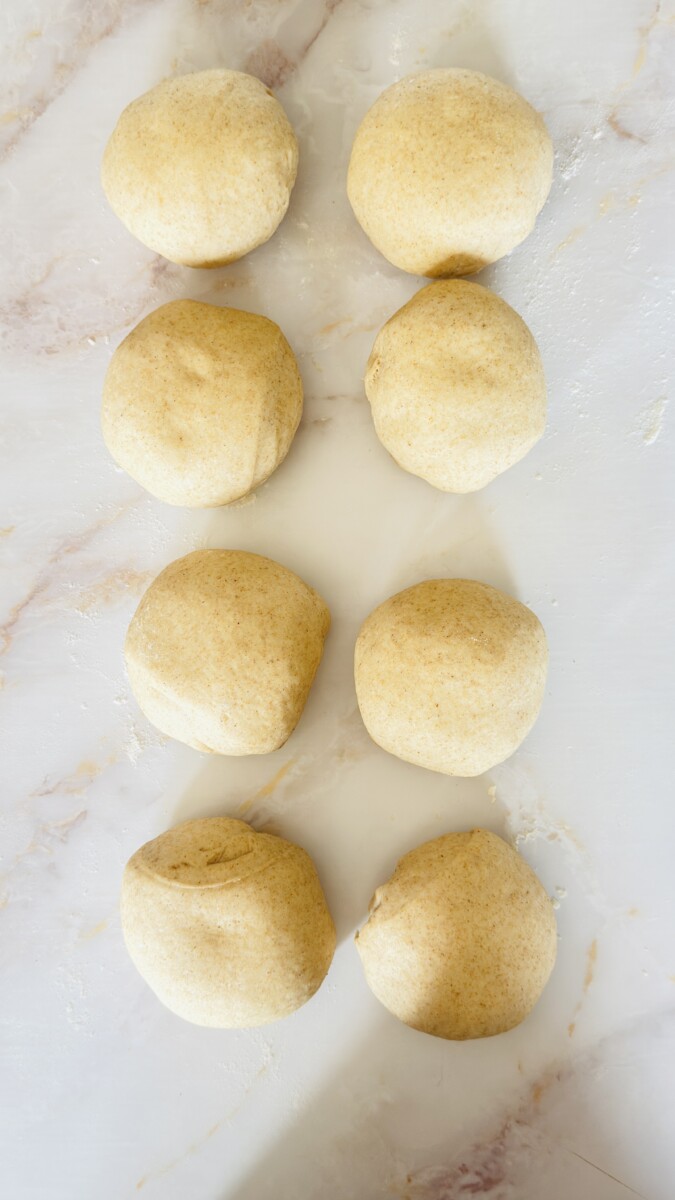
Place the kneaded dough into a lightly oiled bowl, turning it once to coat the surface with oil. Cover the bowl with a clean kitchen towel or plastic wrap and let the dough rise at room temperature for about 1½ hours, or until it has doubled in size. Once risen, gently deflate the dough by pressing down on it with your hand. Transfer it to a lightly floured surface and divide it into 8 equal pieces.
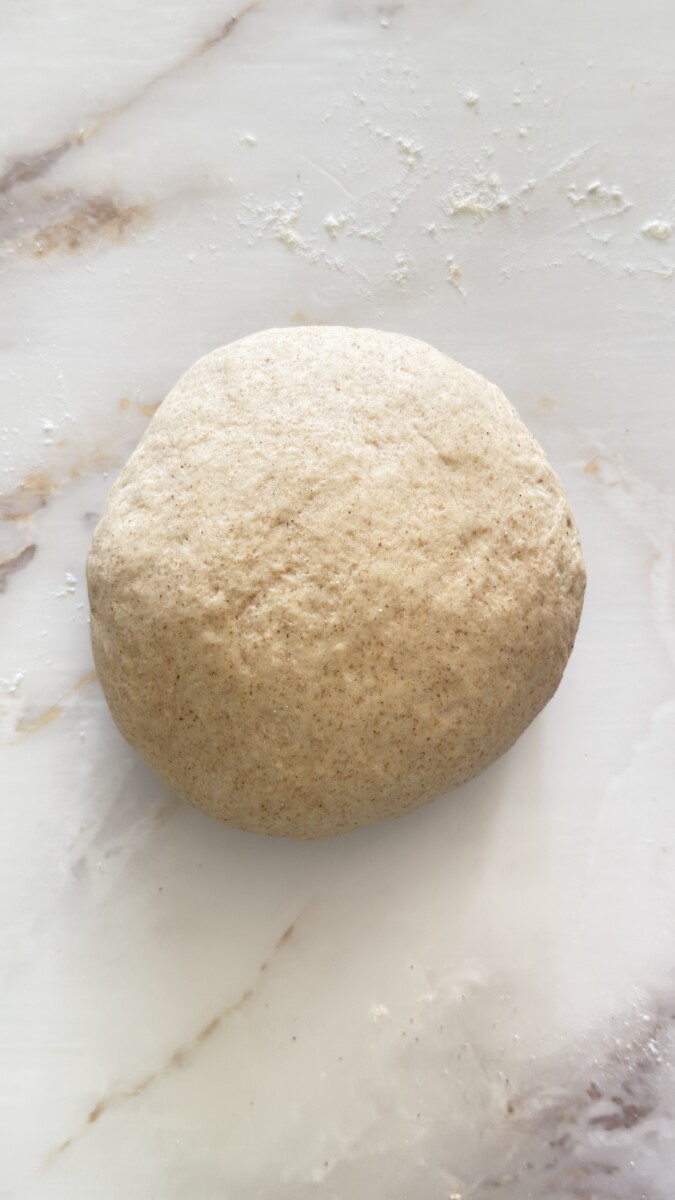
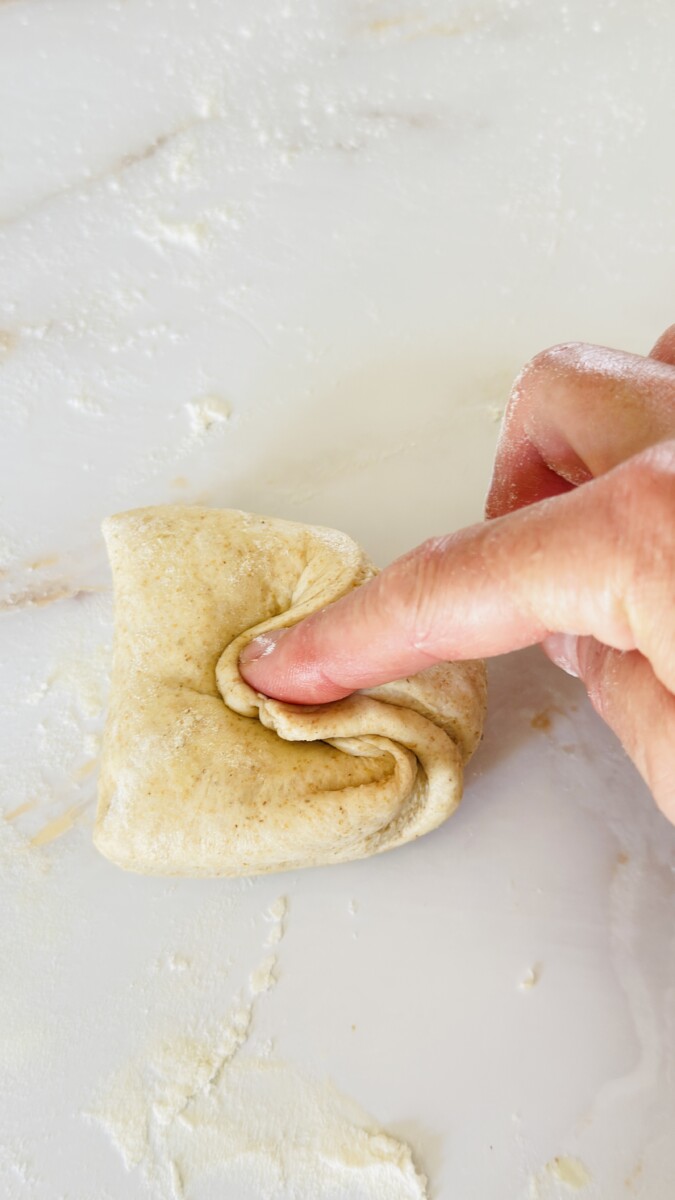
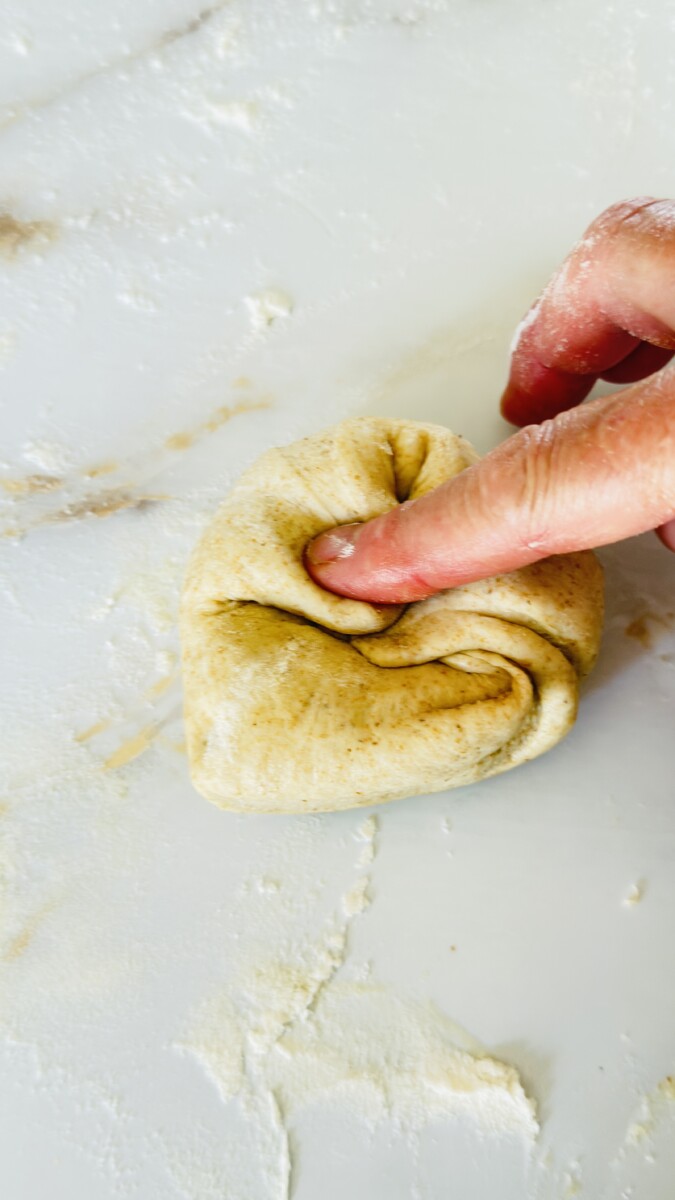
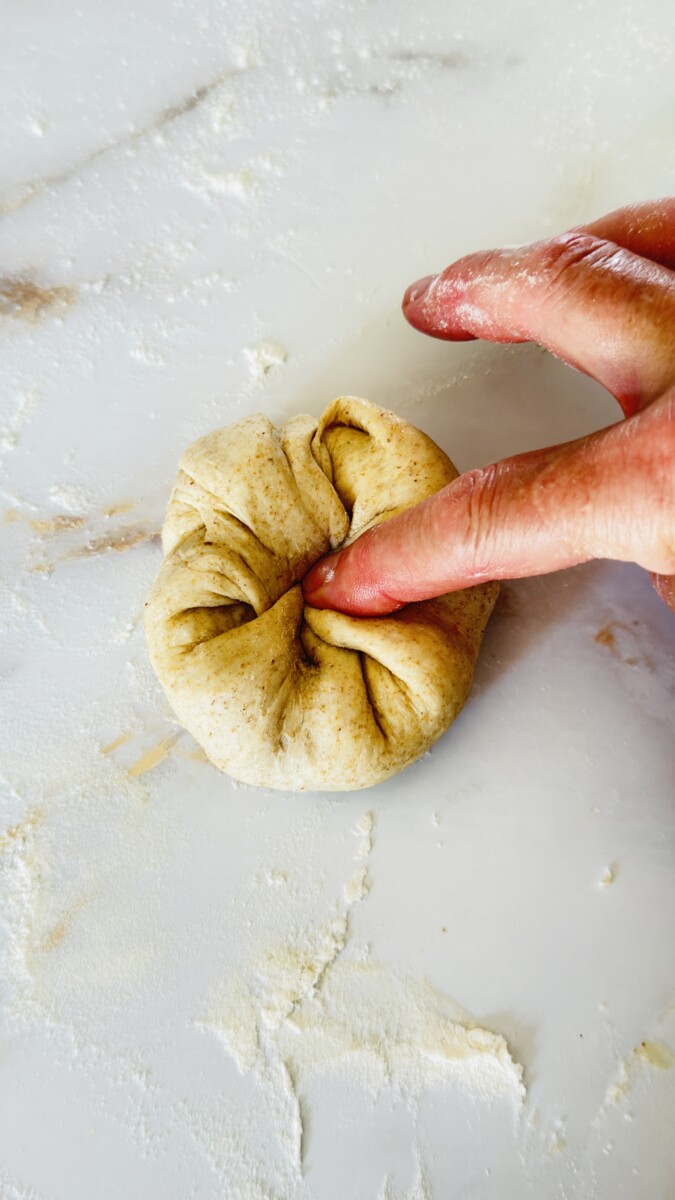
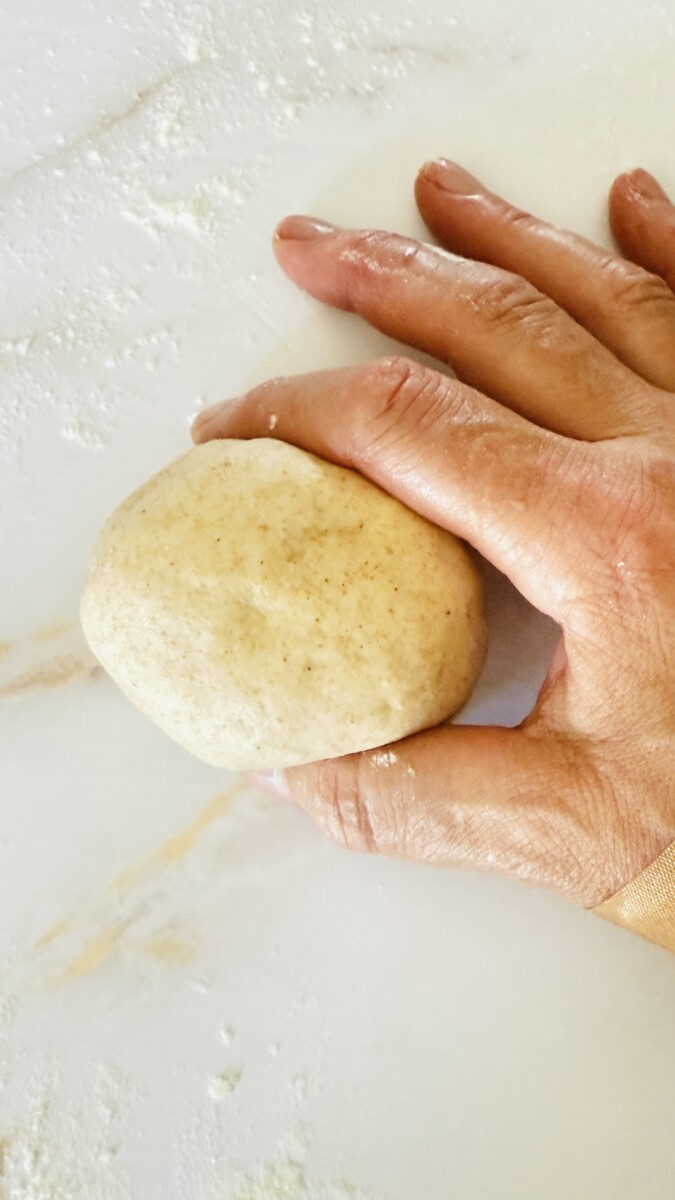
Working with one piece at a time, shape each portion into a ball by gently tucking the edges of the dough toward the center, pinching them together at the bottom. Flip the ball over so the smooth side faces up. Be careful not to overwork the dough at this stage — the goal is to create surface tension without tearing or tightening it too much. Place the dough balls on a lightly floured surface, cover them with a clean kitchen towel, and let them rest for 20 minutes. This rest relaxes the gluten and makes rolling easier.
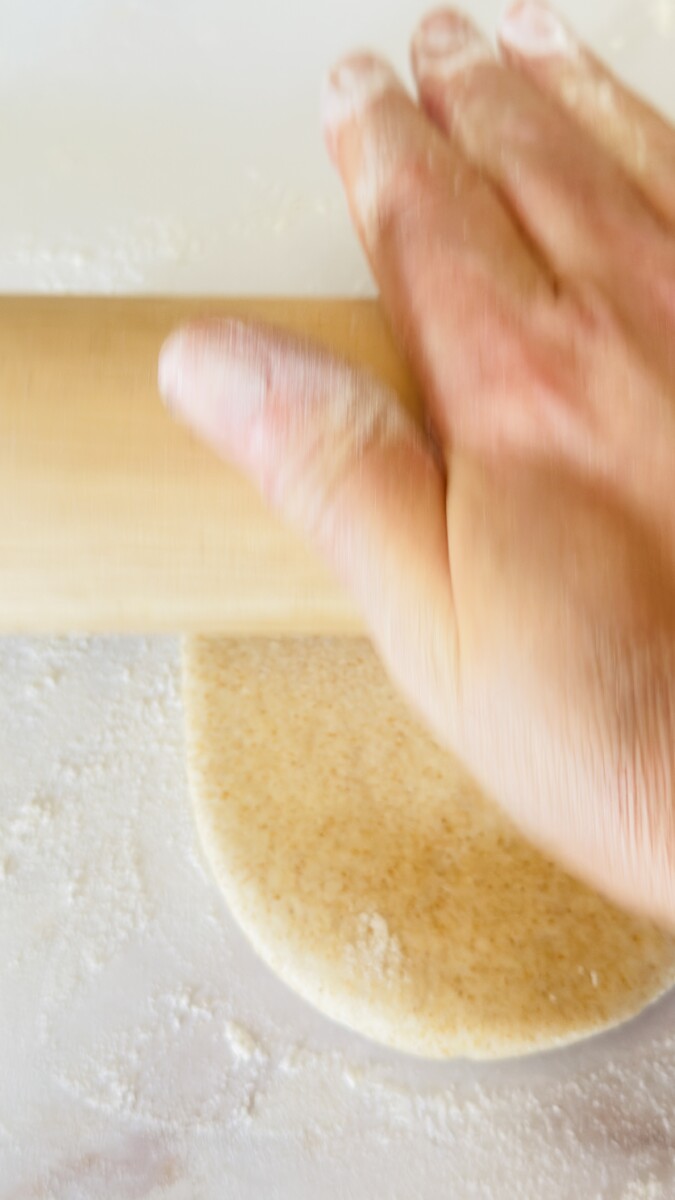
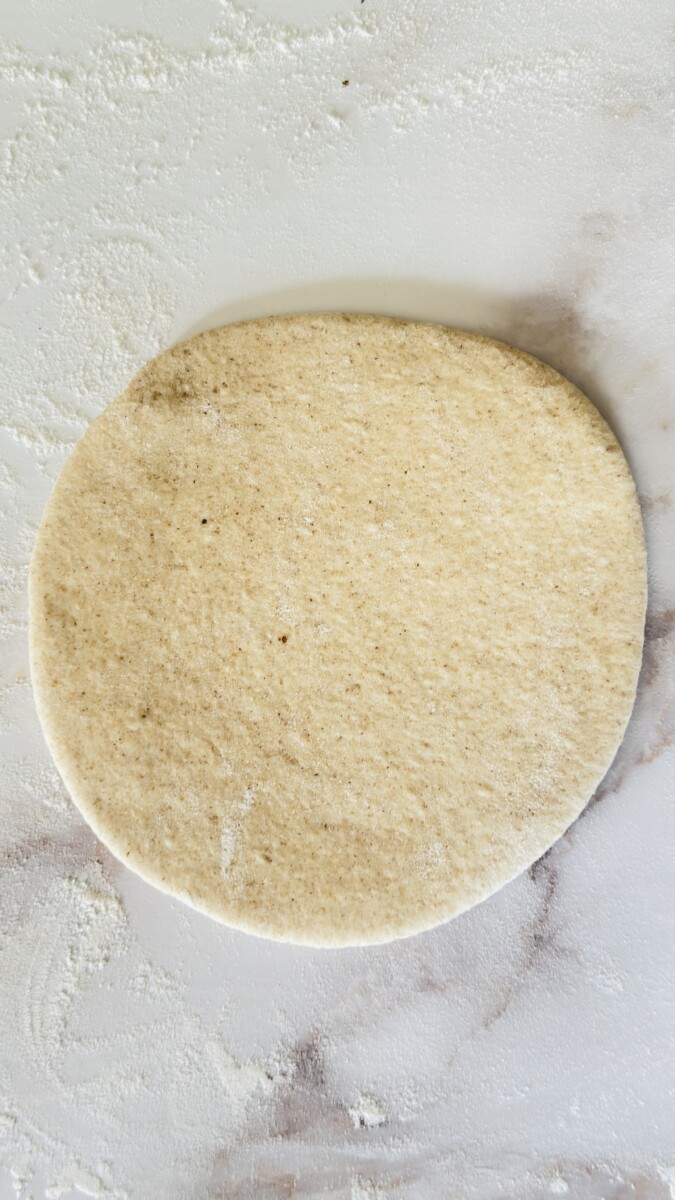
After the dough balls have rested, lightly flour your surface and roll each ball into a circle about 6 inches wide and roughly ¼ inch thick. Try to keep the thickness even and avoid rolling the center too thin, which helps with even puffing. Place the rolled dough on a floured surface or parchment paper in a single layer as you go.
Once all the rounds are rolled, cover them lightly with a kitchen towel and let them rest again for 15 to 20 minutes. This final rest allows the gluten to relax and improves puffing during cooking. While the dough is resting, preheat your oven to 500°F (260°C). If using the oven method, place a cast-iron pan, pizza stone, or inverted baking sheet inside the oven to heat along with it. If you're using the stovetop method, place a cast-iron skillet over medium heat and let it get hot while the dough rests.
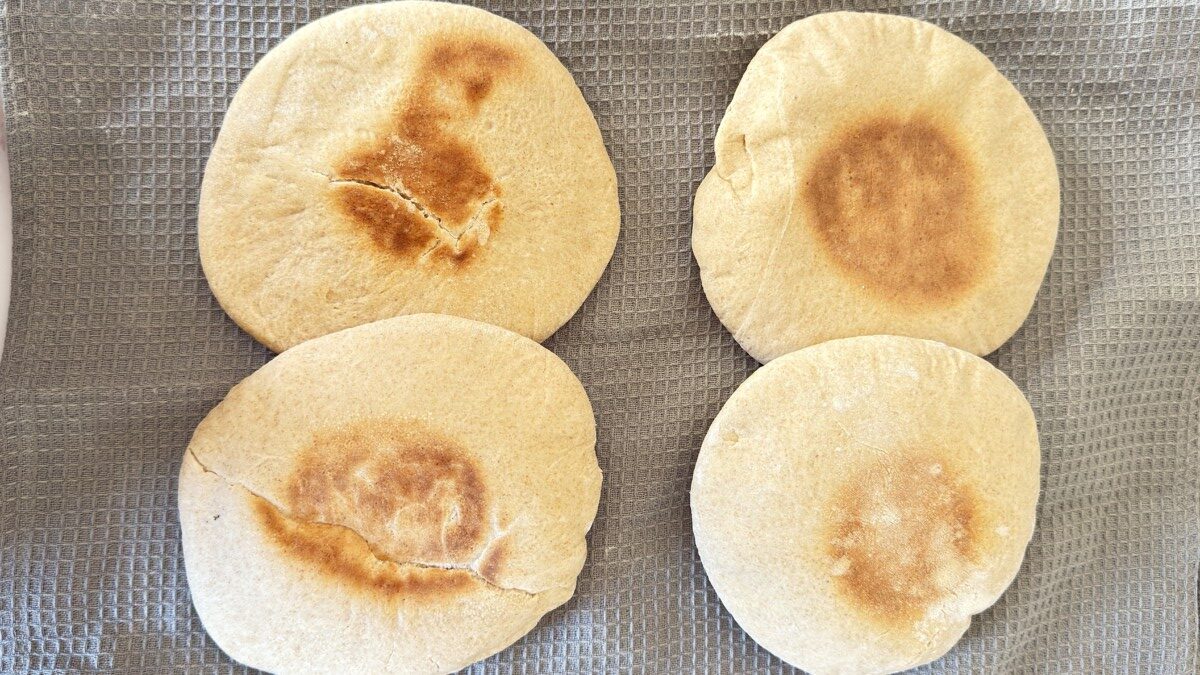
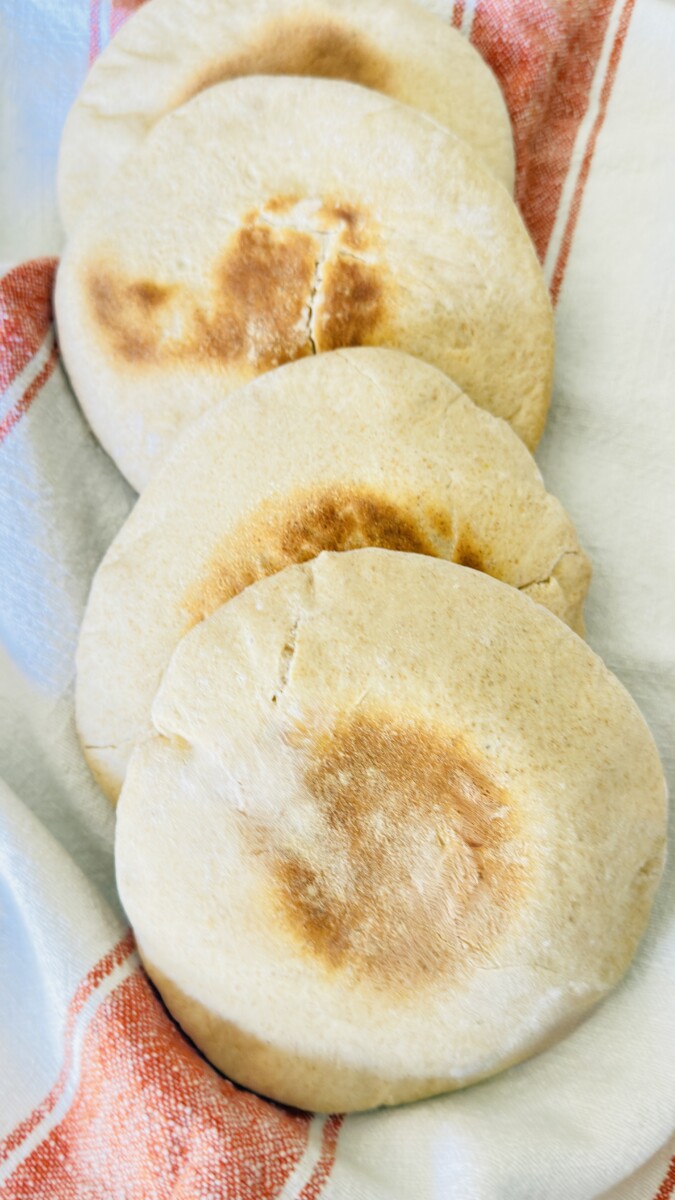
Carefully transfer one or two rounds of dough at a time onto the preheated cast iron pan, pizza stone, or baking sheet in the oven. Bake for 2 to 4 minutes, or until the pita puffs up into a balloon and the surface is lightly golden. Remove from the oven and place the baked pitas on a clean kitchen towel to cool slightly. Cover with the towel to keep them soft. Repeat with the remaining rounds.
Place one round of dough into the hot cast iron skillet. Cook for 30 to 60 seconds, or until bubbles begin to form. Flip the pita and cook for another 1 to 2 minutes, gently pressing with a spatula to encourage puffing. Flip once more if needed, until golden brown on both sides. Transfer to a towel-lined plate and keep covered. Repeat with the remaining dough.
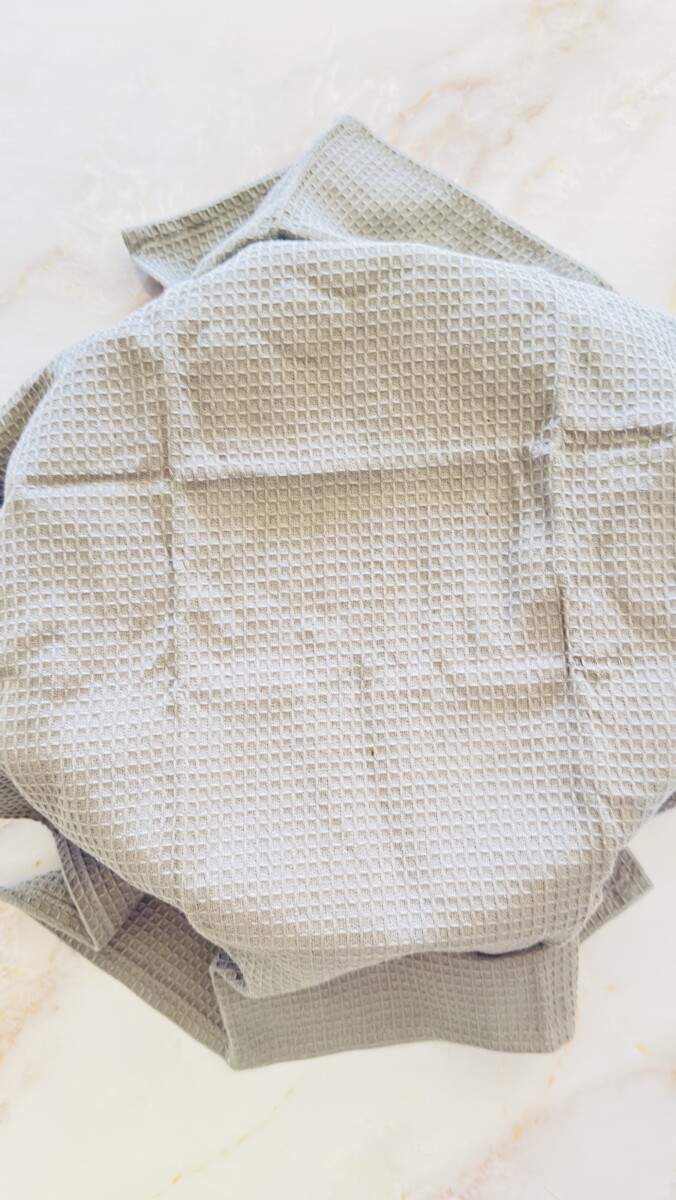
As you cook the pitas, stack them in a clean kitchen towel to keep them warm and soft. If not serving right away, allow the pitas to cool completely to room temperature before storing. Once cooled, place them in an airtight bag or container. They’ll stay fresh at room temperature for up to 2 days or can be frozen for longer storage.
Recipe Tips & Suggestions
Storage & Freezing Tips for Homemade Pita Bread
In the Refrigerator:
Freezing:
Reheating from Frozen:
Nutrition Information
The information shown is an estimate provided by an online nutrition calculator. It should should not be considered a substitute for a professional nutritionist's advice.
See our full nutrition disclosure here.
Subscribe to my newsletter for authentic Mediterranean recipes, essential cooking tips, and the latest food news, all delivered directly to your inbox for FREE. Let’s create memorable dishes together!


I’d love to hear how this recipe turns out for you! Did your pitas puff up with those beautiful pockets? Leave a comment below and share your tips—I can’t wait to see what you think.