As someone who loves to entertain, I’m always on the hunt for easy, crowd-pleasing appetizers. Spanakopita is my go-to: flaky, flavorful, and always a hit. I keep a batch in the freezer, ready to bake whenever guests drop by.

Type of Cuisine:
Mediterranean

Prep Time: 30 minutes.
Cook Time: 30 minutes

How Many Servings?
24 servings
Easy Spanakopita Recipe – Greek Spinach Pie that’s crisp, savory, and packed with Mediterranean flavor. This simple dish combines spinach, feta, and flaky phyllo dough for a crowd-pleasing appetizer or light meal.
Inspired by Greek tradition and Middle Eastern flavors like tangy Fatayer Sabanekh, this version adds a bright touch of lemon and sumac. Pair it with beet hummus, baba ganoush, or Greek salad for a delicious Mediterranean spread.
Ingredients for your Easy Spanakopita Recipe
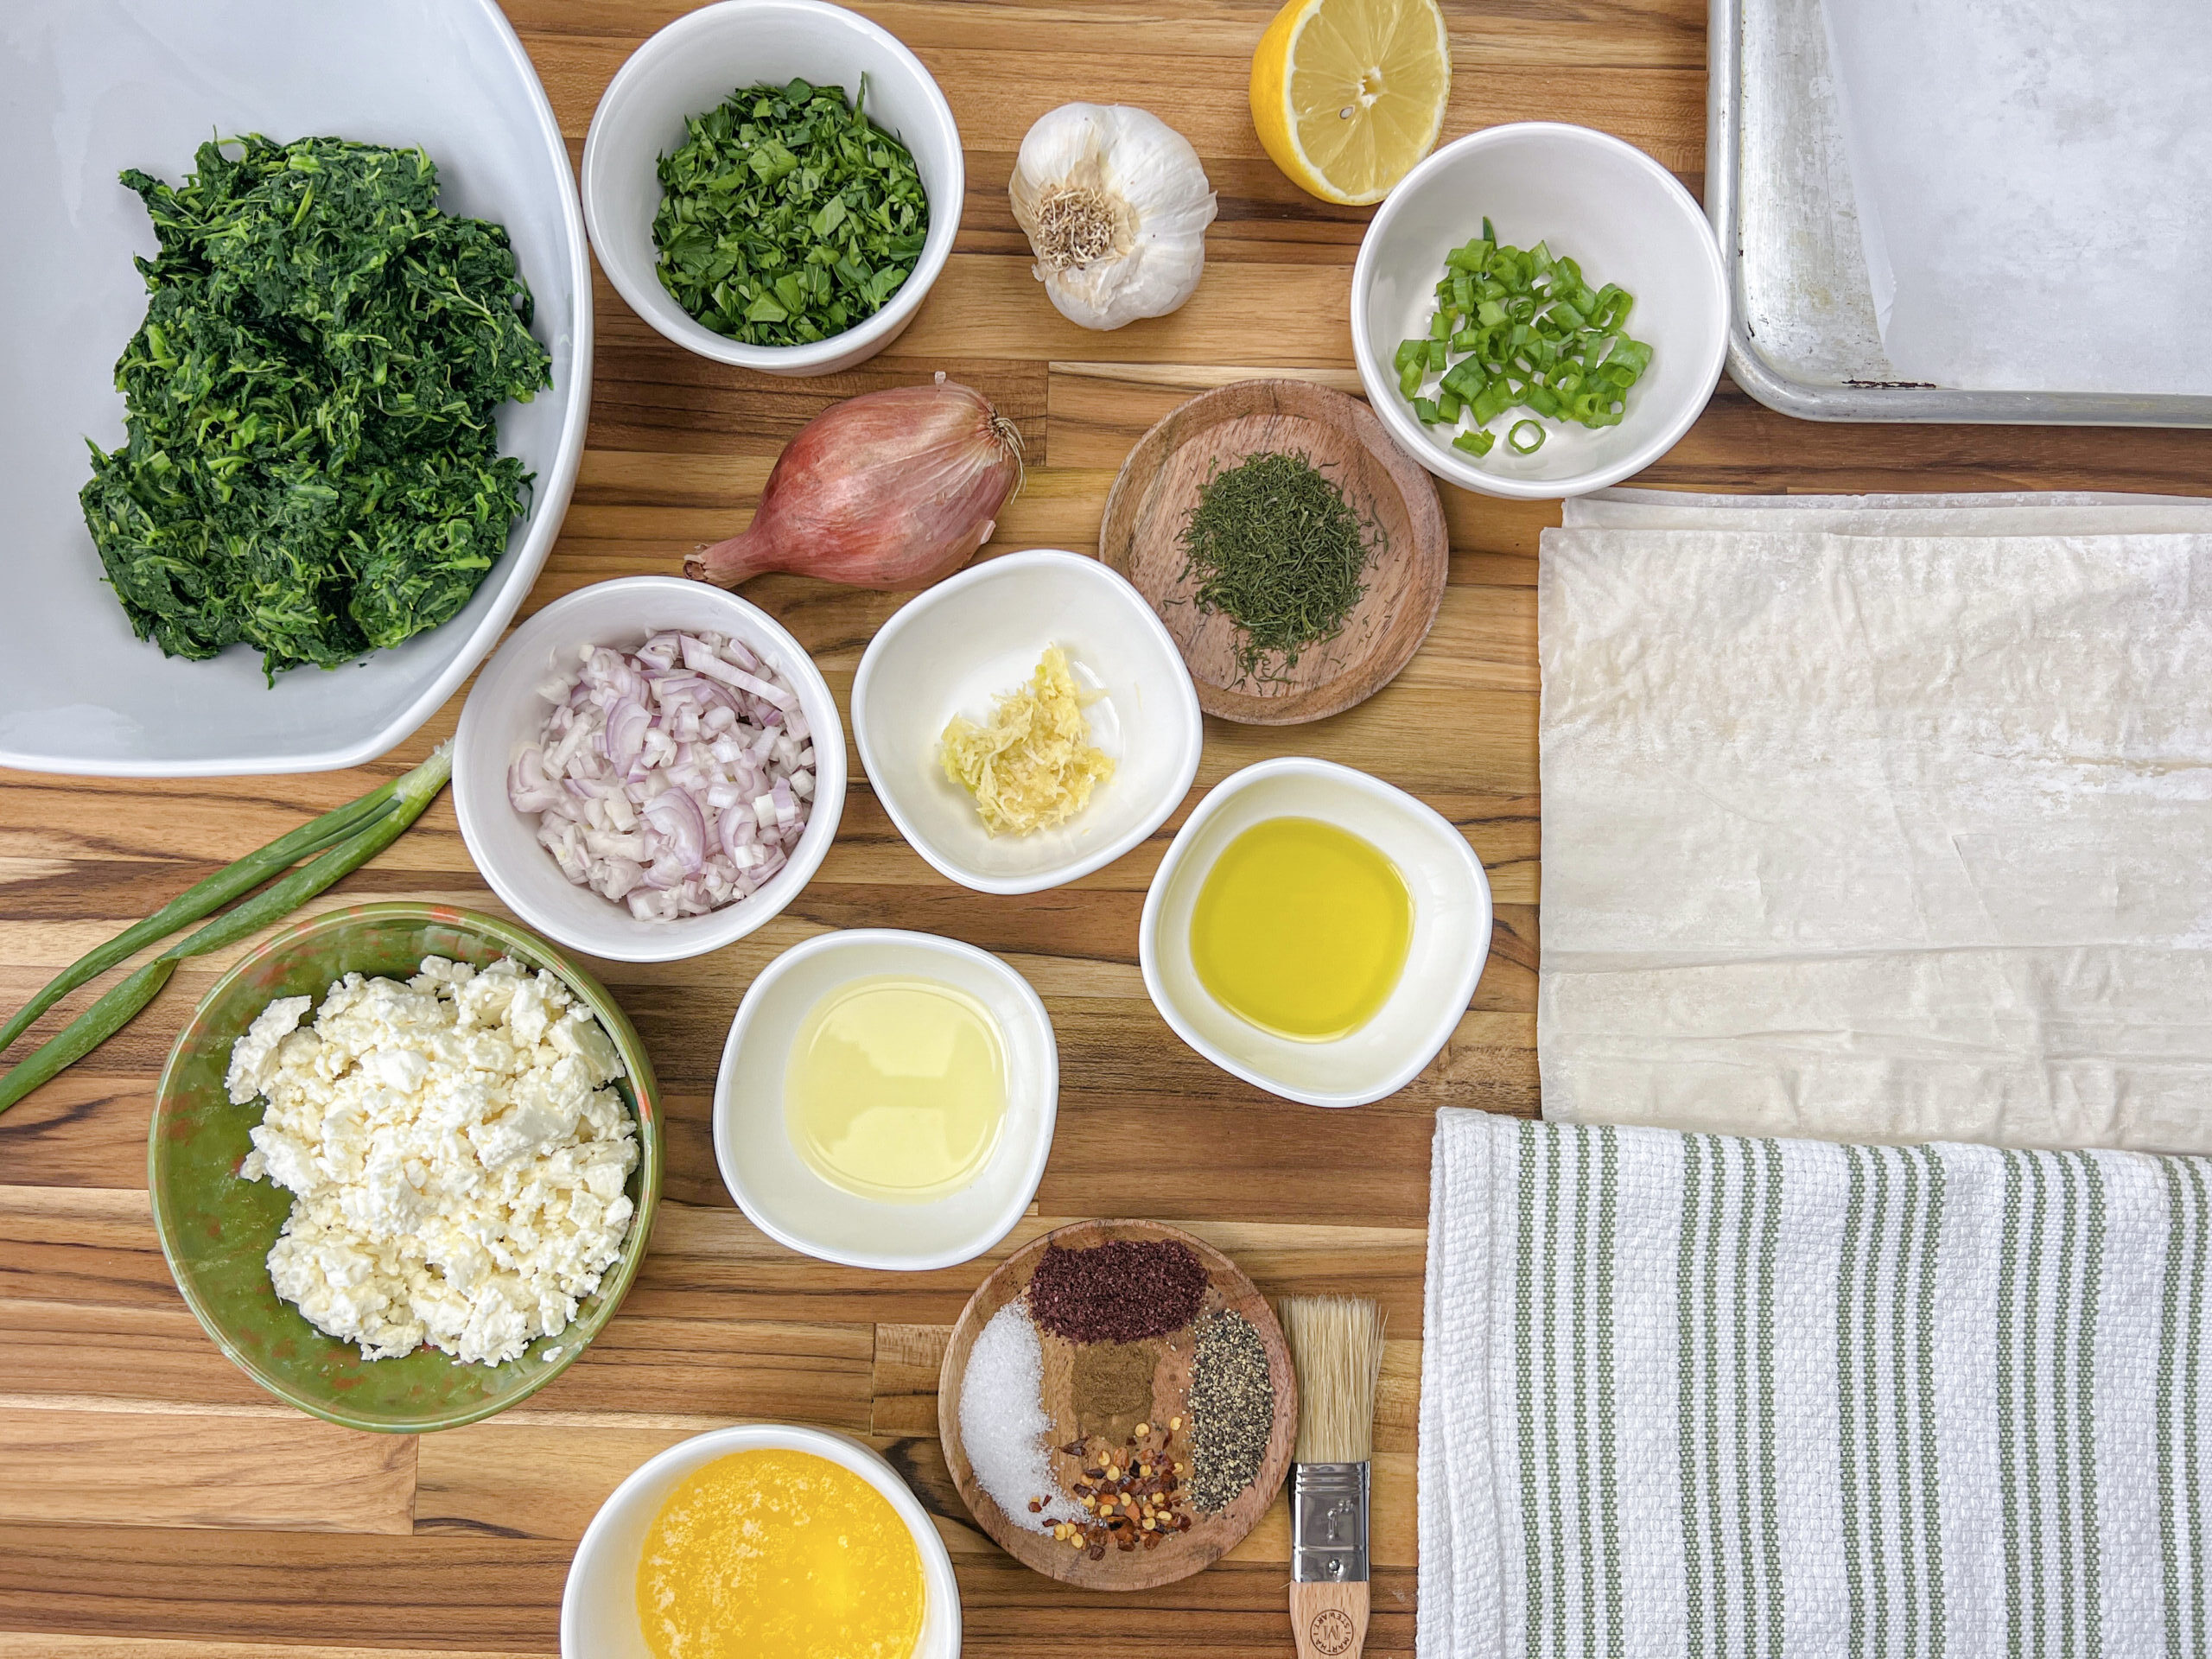
Everything you need for this Easy Spanakopita Recipe: spinach, feta, fresh herbs, and flaky phyllo dough.
- Phyllo dough (frozen: thaw in the fridge overnight before using for best results.
- Frozen Chopped Spinach: Thawed, drained, and patted dry, the spinach contributes a vibrant green color and earthy flavor.
- Shallots: Chopped shallots bring a mild oniony aroma and sweetness to the dish.
- Garlic Cloves: Minced garlic cloves add a pungent, savory note.
- Fresh Parsley: Chopped fresh parsley lends a fresh, herbaceous element to the spanakopita.
- Green Onions: The white and green parts of chopped green onions provide a mild flavor and a touch of color contrast.
- Feta Cheese: Creamy and tangy, feta cheese is an essential ingredient that enhances the overall flavor profile.
- Dry Dill: Dry dill infuses the filling with a gentle herbal flavor.
- Lemon Zest and Juice: Lemon zest adds a bright, citrusy aroma and flavor, while lemon juice provides a zesty, tangy kick.
- Spices: A blend of spices includes salt, black pepper, sumac, nutmeg, and chili flakes. These spices together add depth, warmth, and a hint of spiciness to the filling.
Fresh vs. Frozen Spinach
Preparing the spinach properly is essential before diving into your Simple Spanakopita Recipe. We’ve covered you with easy steps, whether you’re using frozen or fresh.
- Using Frozen Chopped Spinach: Frozen spinach is a convenient choice. Here’s how to get it ready: Thaw it as per package instructions, drain off excess water, and pat it dry with paper towels.
- Working with Fresh Spinach: Opting for fresh greens? Follow these simple steps: Wash the spinach thoroughly, sprinkle a pinch of salt over the leaves, give them a gentle massage, rinse under cold water, and squeeze out excess liquid. This ensures your Spanakopita filling stays delightfully dry and the dish turns out just right.
Preparing Phyllo Dough for Spanakopita
Handling it carefully is essential when working with phyllo dough for your Spanakopita. Follow these steps to ensure your dough remains perfectly pliable and doesn’t dry out:
- Thawing the Dough: Start by taking the phyllo dough out of the freezer and allowing it to thaw. You can do this by placing it in the refrigerator overnight or on the counter for a few hours.
- Keep It Covered: Phyllo dough dries out quickly, so it’s crucial to keep it covered. Use a damp towel or plastic wrap to cover the dough while you work.
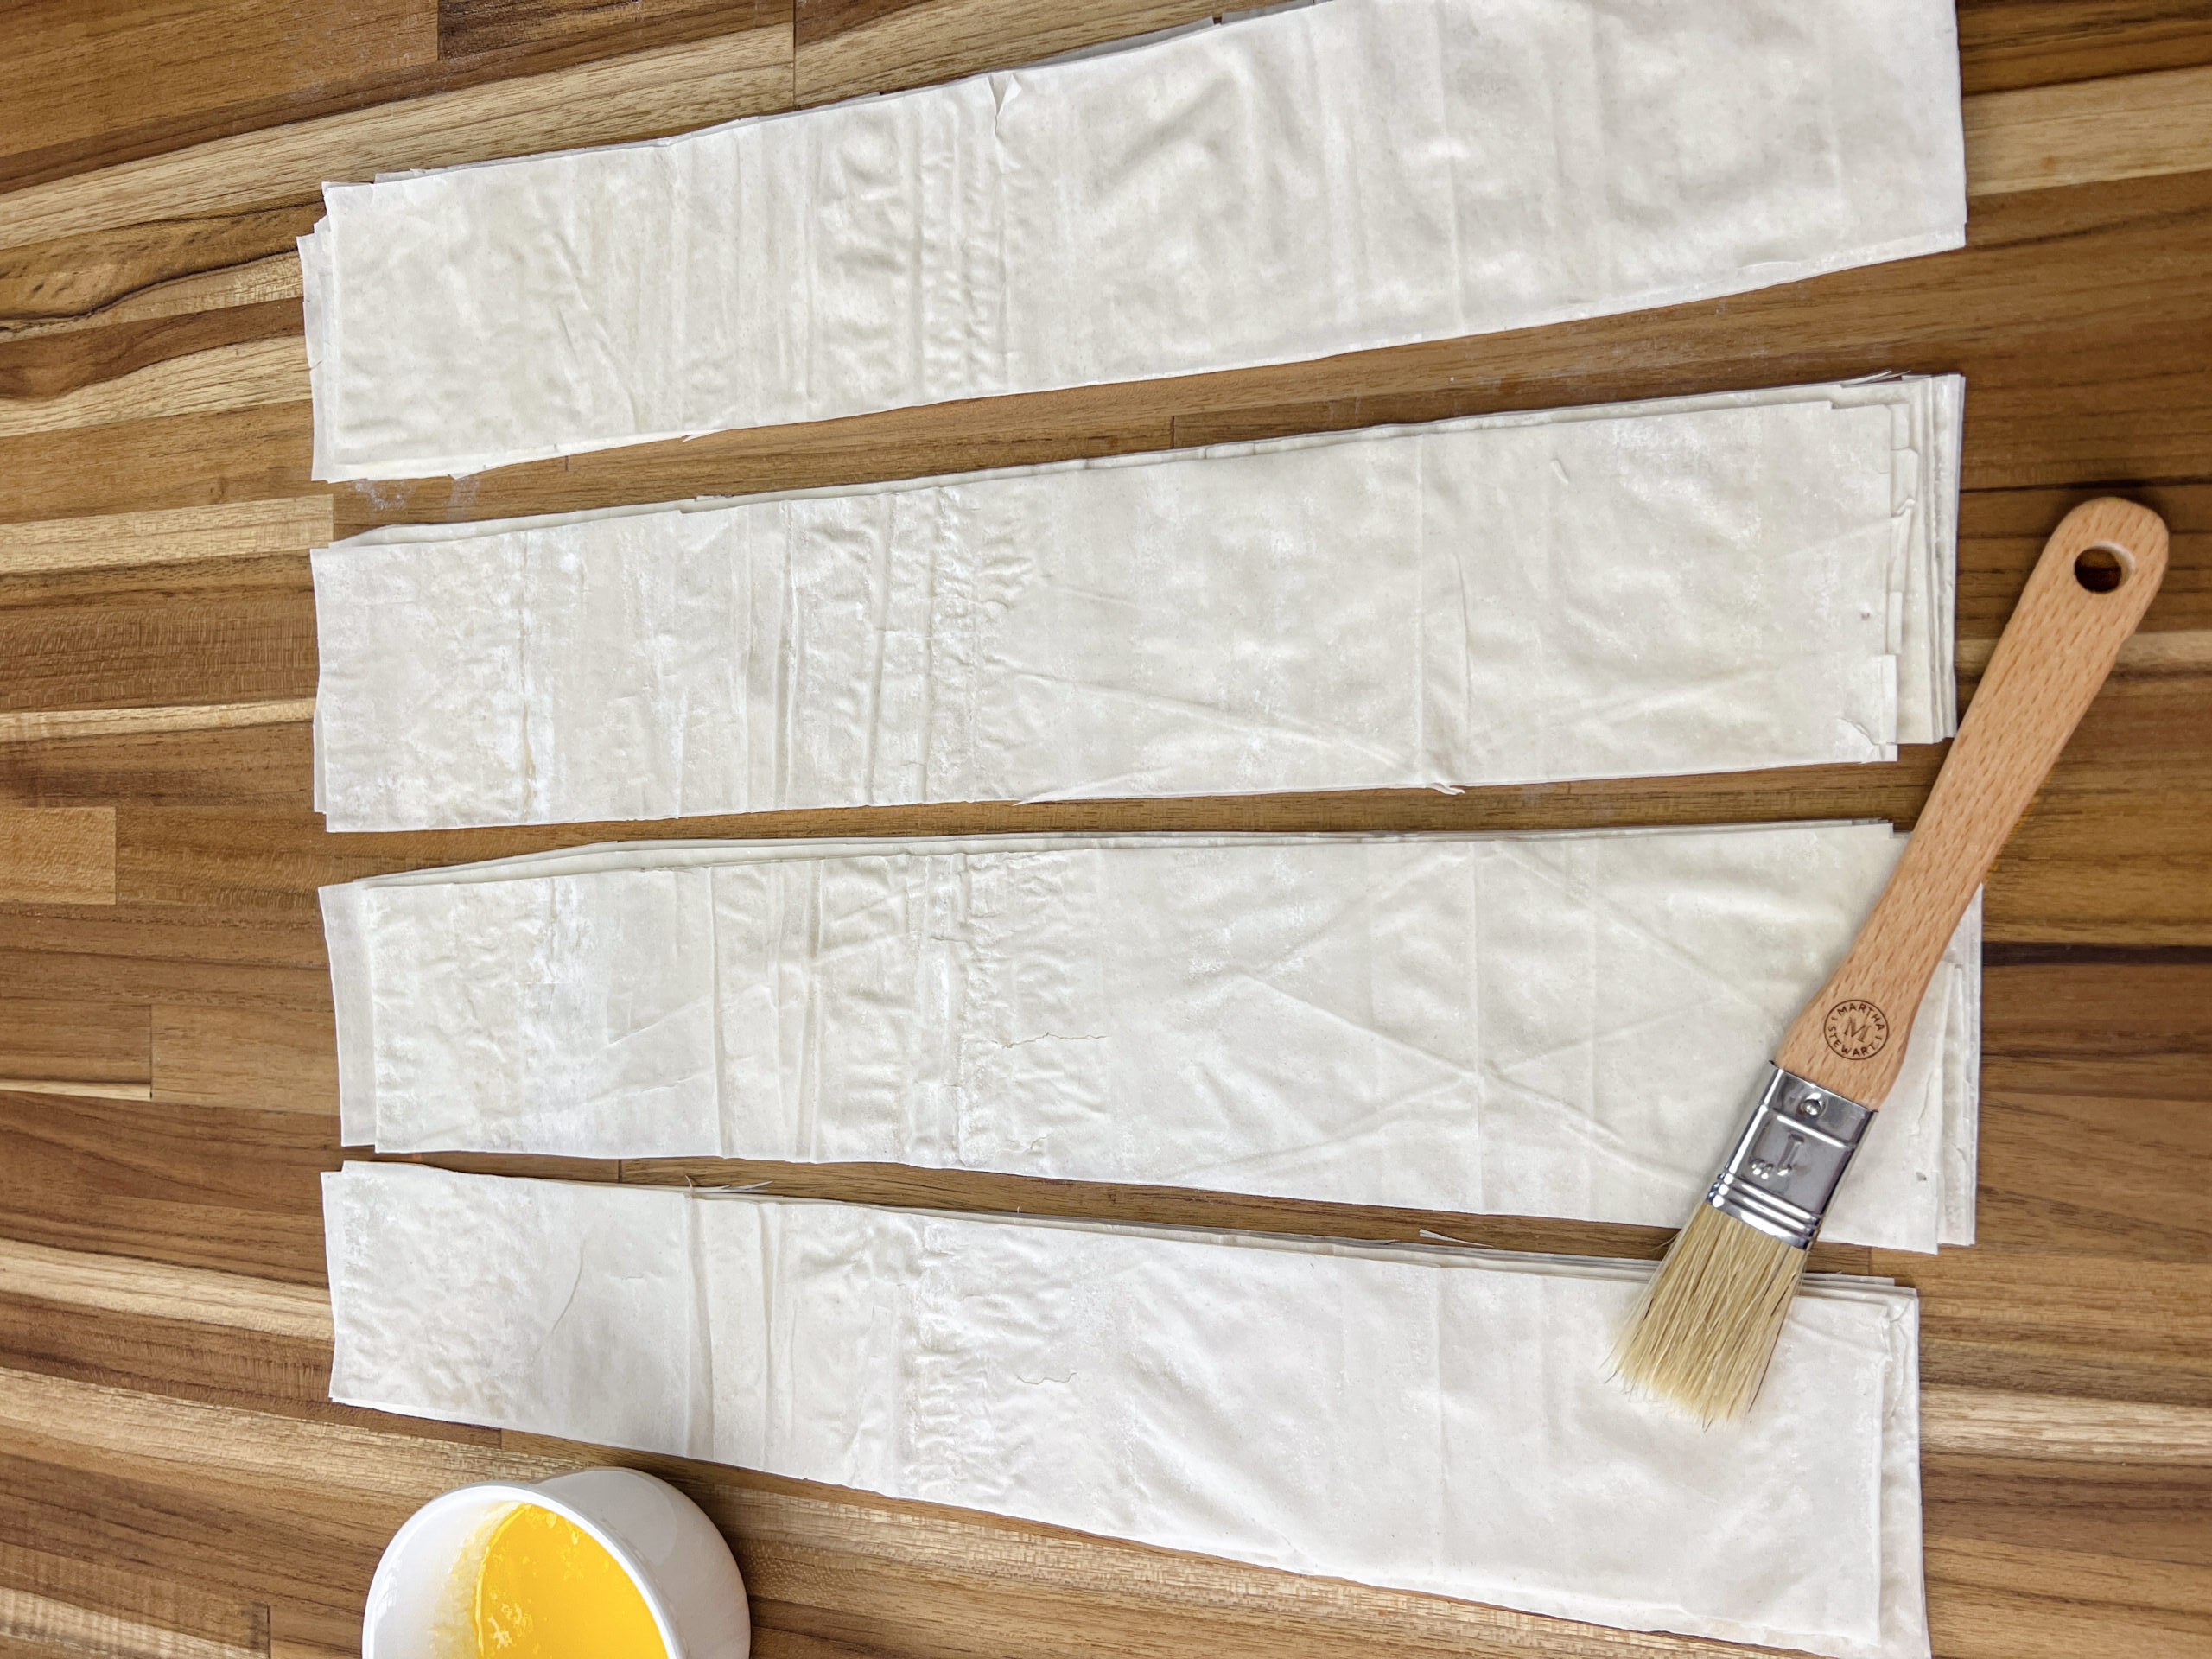
- Working in Pairs: To assemble your Spanakopita, simultaneously work with two sheets of phyllo dough. This helps create a sturdy base for your savory pastries.
- Cutting the Dough: Cut the phyllo dough into 3-inch-wide strips using a ruler or a sharp knife to create individual Spanakopita. Each set of two sheets should yield four small Spanakopita.
- Brushing with Butter: Before adding the spinach mixture, brush each layer of phyllo dough with melted butter. This step adds flavor and helps create a delightful, crispy texture.
- Folding with Precision: Fold the corner of the dough over the spinach to form a triangle shape. Continue folding until you reach the end of the strip, creating a neat and attractive pastry.
- Sealing with Egg Mixture: Brush both sides of the Spanakopita with an egg mixture to ensure they hold together during baking.
- Baking Perfection: Place your beautifully assembled Spanakopita evenly on a sheet pan lined with parchment paper, ready for the oven.
Variations of the Spanakopita recipe

Spanakopita is a versatile dish that allows for creative variations. If you want to change things up, consider experimenting with different types of cheese. While feta is the classic choice, you can try using ricotta, cottage, or goat cheese for a unique twist. For a vegan version, substitute dairy-free cheese or nutritional yeast. Additionally, you can vary the greens in the filling. While spinach is traditional, kale, Swiss chard, or collard greens can add a different dimension of flavor and texture. Don’t be afraid to play with spices, too; a pinch of nutmeg, dill, or red pepper flakes can elevate the spanakopita and make it unique.
Troubleshooting Your Spanakopita
Why is my spanakopita soggy on the bottom?
- Possible Issue: Soggy bottoms can result from excess moisture in the spinach filling.
- Solution: Ensure you’ve thoroughly drained the spinach to remove excess water. Using fresh spinach can also help prevent sogginess.
How do you keep Spanakopita Crispy?
- Store leftovers in an airtight container at room temperature for up to one day.
- For longer storage, refrigerate, but know it may soften.
- To bring back the crunch, reheat in the oven at 350°F (175°C) for 10–15 minutes until the phyllo is crisp again. Avoid the microwave—it makes the pastry soggy.
Can I Make Spanakopita in Advance?
- Possible Issue: Making spanakopita ahead can affect its freshness.
- Solution: You can assemble spanakopita in advance and freeze it before baking. Bake from frozen for a convenient and fresh snack or appetizer.
How can I prevent the phyllo Spanakopita from sticking to the towel?
- Possible Issue: If you cover the assembled spanakopita with a towel, the top layer of phyllo might stick to it and tear when you remove the towel.
- Solution: Lightly coat the towel with cooking spray or butter before covering the spanakopita to prevent sticking.
Should I defrost Spanakopita before baking?
- Spanakopita is typically defrosted before baking, but you can bake it directly from frozen. Remember that baking from frozen may require more time in the oven, but it can help prevent the bottom crust from becoming soggy.
Step-by-Step Instructions
Make the Filling

In a large mixing bowl, combine the spinach, cooled shallots and garlic, dried dill, chopped green onions, parsley, lemon zest, lemon juice, feta cheese, and all the spices. Mix well until everything is evenly combined.
Prepare and Portion the Phyllo Dough
For appetizer-sized spanakopita, use a ruler to cut the dough into 3-inch-wide strips. Since most phyllo sheets are 12 inches wide, each pair of sheets will yield four strips—and each strip becomes one spanakopita triangle.
This recipe makes approximately 24 mini spanakopita, perfect for snacking or serving as party bites.
Assemble the Spanakopita Triangles


Spoon a small amount of the spinach filling onto one corner of the strip, then fold the corner over diagonally to form a triangle. Continue folding, like a flag, until the strip is completely wrapped. Fold the end piece of the dough underneath and brush both sides with the egg mixture.
Repeat with the remaining dough and filling.
Prepare for Baking

Bake and Serve

This spanakopita recipe is a delicious Greek appetizer made with spinach, feta cheese, and phyllo dough. It’s a perfect addition to any party or gathering.
Type of Cuisine:
Mediterranean
Prep Time: 30 minutes.
Cook Time: 30 minutes
How Many Servings?
24 servings
Ingredients:
| 16 oz frozen chopped spinach thaw, drain, and pat dry | |
| 2 medium-size shallots (chopped) | |
| 5 garlic cloves (minced) | |
| ½ cup fresh parsley chopped | |
| ½ cup chopped green onions white and green parts | |
| 1 ½ cup feta cheese | |
| 2 teaspoons dry dill | |
| Zest of 1 lemon and its juice | |
| 12 sheets phyllo dough thawed according to package instructions | |
| 7 tbsp melted unsalted butter | |
| 1 egg whisked | |
| 1 tsp salt | |
| 1 tsp black pepper | |
| 1 tbsp sumac | |
| 1 tsp nutmeg | |
| 1 tsp chili flakes | |
| 2 tablespoons olive oil |
Preparation
In a medium skillet over medium-high heat, warm the olive oil. Add the chopped shallots and garlic, and sauté for about 3-4 minutes until fragrant and softened. Remove from the heat and let cool to room temperature. In a large mixing bowl, combine the spinach, cooled shallots and garlic, dried dill, chopped green onions, parsley, lemon zest, lemon juice, feta cheese, and all the spices. Mix well until everything is evenly combined.
Work with two sheets of phyllo dough at a time, keeping the rest covered with a clean kitchen towel to prevent drying out. For appetizer-sized spanakopita, use a ruler to cut the dough into 3-inch-wide strips. Since most phyllo sheets are 12 inches wide, each pair of sheets will yield four strips—and each strip becomes one spanakopita triangle. This recipe makes approximately 24 mini spanakopita, perfect for snacking or serving as party bites.
Using a pastry brush, lightly coat one strip of phyllo dough with melted butter. Place a second strip directly on top and brush it with more butter. Spoon a small amount of the spinach filling onto one corner of the strip, then fold the corner over diagonally to form a triangle. Continue folding, like a flag, until the strip is completely wrapped. Fold the end piece of the dough underneath and brush both sides with the egg mixture. Repeat with the remaining dough and filling.
Line a sheet pan with parchment paper, then place the spanakopita triangles evenly spaced on the pan. Make sure they aren’t touching to allow for even baking and a crisp finish.
Preheat the oven to 350°F (175°C) and bake the spanakopita for about 30–35 minutes, or until golden brown and crisp.
Rana’s Notes!
Nutrition Information
The information shown is an estimate provided by an online nutrition calculator. It should should not be considered a substitute for a professional nutritionist's advice.
See our full nutrition disclosure here.
Subscribe to my newsletter for authentic Mediterranean recipes, essential cooking tips, and the latest food news, all delivered directly to your inbox for FREE. Let’s create memorable dishes together!

-
 Tori
ToriSomewhat labor intensive but delicious – make sure to read the package instructions on your phyllo dough for thawing instructions before starting the recipe! We doubled this recipe in order to make ahead and freeze for a new mother-to-be to take out and pop into the oven for a hassle free snack or meal.
Of course we tried a few: In our toaster oven at 350 they browned up and were *hot* within 20 minutes.
I definitely would cook the shallots and garlic a little longer next time I make these (maybe get them a little jammy), as the flavor was a little sharper than I would have hoped and resulted in some acid-indigestion.
Overall, delicious and would make again. Thank you for sharing this lovely recipe.
-
Rana Madanat
Hi Tori, Thank you so much for your detailed feedback—I’m thrilled you enjoyed the recipe and love that you made a double batch to freeze for a new mom. What a thoughtful gift!
Great tip about the phyllo thawing instructions—it’s definitely one of those small details that makes a big difference. I also really appreciate your note about the shallots and garlic—sautéing them until jammy sounds like a delicious idea to mellow out the flavor even more. I may just add that suggestion to the recipe notes!
So glad you tried a few right away, too—20 minutes in the toaster oven sounds just right. Thanks again for giving the recipe a try and for taking the time to share your experience! 💛
-

Have you made this simple yet delicious spanakopita? I love to hear from you; please feel free to leave me a comment below.