Shatta was always a staple in my mom’s kitchen—fiery, vibrant, and full of flavor. Just a spoonful would bring any dish to life, and now I always keep a jar in my fridge too.

Type of Cuisine:
Middle Eastern

Prep Time: 20 Minutes.
Cook Time: 0 Minutes

How Many Servings?
6 oz Serving
This shatta recipe—whether green or red—is a spicy Middle Eastern staple that’s been part of my family’s table for generations. My own love for shatta started when I began growing six types of chilies in my garden: jalapeño, serrano, Anaheim, tabasco, banana peppers, and Fresno. These homegrown chilies have become the heart of my kitchen, especially in this zesty hot sauce.
Growing up, we always had a jar of homemade shatta on the table, right next to the olive oil. My mom made sandwiches stuffed with pita, fresh cilantro, and a generous spoonful of shatta. I still love adding it to falafel wraps, foul, or a bowl of creamy hummus for that bold, fiery kick.
Whether you go green or red, this shatta recipe is all about bold flavor, simple ingredients, and tradition—just chilies, garlic, olive oil, and vinegar. Let me show you how to make it your own!
What Is Shatta Sauce?
Shatta is a bold, spicy Middle Eastern chili sauce made with chopped chilies, garlic, vinegar, and olive oil. It comes in two vibrant versions—green (milder) and red (spicier). Whether spooned over hummus or tucked into a falafel sandwich, this simple sauce adds a flavorful kick to any dish.
Choosing the Right Peppers
Making your own Shatta means you can pick the peppers that match your spice level. For a mild green Shatta, go with jalapeños. Want more heat? Serranos are great. For red Shatta, try Fresno or Tabasco peppers—they bring vibrant color and bold flavor. Your choice of chili really shapes the final taste, so mix and match to suit your heat tolerance.
A Quick Note on Safety
Chili peppers can be intense! Wear gloves while prepping, and avoid touching your face. The oils can irritate your skin and eyes. A little caution goes a long way for a smooth (and safe) cooking experience.
Tips for the Best Green or Red Shatta
- Choose One Color for Vibrancy: Stick to either red or green chilies to keep your shatta bright and appealing. Mixing both often turns the sauce brown, which isn’t as appetizing.
- Control the Heat: The real heat lives in the white pith and seeds of the chilies. For a milder version, remove them. For extra kick, leave them in—or add chili flakes for a smoky layer of flavor.’
- Let It Ferment (If You Can Wait!): While you can enjoy it right away, shatta gets better after a few days in the fridge. Letting it sit allows the garlic, vinegar, and chilies to mellow and blend beautifully.
How to Make Shatta Last Longer
Homemade shatta can last up to 3–4 weeks in the fridge when stored properly, but always trust your nose and taste. Over time, it may develop a slightly more fermented or vinegary aroma. That’s natural, especially if it wasn’t cooked, but if it smells off or has visible mold, it’s time to toss it.
Here are a few ways to keep it fresh longer:
- Add a Layer of Olive Oil: After transferring to a clean jar, pour a thin layer of olive oil on top. This creates a barrier from air and helps prevent spoilage.
- Freeze in Portions: Freeze your shatta in an ice cube tray, then pop out cubes and store in a freezer-safe bag. This gives you small, ready-to-go portions that keep for up to 6 months.
- Use Clean Utensils Only: Always use a clean, dry spoon to scoop out shatta—never double-dip! Even a few breadcrumbs or moisture can speed up spoilage
How to Use Green or Red Shatta?
A plate of creamy Lebanese Labneh paired with a vibrant red Shatta, accompanied by two small jars showcasing homemade green and red Shatta.
This vibrant paste brings a smoky and spicy kick to all sorts of dishes. Drizzle it over falafel sandwiches or hummus for a flavor explosion, or stir it into dips like baba ghanoush for an extra punch. Don’t stop there – add a dollop to grilled meats, roasted veggies, or even stews and soups for a touch of heat. For a fiery twist, whip up a salsa by combining shatta with olive oil, lemon juice, and cilantro. Remember, a little goes a long way with this potent condiment. Start small, adjust to your spice preference, and enjoy the magic of shatta!
Step-by-Step Instructions
Sanitize Your Jars

Prepare the Chilies
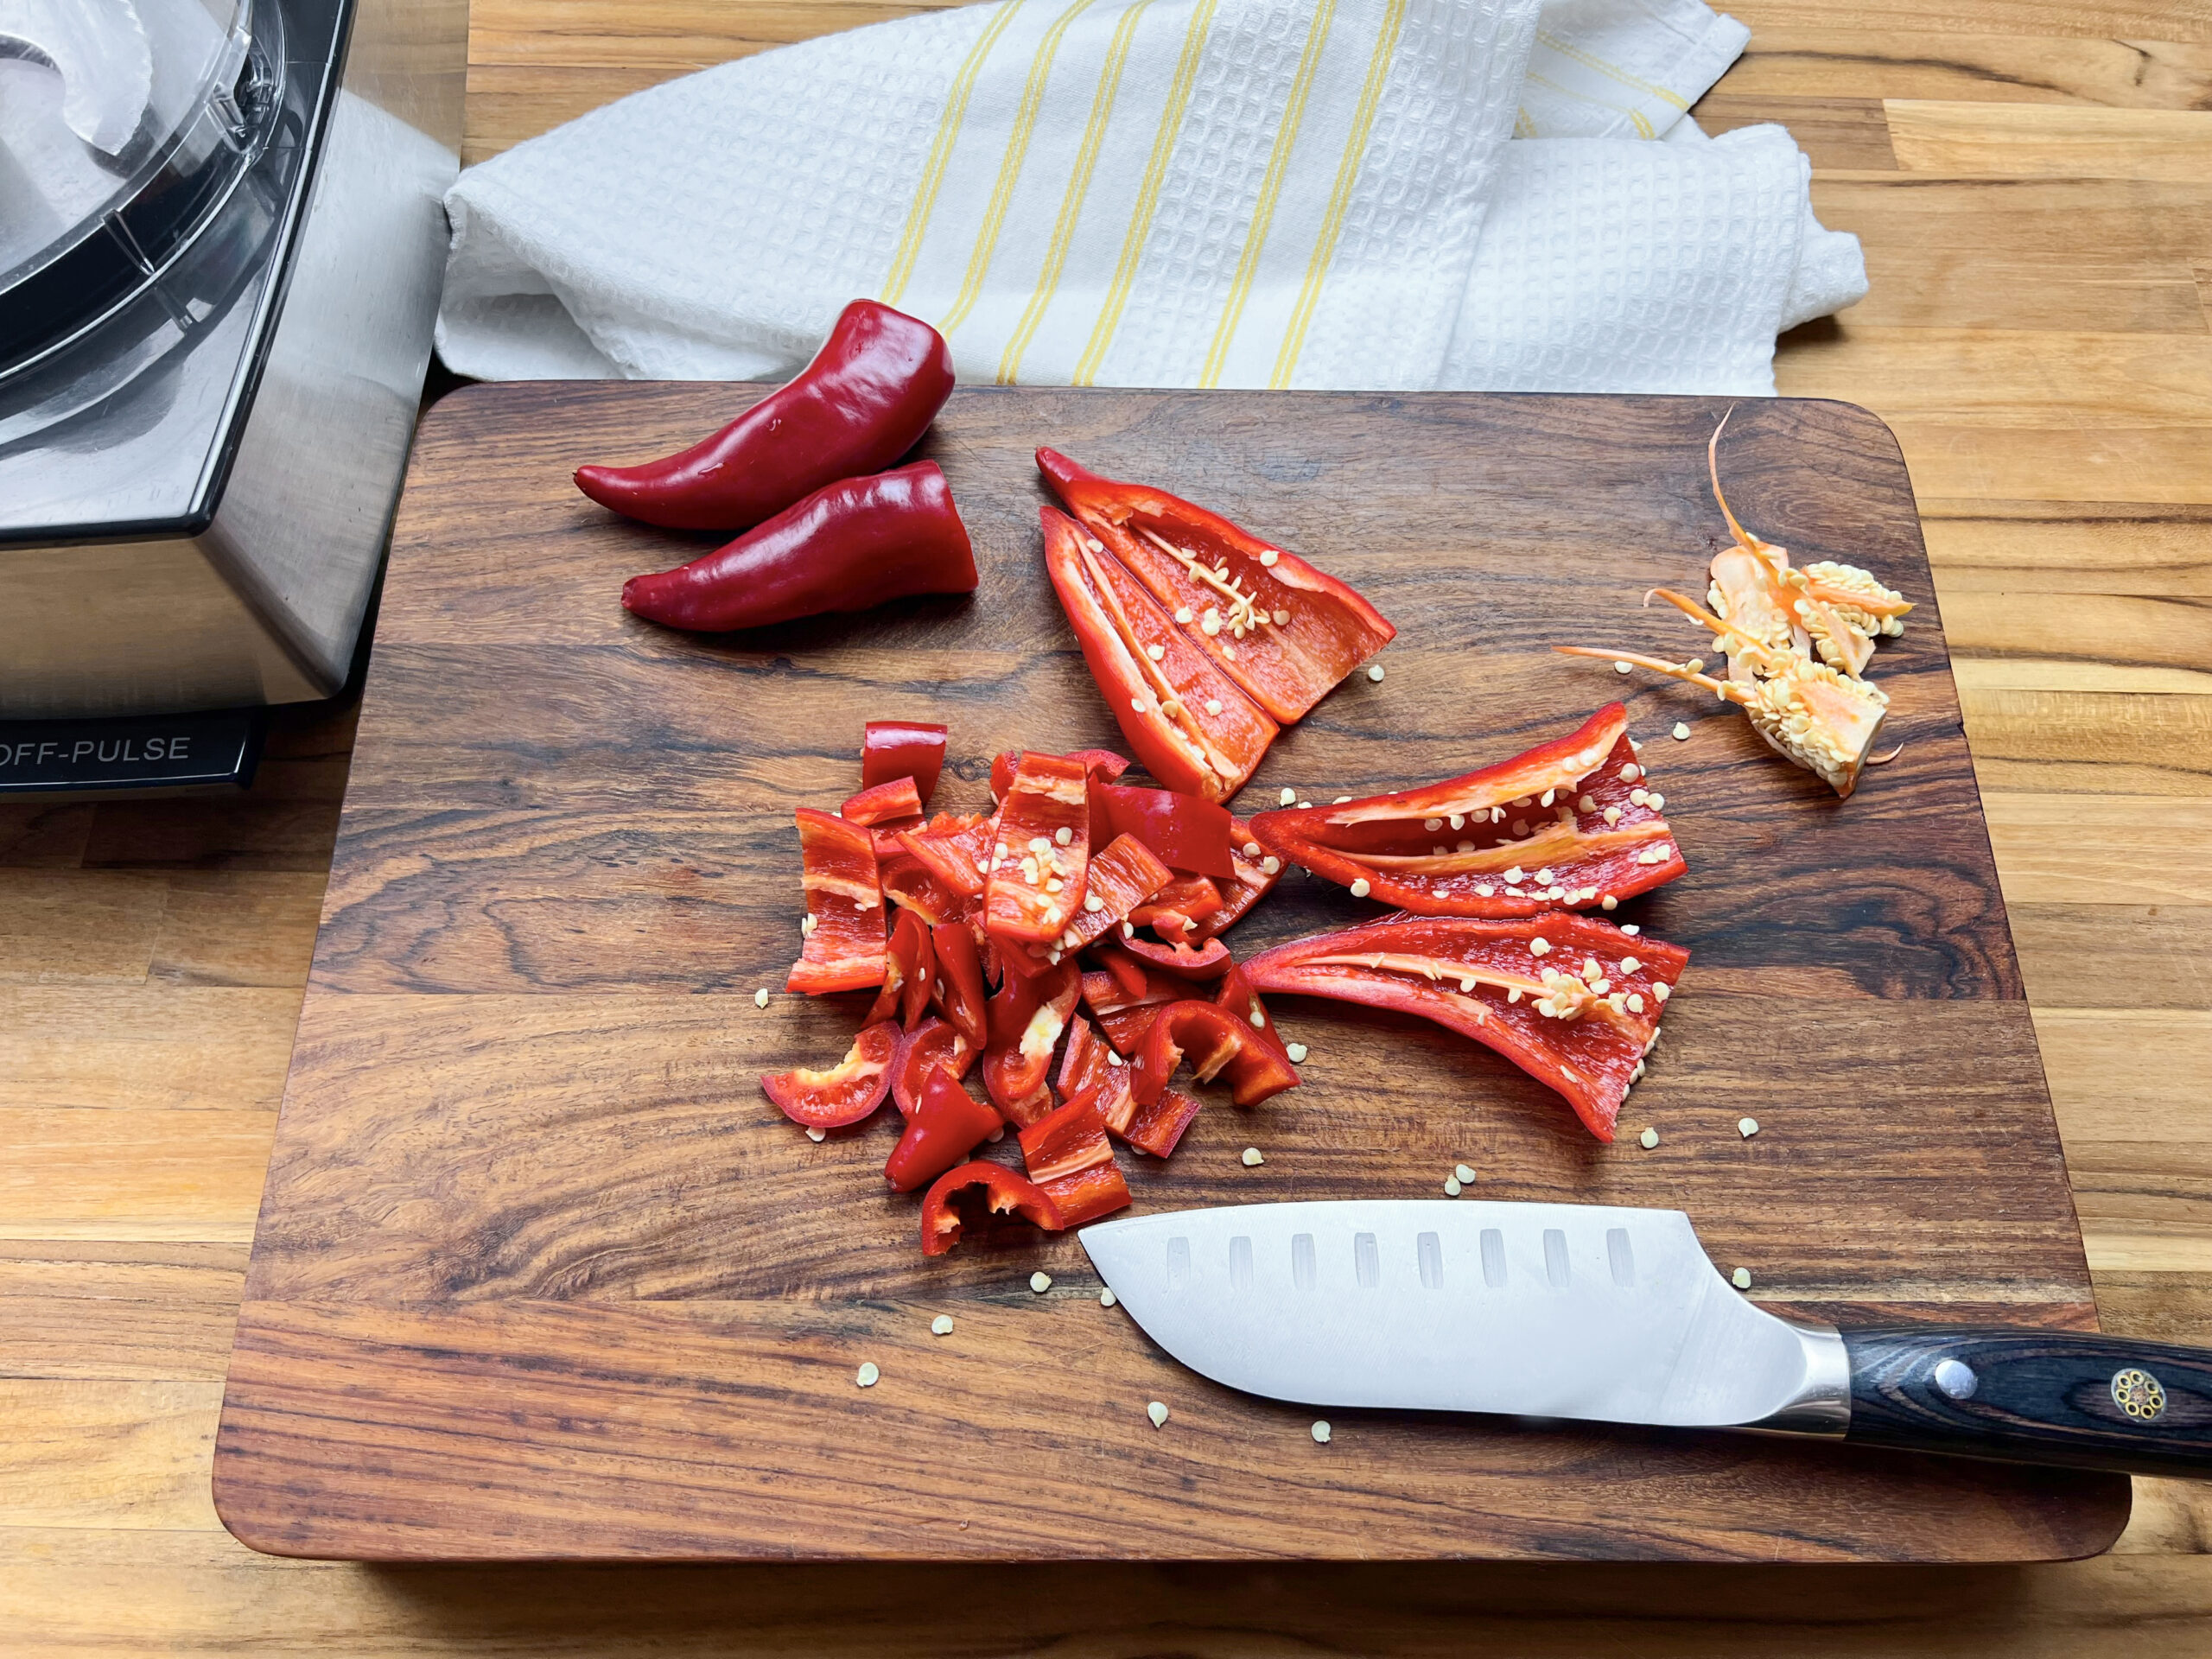
Chop the Chilies and Garlic

Salt and Strain

After 30 minutes, strain the chilies to remove the excess liquid. This keeps your shatta from turning watery later on.
Add the Flavor

Store and Enjoy
Ignite your taste buds with homemade Shatta. Crafted from ripe red chilies, zesty vinegar, and fragrant garlic, this bold condiment brings fiery heat and complexity to your favorite dishes.
Type of Cuisine:
Middle Eastern
Prep Time: 20 Minutes.
Cook Time: 0 Minutes
How Many Servings?
6 oz Serving
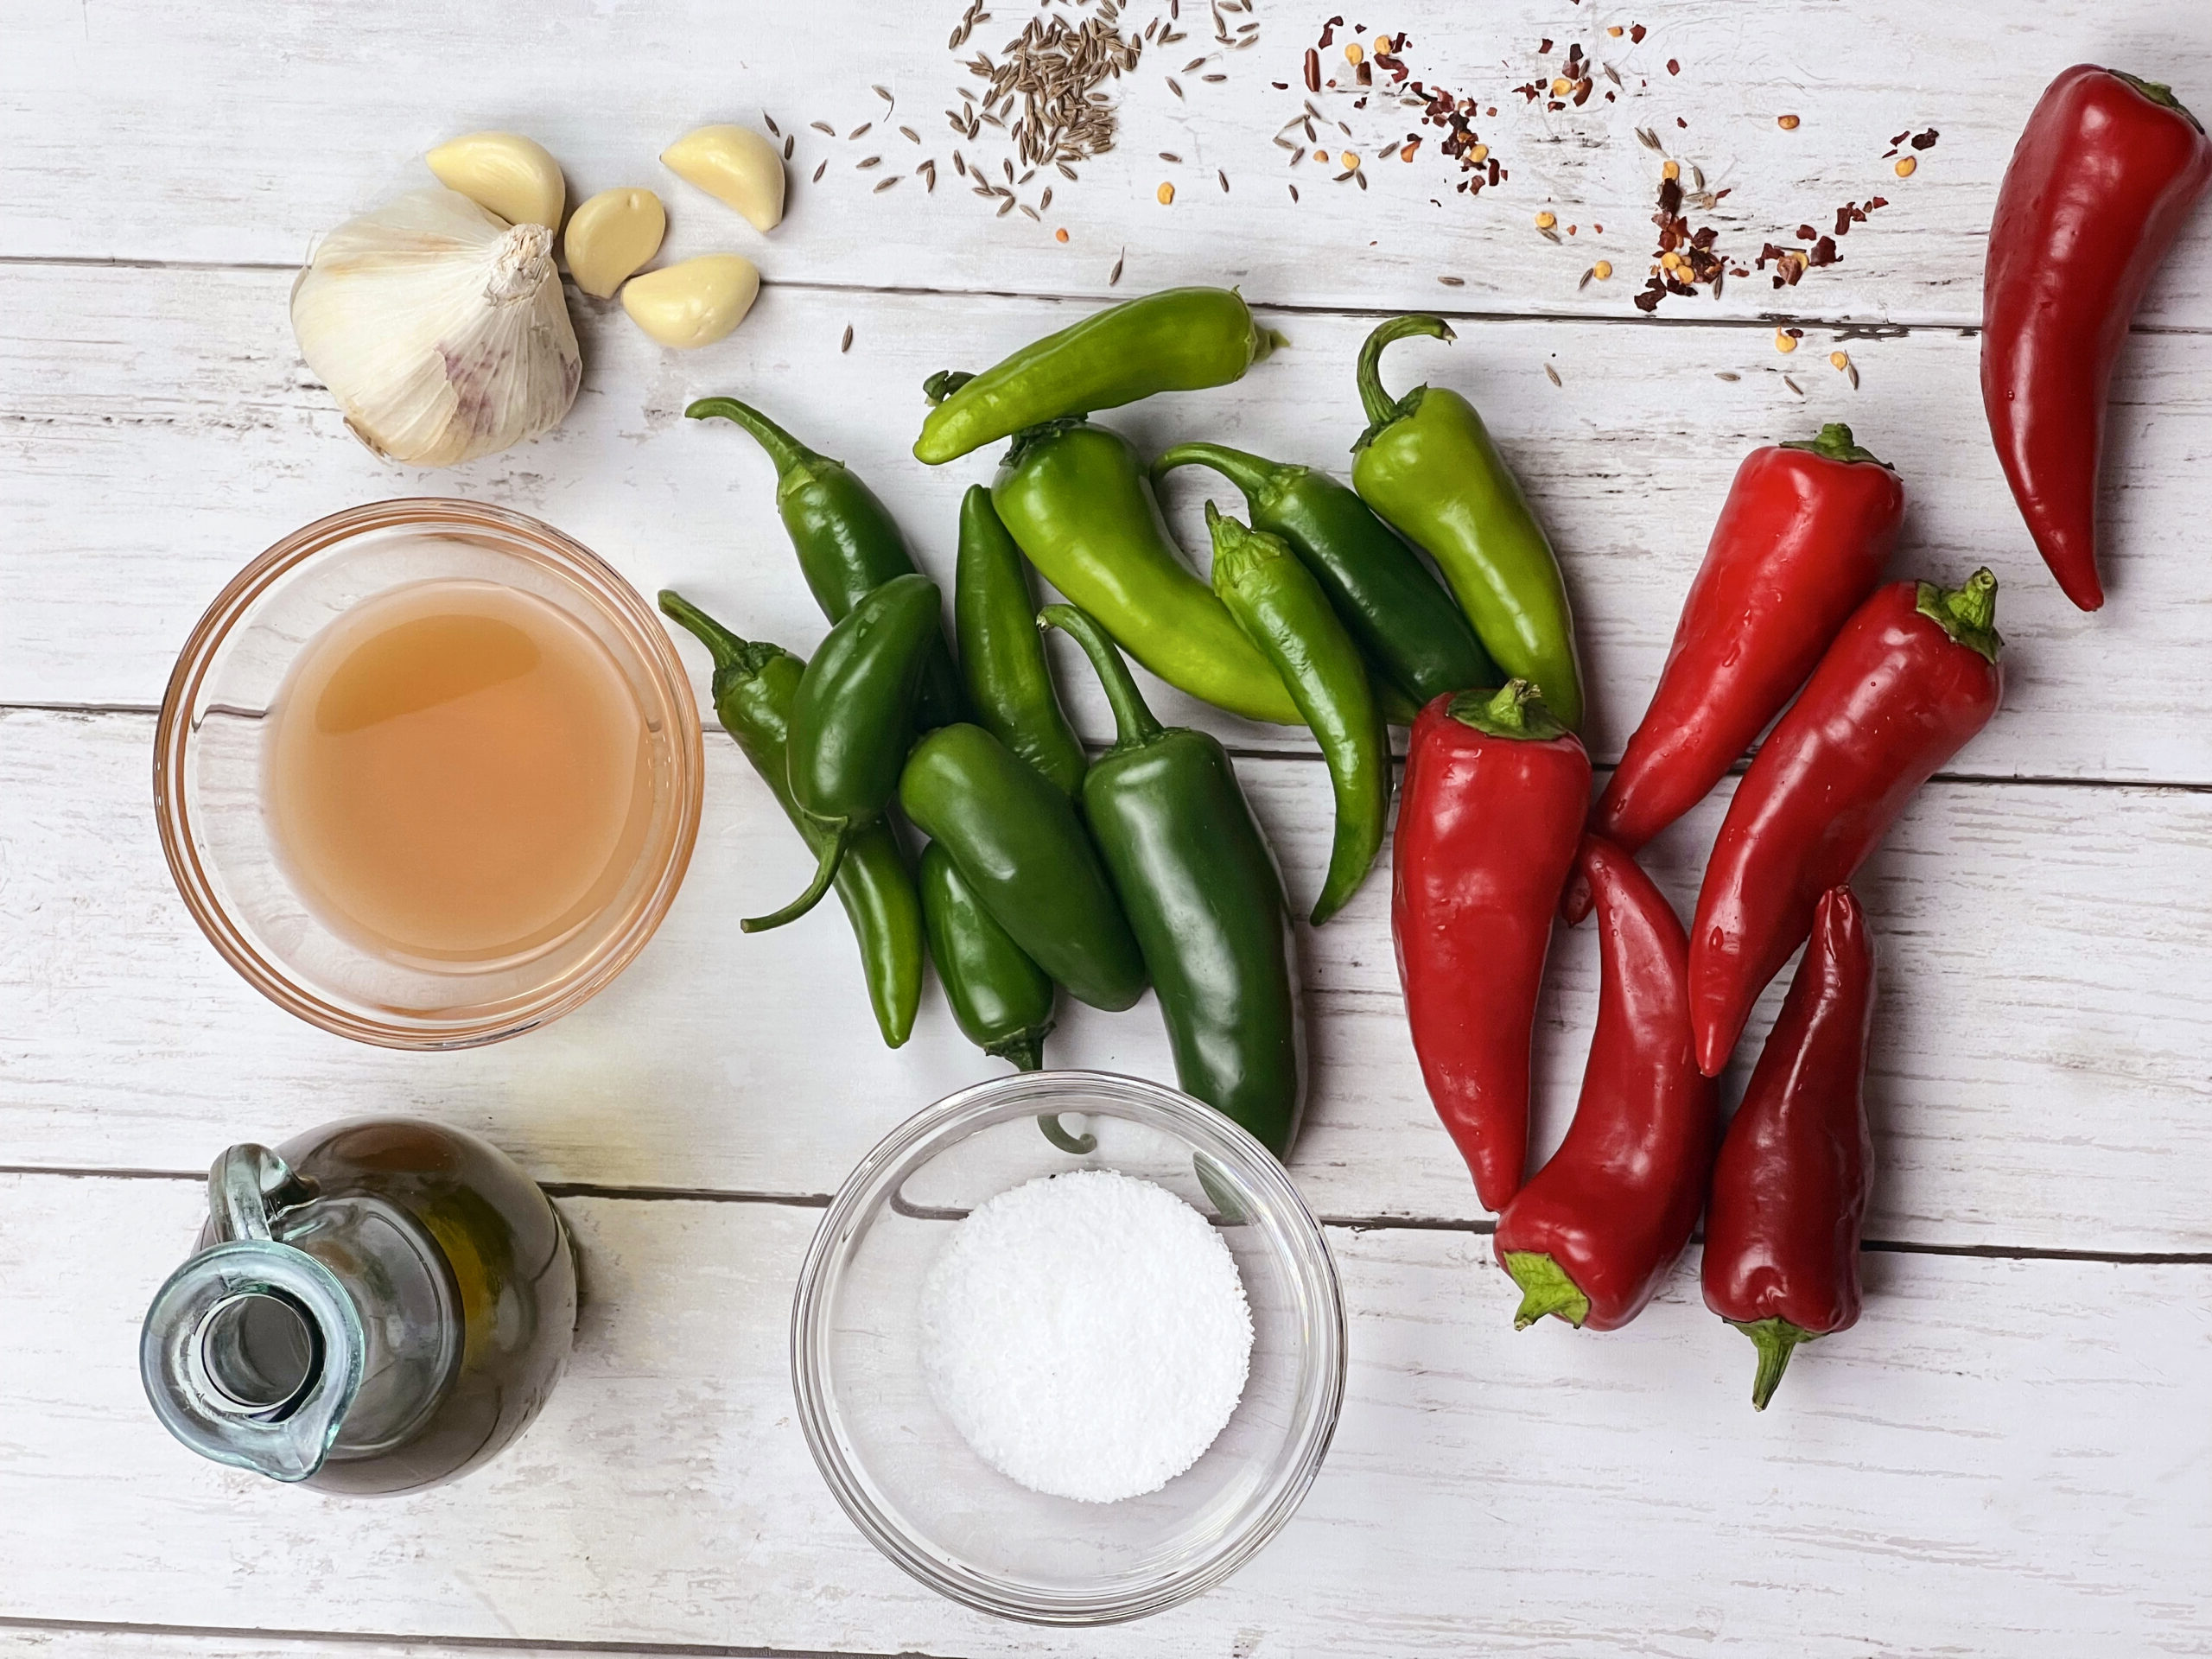
Ingredients:
| 6 oz hot red chilies or greens | |
| 2 garlic cloves | |
| ¼ teaspoon cumin seeds | |
| ¼ teaspoon red chili pepper | |
| 2 tablespoons vinegar ( apple cider or white ) | |
| 2 tablespoons olive oil | |
| 1 tablespoon salt | |
| Canning jars |
Preparation
Before you begin, make sure your jars are clean and sanitized. Place them in a pot of boiling water for a few minutes to kill any bacteria, then carefully remove and let them air dry completely. This step helps your Shatta last longer and stay fresh in the fridge.
Wash your chilies thoroughly and pat them dry with a clean towel. Slice each chili lengthwise and carefully remove only the pith—the white part at the top—while leaving the seeds intact. This helps manage the heat while keeping all the bold chili flavor.
Add the prepared chilies and garlic cloves to a food processor. Pulse until everything is finely chopped and the mixture begins to release its juices. You're looking for a slightly coarse texture—not a paste.
Transfer the processed chilies to a small bowl, sprinkle with salt, and give it a good mix. Let the mixture sit for 30 minutes—this helps draw out moisture and deepen the flavor. After 30 minutes, strain the chilies to remove the excess liquid. This keeps your shatta from turning watery later on.
In the same bowl, stir in the vinegar, red chili flakes (if using), and cumin seeds. Mix everything well to let the flavors come together. The vinegar helps preserve the shatta while adding a nice tang, and the cumin brings a subtle earthy depth.
Transfer the chili mixture into your sanitized jar, then drizzle a thin layer of olive oil on top to help preserve it. Seal the jar tightly and store it in the fridge. Your homemade shatta is ready to enjoy right away—but the flavor gets even better after a day or two!
Recipe Tips & Suggestions
How to store Shatta:
Nutrition Information
The information shown is an estimate provided by an online nutrition calculator. It should should not be considered a substitute for a professional nutritionist's advice.
See our full nutrition disclosure here.
Subscribe to my newsletter for authentic Mediterranean recipes, essential cooking tips, and the latest food news, all delivered directly to your inbox for FREE. Let’s create memorable dishes together!

-
 Mike Cygan
Hi! Boy am I glad I stumbled across your site! I do have one question: one of the photos in the shatta recipe shows an overhead view of a small food processor. Just curious what kind that is. I’m in the market for one, and if you’re happy with that one I’d love to know the details.
Best wishes,
Mike Cygan
Evanston, IL-
Rana Madanat
Hi Mike,
I’m so happy you found the site—welcome! 😊
Great question about the food processor. The one in the photo is actually a full-size Cuisinart food processor. It’s my favorite brand—yes, it’s a bit of an investment, but honestly, it lasts forever and handles everything beautifully, from sauces like shatta to dough and dips.
That said, if you’re mainly using it for small batches (like sauces, dressings, or a quick chop), a smaller and more budget-friendly option like Hamilton Beach works perfectly well too.
From a home cook’s perspective, I always say: if you’ll use it often, go for the Cuisinart—it’s worth it. If not, start small and upgrade later.
Let me know if you end up getting one!
Best,
Rana
-
Give this Shatta recipe a try and let us know how you incorporate its bold flavors into your meals. Share your experiences and recipe ideas in the comments below!